February 2024

Family Emergency Communication Plan

Creating a Family Emergency Communication Plan: 3 Vital Steps

A family emergency communication plan is a way to prepare for the unexpected. It helps you and your loved ones stay in touch and reunite if a crisis separates you. 

Whether it is a flood, a fire, or a lockdown, you never know when normal communication channels might fail or become overloaded. That is why you need a plan that covers different ways to contact each other, alternative meeting places, and essential information to have on hand. 

This article will guide you through the three steps to create your family emergency communication plan: collect, share, and practice.

What is a Family Emergency Communication Plan

A Family Emergency Communication Plan is a way to prepare for disasters and emergencies that may affect your family. 

The family emergency communication plan helps you to:

  • Collect the contact information of your family members and other important people or offices, such as doctors, schools, or service providers.
  • Share this information with everyone in your household and ensure they have a copy in their wallet, backpack, or phone.
  • Practice how to reach each other and where to meet up in different situations, such as if you are separated, if you cannot go home, or if communication networks are down.

Family emergency communication plan

How to Create a Family Emergency Communication Plan

Step 1: Collecting information

The first step to creating a family emergency communication plan is to collect the contact information for your family and other important people or offices. You will need this information to contact them in an emergency and inform them you are safe.

Create a paper copy of the contact information and keep it secure. Use a notebook, a card, or a sheet of paper. You can also use a printable template for a family emergency communication plan that you can fill out and print.

  • The full names, phone numbers, email addresses, and social media accounts of your family members
  • The phone numbers and email addresses of your out-of-town contact person, who can help coordinate your family communication in case of a local emergency
  • Your local emergency contacts’ phone numbers and email addresses and important offices.

Suppose you have a family member who is deaf, hard of hearing, or has a speech disability and uses relay services. In that case, information on how to connect with them through relay services on a landline phone, mobile device, or computer.

Step 2: Sharing information

The second step to creating a family emergency communication plan is to share it with your family and other relevant people or offices. You want to ensure everyone knows how to use the plan and can access it in an emergency.

  • Ensure that everyone in your family carries a copy of the plan in their backpack, purse, or wallet. 
  • Store a digital copy of the plan on your phone, computer, or cloud service. You can use a password-protected file or app to protect your personal information.
  • Post a copy of the plan in a central location in your home, such as your refrigerator or family bulletin board. 
  • Give a copy of the plan to your out-of-town contact person, local emergency contacts, and important offices. Ask them to keep the plan safe and notify you if they change their contact information.
  • Sign up for alerts and warnings from your school, workplace, and local government. These alerts and warnings can provide timely and accurate information on the emergency situation and your actions.
  •  Receive these alerts and warnings through different methods, such as text messages, emails, phone calls, or social media posts. 

Step 3: Practice the plan

The last step to creating a family emergency communication plan is to practice it regularly. This will help you and your family remember the plan’s details and prepare for emergencies.

  • Have a household meeting at least once every six months to review and update your plan. 
  • You can use this opportunity to check if any of your contact information has changed, if you need to add or remove any people or offices from your plan, or if you need to adjust your plan for any new circumstances or needs.
  • Test your communication methods to make sure they work. You can call, text, email, or message your family members and out-of-town contact person to confirm they have received your messages and have a copy of your plan. 
  • Finally, have a family drill at least once a year to simulate an emergency situation and test your communication plan. Choose a scenario relevant to your location and risk level, such as a storm, a fire, or a lockdown. 

To make the drill fun and engaging for children, you can involve them in the planning and execution of the drill. You can ask them to help you choose a scenario, to create a checklist of actions, or to role-play different situations. 

Family emergency communication plan

The 7 Steps In The Emergency Action Plan

Step 1: Consider the situations that could cause an emergency 

Identify the potential hazards and risks that could affect your operations, such as fire, flood, earthquake, chemical spill, or violence. 

Assess the impact and likelihood of each scenario and prioritize the most critical ones. You can use a risk matrix or a hazard analysis to help you with this step.

Step 2: Determine the correct actions to take in each situation. 

Define the appropriate response strategies for each emergency scenario, such as evacuation, shelter-in-place, lockdown, or fire fighting. 

Establish the criteria and triggers for activating and terminating each strategy. Use a decision tree or a flowchart to help you with this step.

Step 3: Create rally points where workers can gather after evacuating. 

Designate safe and accessible locations where employees can assemble and wait for further instructions after leaving the workplace. 

Identify alternate rally points in case the primary ones are unavailable or unsafe. You should mark the rally points on a map and post them in visible places.

Step 4: Assign roles to workers for emergency response. 

Assign specific tasks and duties to employees performing essential functions during an emergency, such as evacuation coordinators, floor wardens, first aiders, or fire extinguishers. 

Define the authority and accountability of each role and provide them with the necessary resources and equipment. Communicate the roles and responsibilities to all employees and update them regularly.

Step 5: Establish an alarm system to alert workers of an emergency. 

Install an effective alarm system to notify employees of an emergency and the required actions. The alarm system should be audible, visible, and clear, covering all workplace areas. 

Test the alarm system periodically and train employees to recognize and respond to it.

Step 6: Communicate with internal and external stakeholders. 

Establish and maintain communication channels and protocols with your employees, management, customers, suppliers, and emergency services during an emergency. 

Inform them of your EAP and the expectations and procedures for each stakeholder. Designate a spokesperson who can provide accurate and timely information to the media and the public.

Step 7: Train workers on and review the emergency action plan regularly. 

Provide regular training and drills to all employees on the EAP and their roles and responsibilities. Evaluate the effectiveness and efficiency of the EAP and the emergency response after each incident or exercise. 

Review and update the EAP at least annually or whenever there are changes in the workplace, the hazards, or the regulations.

Family emergency communication plan

Conclusion

A family emergency communication plan is vital to help you and your loved ones stay safe and connected during a disaster. 

By collecting and sharing contact information, practicing your plan, and reviewing your community’s emergency plans, you can be prepared for different types of emergencies, such as floods, earthquakes, wildfires, or pandemics. 

Don’t wait until it’s too late. Create your family emergency communication plan today and share it with your family and friends. For more information and guidance, visit Ready.gov or contact your local emergency management agency.

Also Read:
  1. DIY: How to Build an Emergency Kit For 24/7 Preparedness
  2. Top 10 Essential Home Safety Kits [Expert Reviews & Buyer’s Guide]
  3. Best Winter Emergency Car Kits to Consider in 2023 [Expert Reviews & Buyer’s Guide]
  4. How to Prepare for an Earthquake
Outdoor physical activities for adults

9 Outdoor Physical Activities for Adults: Ultimate Elderly Fitness Guide

Do you want to stay healthy, happy, and active as you age? If so, consider engaging in outdoor physical activity regularly. 

Outdoor physical activities for adults can offer many benefits, such as improving physical and mental health, reducing your risk of chronic diseases, and enhancing your quality of life.

However, you may also face some challenges and barriers when trying to be physically active outdoors. Don’t worry, we have some tips and recommendations on overcoming these challenges and barriers.

In this article, we will introduce you to nine outdoor physical activities that are suitable and enjoyable for older adults. These activities are fun, easy, and effective, and they can help you achieve your fitness goals and enjoy your golden years. Read on to find out more.

The Benefits of Outdoor Activities for Older Adults

Outdoor activities are a great way to stay healthy and happy as we age. They can provide many benefits for older adults, such as:

1. Reducing the risk of chronic diseases. 

Outdoor activities can help prevent or manage conditions such as diabetes, heart disease, obesity, and osteoporosis by improving blood sugar levels, blood pressure, cholesterol, and bone density

2. Enhancing cognitive function. 

Outdoor activities can stimulate the brain and improve memory, attention, and problem-solving skills. They can also reduce the risk of dementia and Alzheimer’s disease by increasing blood flow to the brain and preventing brain shrinkage.

3. Boosting mood and self-esteem. 

Outdoor activities can increase the production of endorphins, serotonin, and dopamine, neurotransmitters that regulate mood, motivation, and pleasure. They can also improve self-esteem and confidence by providing a sense of achievement, mastery, and social interaction.

What should be a key focus when working with older adults exercise?

The main components of exercise for older adults are:

1. Aerobic exercise.

Involves continuous and rhythmic movements that increase the heart rate and breathing. Aerobic exercise can improve cardiovascular and respiratory health, endurance, and stamina. Examples of aerobic exercise include walking, cycling, swimming, and dancing.

2. Strength training.

It is about using resistance to contract and relax the muscles. Strength training can increase muscle mass, strength, bone density, and metabolism. Examples of strength training include lifting weights, using resistance bands, or doing bodyweight exercises.

3. Flexibility exercise.

This exercise involves stretching the muscles and joints to increase their range of motion. Flexibility exercise can improve posture and alignment and prevent or relieve muscle tension and soreness. Examples of flexibility exercise include yoga, pilates, or tai chi.

4. Balance exercise.

Balance exercise involves maintaining stability and control of the body in different positions and movements. Balance exercise can improve proprioception and coordination and prevent falls and injuries. Examples of balance exercises include standing on one leg, walking heel-to-toe, or using a stability ball.

Some guidelines and recommendations on how to design, implement, and evaluate exercise programs for older adults are:

i. Check the health status

  • Assess the current fitness level, health status, and medical history of the older adult, as well as their preferences, goals, and motivations. 
  • This can help determine the type, intensity, duration, and frequency of exercise that is appropriate and safe for them. 
  • A fitness assessment can include measuring height, weight, body mass index, blood pressure, heart rate, and oxygen saturation and testing strength, flexibility, balance, and endurance. 
  • A health screening can include checking for signs, symptoms, or risk factors of chronic diseases, injuries, or conditions that may affect exercise.

ii. Set realistic and specific goals

  • Set realistic and specific goals that are measurable, achievable, relevant, and time-bound. This can help the older adult stay focused, motivated, and accountable for their exercise program. 
  • Goals can be related to improving functional capacity, independence, or quality of life, such as walking a certain distance, climbing several stairs, or performing a certain activity without assistance or pain. 
  • Goals can also be related to improving health and fitness, such as lowering blood pressure, blood sugar, or cholesterol, increasing muscle mass or strength, or reducing body fat or weight.

iii. Monitor the progress and feedback

  • Monitor the progress and feedback of the older adult and adjust the exercise program accordingly. This can help ensure that the exercise program is effective, safe, and enjoyable for them. 
  • Progress can be monitored using objective and subjective measures, such as fitness tests, health indicators, or self-reports. 
  • Feedback can be obtained by asking the older adults about their satisfaction, comfort, and challenges with the exercise program and their perceived benefits, barriers, and facilitators. 
  • The exercise program can be adjusted by increasing or decreasing the type, intensity, duration, or frequency of exercise or by adding or removing variety, challenge, or support.

Outdoor Physical Activities for Adults

1. Walking

Walking is one of the simplest and most accessible forms of outdoor physical activity for older adults. Walking can increase the heart rate and blood circulation, lowering the risk of heart disease, stroke, and high blood pressure. 

Walking works the major muscle groups in the legs, hips, and core, increasing muscle mass and strength, stimulating bone formation, preventing bone loss, and reducing the risk of osteoporosis and fractures.

There are different types of walking activities that older adults can choose from, depending on their preferences, abilities, and goals. 

  • Brisk walking involves walking at a moderate to vigorous pace, making the heart beat faster and breathing heavier. Brisk walking can be done on flat or hilly terrain, sidewalks or trails, or a treadmill.
  • Hiking involves walking on natural or unpaved paths with varying elevation, terrain, and scenery. Hiking can challenge balance, coordination, and agility and provide a connection to nature and a sense of adventure. Hiking can be done on short or long distances, on easy or difficult trails, or with or without a backpack.
  • Nordic walking is walking with designed poles that provide support and propulsion. Nordic walking can work the upper body muscles and increase the intensity and calorie expenditure of walking. 

Outdoor physical activities for adults

2. Gardening

Gardening is a rewarding and enjoyable hobby that can improve your health and well-being. Gardening can provide many benefits, such as:

  • Enhancing mood, memory, and creativity. Gardening can stimulate the brain and reduce stress, anxiety, and depression. Gardening can also foster a sense of accomplishment, satisfaction, and self-expression.
  • Increasing exposure to sunlight and vitamin D. Sunlight is essential for producing vitamin D, which is important for bone health, immune function, and mood regulation. Vitamin D can also help prevent or treat chronic diseases like diabetes, cancer, and osteoporosis.
  • Providing fresh fruits and vegetables. Gardening can supply fresh, organic, and nutritious produce to enhance your diet and health. Gardening can also save money, reduce food waste, and reduce environmental impact.

Some tips on how to garden safely and effectively are:

  • Use ergonomic tools that fit your hand, provide a good grip, and reduce strain on your muscles and joints. 
  • Choose tools that are sharp, clean, and well-maintained. Store tools properly when not in use.
  • Wear gloves and sunscreen to protect your skin from cuts, scratches, burns, and infections. 
  • Wear appropriate clothing and footwear that are comfortable and durable.
  • Lift and bend properly to avoid back, neck, and knee injuries. Use your legs, not your back, to lift heavy objects. 

3. Cycling

Cycling is a fun and healthy way to enjoy the outdoors and get some exercise. Cycling can provide many benefits, such as:

  • Cycling can increase your heart rate and oxygen intake, improving your blood circulation and lung function. Cycling can also lower your blood pressure and cholesterol levels, reducing heart disease and stroke risk.
  • Cycling can challenge your sense of balance and coordination, which can enhance your motor skills and spatial awareness. Cycling can also improve your reflexes and reaction time, which can help you avoid accidents and injuries
  • It can burn many calories, depending on your speed, intensity, and duration. Cycling can help you lose or maintain a healthy weight and improve your body composition and metabolism. Cycling can also tone and strengthen your muscles, especially in your legs, hips, and core.

Outdoor physical activities for adults

Tips on how to cycle safely: 

  • Choose a bike that fits your height, weight, and riding style, and check that your bike is in good condition, with properly inflated tires, working brakes, and smooth gears. 
  • Wear a snug and secure helmet that protects your head from impact and bright and reflective clothing, especially in low-light or poor-weather conditions, to make yourself visible to other road users.
  • Obey the traffic laws, ride with traffic, and use proper hand signals when turning or stopping. Be aware of your surroundings and avoid distractions while riding. 

4. Swimming

Swimming is a low-impact, full-body workout that can improve your heart, lung, and brain health, as well as your mood and sleep. Swimming can also help prevent or manage chronic conditions like diabetes, arthritis, and back pain.

Some of the benefits of swimming are:

  • Swimming works all the major muscle groups in your body, such as your arms, legs, back, and core. Swimming can also improve your aerobic and anaerobic fitness, allowing you to exercise longer and harder.
  • Swimming can reduce the stiffness and pain in your joints if you have arthritis or osteoarthritis. Swimming can also stretch and relax your muscles, which can improve your posture and alignment
  • Swimming can reduce the pressure and impact on your spine, discs, and nerves, which can help with back pain and sciatica. 

Some tips on how to swim safely and effectively are:

  • Swim in comfortable and clean water, and avoid too cold, hot, or contaminated water. Check the weather and the water conditions before swimming, and avoid swimming in storms, currents, or waves
  • Protect your eyes and ears from the water, especially if it is chlorinated or salty. Goggles can help you see clearly and prevent irritation or infection. 
  • Warm up your muscles and joints before swimming, and cool them down afterward. Stretching can help you prevent injuries, cramps, and soreness and improve your flexibility and range of motion.

Outdoor physical activities for adults

5. Golfing

Golfing is a popular and enjoyable sport that can benefit your health and well-being in many ways. Golfing can provide the following benefits:

  • Golfing can stimulate your brain and improve your memory, attention, and problem-solving skills. Golfing can also foster social connections, friendships with other players, and a sense of achievement and satisfaction.
  • Golfing can lower blood pressure and cholesterol levels by improving cardiovascular and metabolic health. 

Outdoor physical activities for adults

Tips on how to golf: 

  • Choose clubs that suit your height, weight, and swing speed, and check that your clubs are in good condition, with properly fitted grips, shafts, and heads. 
  • Wear clothing that is comfortable, breathable, and weather-appropriate. Wear a hat, sunglasses, and sunscreen to protect yourself from the sun.
  • Warm up and stretch before and after golfing by doing gentle exercises and movements that target the muscles and joints used in golfing. 

6. Tennis

Tennis involves hitting a ball with a racquet over a net to the opponent’s court. Tennis can be played by two players (singles) or four players (doubles). Tennis can be played on grass, clay, or hard courts.

Some of the benefits of tennis are:

  • Tennis can increase your heart rate and oxygen consumption, improving cardiovascular and respiratory health. 
  • Tennis can challenge your agility, which is the ability to move quickly and efficiently in different directions. 
  • Tennis can improve your hand-eye coordination, which is the ability to coordinate the movements of your eyes and hands. Hand-eye coordination is essential for hitting the ball accurately and consistently, as well as for anticipating and tracking the ball

Outdoor physical activities for adults

Tips on how to play tennis safely and effectively:

  • Warm up your muscles and joints before playing tennis by doing light cardio and dynamic stretches. This can help prevent injuries, cramps, and soreness and improve your performance and flexibility. 
  • Use proper tennis techniques, such as holding the racquet correctly, swinging smoothly, and following through. 
  • Drink plenty of water before, during, and after playing tennis, especially in hot or humid weather. Dehydration can cause fatigue, headache, dizziness, and nausea, impairing performance and recovery.

7. Yoga

Yoga combines physical poses, breathing exercises, and meditation to create a harmonious balance between the body, mind, and soul. Yoga can help you improve your health, fitness, and well-being in many ways, such as:

  • Yoga can reduce stress, anxiety, and depression and promote relaxation, happiness, and peace. It can also improve your immune system, blood pressure, and cholesterol levels and prevent or manage chronic diseases like diabetes, heart disease, and arthritis.
  • It stretches and strengthens your muscles, tendons, and ligaments, increasing your range of motion and mobility. Yoga can also improve your posture and alignment and prevent or relieve back, neck, and joint pain.
  • Yoga teaches you how to breathe deeply, slowly, and consciously, which can improve your lung capacity, oxygen intake, and energy levels. It helps you develop mindfulness, concentration, and awareness, enhancing mental clarity, focus, and memory.

You can choose from different types of yoga activities depending on your preferences, abilities, and goals. Some examples are:

  • Hatha yoga is the most common and basic form of yoga and involves a combination of physical poses, breathing exercises, and relaxation techniques. 
  • Vinyasa yoga is a dynamic and flowing form of yoga and involves linking the physical poses with the breath in a continuous sequence. 
  • Bikram yoga, a hot and humid form, involves performing 26 specific poses and two breathing exercises in a room heated to 105°F (40°C) and 40% humidity. 

Tips 

  • Select a yoga activity that matches your fitness level, health condition, and preference. Experiment with different styles of yoga to find the one that suits you best. 
  • Pay attention to your body’s signals and sensations, and respect your limits and boundaries. You should not force yourself into any pose that causes pain, discomfort, or injury. 
  • Adapt the poses to your body’s needs and abilities rather than trying to fit your body into the poses. Vary the poses according to your mood, energy, and time.

Outdoor physical activities for adults

8. Bowling

Bowling is a fun and social sport that can benefit your health and fitness. Bowling can provide the following benefits:

  • Bowling can challenge your mental skills, such as concentration, strategy, and problem-solving. Bowling can also improve your memory and cognitive function by activating different parts of your brain
  • It can enhance your coordination and control of your eyes and hands, which is essential for accurately and consistently hitting the pins. Bowling can also improve fine and gross motor skills by involving various muscles and movements in your arms, legs, and core.
  • It strengthens your social bonds and friendships with other players and makes new ones. Bowling can also reduce stress and anxiety levels by providing a source of relaxation, enjoyment, and entertainment.

Outdoor physical activities for adults

9. Fishing

Fishing is a relaxing and rewarding activity that can improve your physical and mental health. Fishing can provide the following benefits:

  • Fishing can also release endorphins, serotonin, and dopamine, neurotransmitters that regulate mood and pleasure. Fishing can boost your self-esteem and confidence by providing a sense of achievement and satisfaction.
  • Fishing can teach you patience and focus while waiting for the fish to bite and react to their movements. Fishing can also improve your attention span and cognitive function by challenging your mental skills, such as strategy, problem-solving, and memory

Safety precautions and first aid tips for outdoor physical activity

Outdoor physical activity can be fun and beneficial for your health, but it comes with risks and hazards. Always be prepared and cautious when engaging in outdoor physical activity. 

Here are some safety precautions and first aid tips that can help you prevent or deal with common problems that may occur during outdoor physical activity:

1. Avoiding injuries. 

  • Wear appropriate clothing and footwear that are comfortable, supportive, and suitable for the weather and terrain. 
  • Use proper equipment and techniques for your activity, and follow the rules and regulations. 
  • Warm up and stretch before and after your activity, and avoid overexerting yourself or pushing beyond your limits. 
  • Immediately stop your activity and seek medical attention if you get injured. 
  • Apply the RICE method (rest, ice, compression, and elevation) to reduce pain, swelling, and inflammation

2. Avoiding dehydration. 

  • Drink plenty of water before, during, and after your activity, especially in hot or humid weather. 
  • Avoid alcohol and caffeine, which can dehydrate you. 
  • Monitor your urine color and volume, and drink more water if your urine is dark or scanty. 
  • If you get dehydrated, drink water or sports drinks slowly and steadily, and rest in a cool and shaded place. 
  • Seek medical attention for dizziness, headache, nausea, or confusion.

3. Avoiding sunburn. 

  • Wear sunscreen with SPF 15 or higher, and reapply it every two hours or more often if you sweat or swim. 
  • Wear a hat, sunglasses, and long sleeves to protect yourself from the sun. 
  • Avoid the sun during peak hours, usually between 10 a.m. and 4 p.m. 
  • If you get sunburned, cool your skin with cold water or a damp cloth, and apply aloe vera gel or moisturizer. 
  • Drink plenty of water and take pain relievers if needed. You should also seek medical attention for symptoms such as blisters, fever, or chills.

4. Avoid insect bites. 

  • Wear insect repellent with DEET or picaridin, and reapply it as directed. 
  • Wear long pants and long sleeves, and tuck them into your socks and shoes. 
  • Avoid areas with stagnant water, tall grass, or flowers where insects gather. 
  • If you get bitten, wash the bite area with soap and water and apply ice or a cold compress. 
  • Apply antihistamine cream or take antihistamine pills if you have itching or swelling. 
  • Seek medical attention if you have a rash, fever, or difficulty breathing symptoms.

How to choose, plan, and prepare for outdoor activities for older adults

Outdoor activities can be a great way to stay healthy, happy, and active as you age. However, you must choose, plan, and prepare for them carefully to ensure they are suitable, safe, and enjoyable for you. Here are some practical tips that can help you:

1. Check for places

Look for places that are easy to reach, have good facilities, and have enough space and shade. Avoid places that are crowded, noisy, or polluted. Use online resources like Google Maps or Yelp to search for and review different locations. 

2. Check weather forecast

Check the weather forecast before you go, and dress appropriately for the temperature and conditions. Bring sunscreen, sunglasses, a hat, and water to protect yourself from the sun and dehydration. Bring a small first aid kit, a cell phone, and an ID with emergency contact information in case of any accidents or emergencies.

3. Invite others

Invite someone to join you for your outdoor activity, such as a friend, a family member, or a neighbor. This can make your activity more fun and social and provide support and motivation. You can also join a group or a club that organizes outdoor activities for older adults, such as walking, hiking, or cycling. 

How to modify outdoor activities for older adults

1. Use assistive devices. 

Use devices that can help you move, balance, or see better, such as canes, walkers, wheelchairs, or glasses. You can also use devices that can help you monitor your health, such as heart rate monitors, blood pressure monitors, or glucose meters. You can also use devices that can help you communicate, such as cell phones, hearing aids, or whistles.

Read On: Elderly Safety Products.

Check the following devices:
Outdoor physical activities for adultsBuy On Amazon 

Outdoor physical activities for adultsBuy On Amazon 

Outdoor physical activities for adultsBuy On Amazon 

Outdoor physical activities for adultsBuy On Amazon 

2. Adjust the intensity and duration. 

Adjust the intensity and duration of your activity according to your fitness level, health condition, and personal preference. Start with low-impact activities like walking, swimming, or yoga, and gradually increase the intensity, frequency, and duration as you feel comfortable. You can also alternate between activities, such as aerobic, strength, flexibility, and balance exercises, to work different muscles and joints.

3. Incorporate rest and recovery. 

Take breaks during and after your activity to rest and recover your energy and muscles. Drink plenty of water and eat healthy snacks to replenish your fluids and nutrients. Stretch and massage your muscles to relieve any tension or soreness. Listen to your body and stop your activity if you feel pain, discomfort, or fatigue.

Conclusion

Outdoor physical activity is a wonderful way to improve your health, happiness, and quality of life as you age. It can offer many benefits, such as reducing the risk of chronic diseases, enhancing cognitive function, and boosting mood and self-esteem. 

You can choose from many outdoor activities, such as walking, gardening, cycling, swimming, golfing, tennis, yoga, bowling, and fishing. Each activity has its own features and benefits, as well as tips and recommendations on how to do it safely and effectively. 

We hope you enjoyed this article and learned something new. We encourage you to try some activities and share your experiences and feedback. We would love to hear from you and see how you are doing. Thank you for reading, and happy exercising!

Also Read:

  1. Home Safety for Elderly: 5 Common Hazards Explained
Electrical outlet safety

Electrical Outlet Safety: The 5-Point Guide to Electrical Safety

Electricity is a powerful and useful resource we use daily, but it can also be dangerous if not handled properly. Electrical outlets are among the most common sources of electrical hazards in our homes and workplaces. 

That’s why knowing how to use electrical outlets and prevent potential risks safely is important. This article will share five essential tips on electrical outlet safety that will help you protect yourself, your family, and your property from electrical accidents. 

So, let’s get started and learn more about electrical outlet safety.

Electrical Outlet Safety

Electrical outlets are essential for powering your devices and appliances but can pose risks if improperly maintained. 

Here are some tips to keep your outlets safe and efficient:

1. Upgrade your outlets

If you have old, two-prong outlets, replace them with three-prong or GFCI outlets. GFCI outlets can prevent electric shocks by cutting off power when they detect water or other hazards. Install GFCI outlets in wet or outdoor areas, such as bathrooms, kitchens, garages, and basements.

2. Inspect cords and covers 

Before plugging in anything, check the cord for damage or exposed wires. Replace any faulty cords as soon as possible. Also, check your outlet covers at least once a year. Make sure they are secure and intact. Call an electrician immediately if you notice any overheating, burning, or buzzing.

3. Avoid overloading an outlet 

Overloading an outlet can cause power outages, fires, or appliance damage. To prevent this, plug major appliances into separate outlets, limit the number of devices you use simultaneously, use energy-efficient LED or CFL bulbs, or ask an electrician to add more outlets if needed.

4. Unplug cords safely

Pull the plug gently from the base when you use a device. Do not yank or twist the cord, which can cause wire breakage, plug bending, or outlet damage. Also, unplug your electronics before a storm to protect them from power surges.

5. Childproof your outlets

Children may be curious about electrical outlets and try to touch or insert objects. This can result in electric shocks or burns. To prevent this, buy plastic plugs that fit snugly into the outlets. They are easy to insert and remove for adults but not for children. You can save money by buying them in bulk.

READ: How to Create a Safe Home Environment for Babies

Common Risks Associated with Electrical Outlets

Electrical outlets are one of the most common sources of electrical hazards in our homes and workplaces, as they can cause fires, shocks, burns, and electrocution if we are not careful. 

Here are some of the common risks associated with electrical outlets and how to avoid them:

1. Electrical Fires: 

Electrical fires occur when outlets are overloaded, damaged, or improperly installed. Overloading an outlet by plugging in too many devices that draw more power than the outlet can handle causes overheating, sparking, and melting of wires and plugs

To prevent overloading, use only one high-wattage appliance per outlet. Avoid using extension cords or power strips for these appliances, as they can cause overloading. If you notice any outlet damage, replace them immediately or call a professional electrician. 

2. Electrical Shocks: 

The shocks occur when someone touches the exposed wire. Electrical shocks range from mild to severe, depending on the contact’s voltage, current, and duration, and can cause pain, burns, muscle spasms, and even death. 

To prevent shocks, keep foreign objects away from outlets, and use outlet covers to childproof your outlets. Ensure your outlets are grounded and have a ground fault circuit interrupter (GFCI), which can detect and stop the flow of electricity in case of a ground fault. 

3. Pest attraction:

Outlets can attract pests that chew on wires and cause damage and fire hazards. Seal gaps or holes around your outlets and use pest repellents or traps to prevent this. 

4. Poisoning: 

Carbon monoxide poisoning can occur when gas appliances are plugged into poorly ventilated outlets. This gas can cause headaches, nausea, dizziness, confusion, and even death. To prevent this, ensure your gas appliances are vented to the outside and have a carbon monoxide detector in your home. 

How to use electrical outlet properly

Here are some tips on how to use electrical outlets properly and avoid common mistakes:

  • Use the right outlet for the right appliance: 

Different appliances and devices have different power requirements and plug types. Use the outlet that matches the voltage, frequency, and plug type of the appliance you want to use. 

For example, in the U.S., most outlets supply 120 volts and 60 hertz, with three slots for three-pronged plugs. Use these outlets for appliances designed for this specification. Do not use adapters incompatible with the outlet, which can cause damage, fire, or shock.

  • Do not overload outlets: 

Overloading outlets by plugging in too many devices that draw more power than the outlet can handle causes overheating, sparking, and melting of wires and plugs, leading to fires and shocks. 

To avoid overloading, use only one high-wattage appliance per outlet, such as a microwave, toaster, or hair dryer. Avoid using extension cords for these appliances, which can also cause overloading. If you need more outlets, hire a professional electrician to install them.

  • Do not use damaged outlets:

Damaged outlets have cracks, loose parts, exposed wires, or other signs of deterioration. 

These outlets can cause short circuits, leading to fires and shocks. 

To prevent this, replace or repair damaged or worn-out outlets as soon as possible, or call a professional electrician to do it for you. Do not use tape, glue, or nails to fix or hold outlets, as this can worsen the situation.

  • Do not use outlets near water sources:

Using outlets near water sources can cause electric shocks. Water can conduct electricity and create a ground fault, which can be deadly. To prevent this, keep water from outlets and use only weather-resistant GFCI outlets and weatherproof covers outdoors. 

Do not use electrical appliances or devices near water sources, such as hair dryers, radios, or phones. If an appliance or device falls into water, unplug it immediately and do not touch it or the water.

READ: Mastering Safe Use of Electricity: Staying Shock-Free 

Common Mistakes to Avoid In DIY Electrical Projects

DIY electrical projects can be tempting for homeowners who want to save money, learn new skills, or customize their homes. However, DIY electrical projects can also be dangerous if you are not fully educated or equipped. 

Many DIYers make common mistakes that can lead to electrical hazards or even death. Here are some of the common mistakes to avoid in DIY electrical projects and how to prevent them:

1. Reversing hot and neutral wires

This is a wiring mistake that can cause a lethal shock. The hot wire (black wire) carries the electricity from the source to the outlet. The neutral wire (white) returns the electricity to the source. 

The hot wire is connected to the brass terminal of the outlet, and the neutral wire is connected to the silver terminal. If you reverse them, you can create a live circuit that can shock anyone who touches the outlet. 

To avoid this mistake, always check the wires’ color and polarity before connecting them, and use a circuit tester to verify the correct wiring.

2. Not using junction boxes 

Junction boxes are metal or plastic boxes that hold the connected wires together and protect them from accidental damage. They isolate any heat that can occur from a loose connection or a short circuit. 

The National Electrical Code requires junction boxes for all wire connections. If you do not use junction boxes, you can expose the wires to moisture, dust, pests, or physical impact, which can cause fire or shock. 

To avoid this mistake, always use junction boxes for your wire connections, and make sure they are properly secured and covered.

Electrical outlet safetyBuy On Amazon 

3. Not using GFCI outlets in wet areas: 

GFCI monitors the flow of electricity through a circuit and detects any imbalances. If a ground fault occurs, it automatically cuts off the power to the outlet, preventing shock and electrocution. 

To avoid this mistake, always use GFCI outlets in wet areas and test them monthly by pressing the test and reset buttons.

Electrical outlet safetyBuy On Amazon 

4. Overloading outlets 

Plugging in too many appliances that draw more power than the outlet can handle causes overheating, sparking, and fire. This can overheat wires, which can lead to fire and shock. 

To avoid overloading, use only one high-wattage appliance per outlet and avoid using extension cords for these appliances. If you need more outlets or circuits, hire a professional electrician to install them.

5. Working on live wires or circuits: 

Working on live wires when still connected to the power source and have electricity flowing through them is hazardous. If you touch them or cut them, you can get electrocuted or start a fire. 

To avoid this mistake, always turn off the power at the main switch before working on any electrical project. Use a circuit tester to ensure the wires are dead before touching them. Do not rely on the wall switch, as it may not cut off the power completely.

READ: Electrical Safety for DIY Projects: 5 Key Measures to Secure Your Home Projects

Outdoor Electrical Outlet Safety

Outdoor outlets are exposed to harsh weather conditions, which can damage them and cause electrical hazards. Therefore, following some safety precautions when using outdoor outlets is important. 

Here are some tips on outdoor electrical outlet safety:

1. Use weather-resistant GFCI outlets

The National Electrical Code requires the installation of GFCI outlets outdoors to ensure safety and avoid electric shocks and other hazards. These outlets have a special seal that protects them from moisture and corrosion and interrupts the electric current flow when they detect any imbalances. 

2. Use weatherproof covers 

Use weatherproof covers to prevent moisture and debris from entering the outlets. These covers are designed to seal the outlets when not in use and to allow the cords to pass through when they are in use. 

Electrical outlet safetyBuy On Amazon 

3. Use the correct outdoor extension cords

Indoor extension cords have thinner insulation and weaker plugs, which can be damaged by weather and temperature changes. Outdoor extension cords have thicker insulation and stronger plugs, which can withstand outdoor conditions. They also have three-pronged plugs that provide grounding and prevent shocks. Use only outdoor extension cords for your outdoor appliances, and ensure they are rated for the power and length you need. 

Electrical outlet safetyBuy On Amazon 

4. Avoid overloading outlets

Outdoor outlets can also be overloaded if you plug in too many devices that draw more power than the outlet can handle. This can cause overheating, sparking, and melting of wires and plugs, leading to fires and shocks. To avoid overloading, use only one high-wattage appliance per outlet. Avoid using power strips, as they can also cause overloading.

5. Inspect and maintain your outdoor outlets: 

Regular inspection and maintenance of your outdoor outlets can help detect and prevent any damage that can cause electrical hazards. Check your outdoor outlets for wear and tear. Check the wiring and the circuit breaker for faults and replace the outlets immediately. Clean your outdoor outlets occasionally, and remove any dirt, dust, or debris that can accumulate on them.

READ: Outdoor Electrical Safety: 6 Crucial Tips for a Shock-Free Environment

FAQs

1. How do I make sure my electrical outlet is safe?

Inspect for damages like cracks, loose parts, or overheating. Look out for sparks, smoke, or burns. Check the wiring and circuit breaker, replace outlets if issues arise, or consult a professional electrician. Outdoors, opt for weather-resistant GFCI outlets and shield them with weatherproof covers to prevent moisture and dust infiltration. 

2. What are the safety features of electrical outlets?

Electrical outlets boast crucial safety features like grounding, linking the system to the earth for safe electricity flow, and reducing shock and fire risks. Modern outlets, with three slots, include a grounding wire, and only three-pronged plugs should be used, ensuring proper installation. Ground Fault Circuit Interrupters (GFCIs) monitor electricity flow, automatically cutting power during imbalances to prevent shocks and electrocution. 

3. What are the hazards of an outlet?

Outlets pose hazards like overloading when too many high-power devices plugin, causing overheating and potential fires. Prevent overload by using one high-wattage appliance per outlet, avoiding power strips. Damaged outlets displaying cracks risk short circuits leading to fires should be replaced.

4. What are the rules for an outlet?

Follow outlet safety rules to keep things running smoothly. Stick to the manufacturer’s guidelines for appliances, avoiding any modifications. When dealing with electrical gear, ensure your hands are dry to prevent shocks, and always pull the plug, not the cord. Look for damaged cords and promptly replace them to avoid shocks. Use only approved adapters matching outlet to dodge potential damage.

Final Word

Prioritizing electrical outlet safety is paramount for everyone’s well-being. By diligently applying the tips and advice in this article, you empower yourself to prevent potential electrical accidents, safeguarding not only your property but also the lives of your loved ones

While electricity is undeniably a powerful and beneficial resource, its potential dangers underscore the need for responsible handling. So, be smart, stay safe, and cultivate an electrically savvy approach to daily life. Your commitment to these safety measures ensures a secure environment where the benefits of electricity can be harnessed without unnecessary risks. 

This marks the end of our exploration into electrical outlet safety, and I trust you’ve found the information helpful and enlightening. Thank you for joining us on this journey, and may your days be filled with safety and peace of mind.

Electrical Safety for DIY Projects

Electrical Safety for DIY Projects: 5 Key Measures to Secure Your Home Projects

Electrical Safety for DIY Projects: Do you enjoy doing DIY projects at home? Whether installing a new light fixture, replacing an old outlet, or wiring a new appliance, DIY projects can be fun and rewarding. However, they can also be dangerous if you do not follow proper electrical safety precautions. 

Electricity is a powerful force that can cause shocks, burns, fires, and even death if mishandled. That is why you need to know the basics of electrical safety for DIY projects before you start any work.

In this article, we will discuss five key measures that you should take to secure your home projects and protect yourself from electrical hazards. 

You can complete your DIY projects safely by following these measures. You will also learn how to prevent electrical accidents and injuries and what to do if they happen. So, let us begin by exploring some basic electrical concepts that every DIY’er should know

Electrical Safety for DIY Projects: 5 Measures

1. Understand Basic Electrical Concepts

Before you start any DIY project involving electricity, you need to understand some electrical concepts and terms. This will help you plan your project, choose the right materials and tools, and avoid common errors and hazards. 

Here are some of the most important concepts to know:

Voltage: 

Voltage is the measure of the electrical potential difference between two points. It is what makes electricity flow through a circuit. The higher the voltage, the more powerful the electric current. Voltage is measured in volts (V).

Current: 

Current is the flow rate of electric charge through a circuit and is measured in amperes (A) or amps. It powers your devices and appliances. The higher the current, the more energy is delivered. 

Resistance: 

Resistance measures how much a material opposes the flow of electric current. It reduces the current and dissipates energy as heat. The higher the resistance, the less current flows. Resistance is measured in ohms (Ω).

Power: 

Power measures the rate of energy transfer in a circuit and determines how much work can be done by an electric device or appliance. The higher the power, the more energy is used. Power is measured in watts (W).

Ohm’s law: 

Ohm’s law is a fundamental equation that relates voltage, current, and resistance in a circuit. It states that the voltage across a resistor is equal to the product of the current and the resistance. Mathematically, it can be expressed as

V=IR

 V is the voltage, I is the current, and R is the resistance.

Series and parallel circuits: 

Series and parallel circuits are two ways of connecting electrical components in a circuit. In a series circuit, the components are connected end to end so the same current flows through all of them. 

  • The total resistance is the sum of the individual resistances. 
  • The total voltage is the sum of the individual voltages. 
  • In a parallel circuit, the components are connected across each other so that the same voltage is applied to all of them. 
  • The total resistance is the reciprocal of the sum of the reciprocals of the individual resistances. The total current is the sum of the individual currents.

2. Following Safe Wiring Practices

Wiring an electrical project is the most common and important aspect. However, it is also one of the most challenging and risky ones. Improper wiring can lead to short circuits, shocks, fires, and other hazards. Therefore, following some safe wiring practices in your DIY projects is essential. 

Here are some of them:

a) Use the right type and size of wire

Different wires have different ratings and capacities depending on the voltage, current, and temperature they can handle. Using the wrong wire can result in overheating, melting, or breaking. Consult the manufacturer’s instructions or a qualified electrician to determine the best wire for your project.

b) Use the right type and size of connectors for your wire. 

Connectors join wires together or to other components. They should be compatible with the wire and provide a secure and reliable connection. 

Using the wrong connectors can result in loose or faulty connections, which can cause sparks, shocks, or fires. 

C) Use the right tools and techniques 

Stripping is removing the insulation from the end of a wire. Cutting is the process of trimming the wire to the desired length, while splicing is the process of joining two or more wires together. 

Use tools for these purposes, such as wire strippers, wire cutters, and wire crimpers. Employ techniques that ensure a clean and neat cut without damaging the wire or leaving any exposed strands.

d) Use the right color coding for your wires. 

Color coding is a system of using different colors to identify the function and polarity of wires. It helps to avoid confusion and mistakes when connecting wires. The color coding may vary depending on the country, region, or standard you are following. However, some common colors and their meanings are:

  • Black: Hot or live wire. Carries the current from the power source to the load.
  • White: Neutral wire. Completes the circuit and returns the current to the power source.
  • Green or bare: Ground wire. Provides a path for excess current to flow to the earth in case of a fault.
  • Red, blue, yellow, or other colors: Switched or secondary hot wires. Carry the current to or from switches, outlets, or other devices.

Here is an article to guide you on safe use of electricity: Mastering Safe Use of Electricity: Staying Shock-Free 

e) Use the right methods for routing and securing wires. 

Routing is arranging and organizing wires in a circuit while securing is fastening and supporting wires. Use neat and orderly wiring methods without twists, kinks, or tangles, and prevent wires from being damaged by sharp edges, heat, moisture, or rodents. 

Some common methods are:

  • Conduit: A metal or plastic tube that encloses and protects wires.
  • Cable tray: A metal or plastic structure that supports and guides wires.
  • Staples, clamps, or ties: Devices that attach wires to walls, ceilings, or floors.

3. Compliance with Electrical Codes and Regulations

Electrical codes and regulations are rules and standards that govern the design, installation, and maintenance of electrical systems and equipment. These codes are intended to ensure the safety and efficiency of electrical systems and prevent electrical hazards. 

These codes may vary depending on the country, state, or locality. Therefore, it is important to familiarize yourself with the applicable codes and regulations before starting any DIY project.

The benefits of complying with electrical codes and regulations

  • You will avoid fines and penalties for violating the law.
  • You will avoid liability and insurance issues in case of accidents or damages.
  • You will increase the value and resale potential of your home.
  • You will enhance the performance and lifespan of your electrical system and equipment.

Sources of electrical codes and regulations

National Electrical Code (NEC) 

The NEC is the most widely adopted and recognized electrical code in the United States. It covers the minimum requirements for safe electrical installations in residential, commercial, and industrial buildings.

International Electrotechnical Commission (IEC) 

The IEC is an international organization that develops and publishes standards for electrical and electronic technologies. It covers electrical safety, electromagnetic compatibility, renewable energy, and smart grids.

Local Building Codes and Ordinances

Local building codes and ordinances are specific rules and regulations for a particular jurisdiction or area. They may supplement or modify the national or international codes and standards. They may also require permits, inspections, or approvals for certain electrical projects.

To comply with electrical codes and regulations

  • Consult the relevant authorities and obtain your project’s necessary permits, inspections, or approvals.
  • Follow the manufacturer’s instructions and specifications for your electrical equipment and materials.
  • Use the appropriate wiring methods, materials, and devices for your project.
  • Label and identify your project’s wires, circuits, and components.
  • Test and verify the functionality and safety of your project.

4. Common Mistakes to Avoid in DIY Electrical Projects

Even if you follow the best practices and safety tips for DIY electrical projects, you may still make mistakes that can compromise your work or jeopardize your safety. Therefore, it is important to be aware of some common mistakes that DIY’ers make and how to avoid them. 

Reversing the polarity of wires. 

  • Polarity refers to the direction of the electric current in a circuit. The hot wire should be connected to the brass terminal of an outlet or switch, and the neutral wire connected to the silver terminal. 
  • Reversing the polarity can cause shocks, fires, or damage to your appliances and devices. 
  • To avoid this mistake, always check the color coding of your wires and use a polarity tester to verify the correct wiring.

Using the wrong size of the circuit breaker or fuse. 

  • Circuit breakers and fuses protect your circuits from overloading and short circuits. They are designed to trip or blow when the current exceeds a certain limit. 
  • However, if you use a circuit breaker too large for your circuit, it may not trip when needed, allowing the current to continue and cause overheating or fire. 
  • To avoid this mistake, always use the correct circuit breaker size specified by the manufacturer or the electrical code.

Mixing different types of wires. 

  • Wires come in different types, such as solid, stranded, copper, or aluminum. Each type has its own characteristics and applications. 
  • Mixing different types of wires can result in poor connections, corrosion, or overheating. 
  • To avoid this mistake, always use the same type of wire for your project, and use the appropriate connectors and terminals for joining them.

Leaving exposed or loose wires. 

  • Exposed or loose wires can pose a serious safety hazard, as they can come into contact with other wires, metal objects, or people and cause shocks, sparks, or fires. 
  • To avoid this mistake, always cover or enclose your wires with proper insulation, conduit, or boxes. 
  • Ensure your wires are securely fastened and supported and do not have any frayed or damaged ends.

Ignoring the electrical codes and regulations. 

  • Ignoring electoral codes can result in violations, fines, penalties, or legal issues. It can also compromise the safety and performance of your electrical system and equipment.
  • To avoid this mistake, consult the relevant authorities and comply with your project’s applicable codes and regulations.

5. Emergency Procedures and First Aid

Despite your best efforts and precautions, electrical accidents can still happen in your DIY projects. Therefore, knowing some of the emergency procedures and first aid to follow in an electrical accident is important. 

Here are some of them:

When someone is being electrocuted

  • Do not touch them directly. 
  • Turn off the power source or use a non-conductive object, such as a wooden stick or a rubber mat, to separate them from the electrical source.

For unconscious persons

  • Call 911 or your local emergency number immediately. Perform CPR (cardiopulmonary resuscitation) if you are trained and certified. Continue until help arrives.

Treat burns, cuts, or other injuries

  • Cool the affected area with water or a moist cloth for minor burns. 
  • Do not apply ice, butter, or ointments. 
  • Cover the burn with a sterile bandage or cloth. 
  • Do not remove any clothing or debris stuck to the skin for major burns. 
  • Cover the burn with a clean, dry cloth or sheet. 

For bleeding wounds

  • Apply direct pressure with a clean cloth or bandage. 
  • Elevate the injured part above the level of the heart if possible. 
  • For other wounds, clean them with water and soap if available. 
  • Apply an antibiotic ointment and a bandage.

If someone is in shock

  • Lay them down and elevate their feet about 12 inches. 
  • Keep them warm and comfortable. Do not give them anything to eat or drink. 
  • Monitor their breathing and pulse until help arrives.

I would suggest that you a few emergency kits. The following are some:
Electrical Safety for DIY ProjectsBuy On Amazon

Electrical Safety for DIY ProjectsBuy On Amazon

Electrical Safety for DIY ProjectsBuy On Amazon

Final Verdict

Prioritizing electrical outlet safety is paramount for everyone’s well-being. By diligently applying the tips and advice in this article, you empower yourself to prevent potential electrical accidents, safeguarding not only your property but also the lives of your loved ones. 

While electricity is undeniably a powerful and beneficial resource, its potential dangers underscore the need for responsible handling. So, be smart, stay safe, and cultivate an electrically savvy approach to daily life. 

Your commitment to these safety measures ensures a secure environment where the benefits of electricity can be harnessed without unnecessary risks. This marks the end of our exploration into electrical outlet safety, and I trust you’ve found the information helpful and enlightening. 

Thank you for joining us on this journey, and may your days be filled with safety and peace of mind

Also Read:

  1. Best DIY Home Security Systems [Expert Reviews & Buyer’s Guide] 
  2. What to do to stay safe during a blackout
  3. Outdoor Electrical Safety: 6 Crucial Tips for a Shock-Free Environment


Fire Safety Accessories for Blankets

6 Must-Have Fire Safety Accessories for Blankets

Fire blankets are simple but powerful tools that can save lives and property. They are made of fire-resistant materials that can cover small fires, preventing them from spreading and causing more damage. They are especially useful when water or fire extinguishers are unavailable. 

This article introduces six fire safety accessories to make your fire blankets more effective and convenient. Each of these accessories has its advantages and functions, which we will explain in detail in the following sections. 

Read on to learn how to enhance your protection with these must-have fire safety accessories for blankets.

6 Fire Safety Accessories for Blankets

A. Fire Blanket Bag or Case

A fire blanket bag is a protective cover that stores unused fire blankets. It can protect the fire blanket from dust, moisture, and damage that could affect its performance and durability. A fire blanket bag can also make the fire blanket more accessible and visible in an emergency by allowing you to hang it on a wall, carry it with you, or fold it into a compact size. 

Some examples of fire blanket bags are wall-mounted ones that have a pull-down tab for quick release, portable ones that have a handle or a strap for easy transport, or foldable ones that can fit into a drawer or a glove box. 

When choosing the right fire blanket bag, consider the cover’s size, material, color, and label. 

  • The size should match the fire blanket’s dimensions
  • The material should be fire-resistant and durable, 
  • The color should be bright and noticeable
  • The label should indicate the contents and instructions of the fire blanket.

Fire Safety Accessories for BlanketsBuy On Amazon

B. Fire Blanket Hook

A fire blanket hook is a simple device that can help you hang the fire blanket on a wall or a door. It can save space and improve accessibility of the fire blanket by keeping it out of the way but within reach in case of emergency. 

There are different fire blanket hooks: metal, plastic, or magnetic. Metal and plastic hooks are nailed to the wall or the door, while magnetic hooks can be attached to any metal surface. 

When installing and using the fire blanket hook, consider the hook’s location, height, and angle. 

  • The location should be near the potential fire sources, such as the stove, the fireplace, or the electrical outlets. 
  • The height should be easy to reach for everyone but not too low that children or pets can access it. 
  • The angle should be horizontal so the fire blanket can be quickly pulled out.

Fire Safety Accessories for BlanketsBuy On Amazon

C. Fire Blanket Gloves

Fire blanket gloves are special gloves that can protect the hands from burns and injuries when using the fire blanket. They are made of fire-resistant materials that can withstand high temperatures and prevent heat transfer. Fire blanket gloves can enhance the grip and control of the fire blanket by preventing the fire blanket from slipping off the hands. 

Some examples of fire blanket gloves are leather, cotton, or silicone ones. Leather gloves are durable and flexible, cotton gloves are breathable and comfortable, and silicone gloves are waterproof and easy to clean. 

When choosing and wearing the fire blanket gloves, consider the gloves’ size, fit, and comfort. 

  • The size should match the hand size
  • The fit should be snug but not tight
  • The comfort should be suitable for the duration and frequency of use.

Fire Safety Accessories for BlanketsBuy On Amazon

D. Fire Blanket Sticker or Sign

A fire blanket sticker or sign is a label that indicates the location and instructions of the fire blanket. It can increase the awareness and readiness of the fire blanket by making it easier to find and use in an emergency. 

There are different fire blanket stickers or signs, adhesive or reflective. Adhesive stickers can be stuck to any smooth surface, like a wall, a door, or a cabinet. Reflective stickers can reflect light and shine in the dark, making them more noticeable. Glow-in-the-dark stickers can emit light without any external source, making them visible even in total darkness. 

When placing and maintaining the fire blanket sticker or sign, consider the label’s visibility, readability, and cleanliness.

  •  The visibility should be high and unobstructed
  • The readability should be clear and simple, and the cleanliness be regular and thorough.

Fire Safety Accessories for BlanketsBuy On Amazon

E. Fire Blanket Spray

A fire blanket spray adds a layer of fire retardant coating to the fire blanket to improve the performance and durability of the fire blanket by enhancing its resistance to heat and flames.

There are different types of fire blanket sprays,  water-based, solvent-based, or aerosol ones. Water-based sprays are eco-friendly and non-toxic, solvent-based sprays are fast-drying and long-lasting, and aerosol sprays are easy to use and evenly distributed. 

Consider the spray’s frequency, coverage, and temperature when applying and storing the fire blanket spray. The frequency should be according to the manufacturer’s instructions, the coverage should be sufficient and uniform, and the temperature should be moderate and stable.

F. Fire Blanket Tester

A fire blanket tester can simulate a fire scenario to test the fire blanket. It can verify the quality and functionality of the fire blanket by measuring its ability to extinguish and withstand different types of fires. 

There are different types of fire blanket testers, electric, gas, or manual ones. Electric testers use a heating element to generate a controlled fire, gas testers use a burner to produce a variable fire, and manual testers use a match or a lighter to ignite a combustible material. 

Consider the device’s safety, accuracy, and environmental impact when using and disposing of the fire blanket tester. The safety should be ensured by wearing protective gear, following the instructions, and keeping a safe distance. 

The accuracy is checked by calibrating the device, using the appropriate fire class, and recording the results. The environmental impact should be minimized by using eco-friendly fuels, reducing the emissions, and recycling the waste.

How to Use a Fire Blanket 

Here are some steps and precautions to follow when using a fire blanket correctly and safely:

  • Pull the tabs to release the blanket from its container. Hold the blanket before you, with the edges covering your hands, to shield yourself from the heat.
  • Cover the fire completely with the blanket, starting from the near side and moving towards the far side. Ensure there are no gaps for the air to enter and fuel the fire.
  • Turn off the heat source to help extinguish the fire faster 
  • Call for help and alert others to the fire. 
  • Do not remove the blanket until the fire is completely out and the blanket is cool. Removing the blanket too soon may cause the fire to flare up again.
  • Wear gloves to protect your hands from burns and improve your grip and control of the blanket.
  • Avoid gaps between the blanket and the surface of the fire that can allow oxygen to enter and feed the fire, making it harder to put out. Tuck the blanket’s edges around the fire to create a tight seal.
  • Keep a safe distance from the fire and the blanket. Do not touch or move the blanket until cool; it may be very hot and cause burns. 
  • Do not inhale the smoke or fumes from the fire or the blanket, as they may be toxic or harmful.

How to Clean and Maintain a Fire Blanket

Here are some guidelines on how to do so:

Frequency and methods of cleaning

  • Depending on the manufacturer’s instructions, clean your fire blanket after each use or at least once a year. 
  • To clean your fire blanket, wash it by hand or by machine, using cold water and mild detergent. 
  • Rinse it thoroughly and let it air dry completely. 
  • Do not wring, twist, or iron your fire blanket, as this may damage its fibers and coating. 
  • Store your fire blanket in a clean and dry place, away from direct sunlight and heat sources. 
  • You can fold it neatly, roll it up, and place it in a bag or a case.

Signs of wear and tear

  • Inspect your fire blanket regularly for any signs of wear and tear, such as holes, stains, frays, and odors. 
  • Holes compromise your fire blanket’s fire resistance and coverage, allowing the fire to escape or spread. 
  • Stains may indicate the presence of dirt, grease, or chemicals that may affect the performance and durability of your fire blanket. 
  • Frays can weaken the structure and strength of your fire blanket, making it more prone to tearing or breaking. 
  • Odors suggest the growth of mold, mildew, or bacteria that may cause health problems or allergies. If you notice any of these signs, replace your fire blanket immediately.

How to Dispose of a Used or Damaged Fire Blanket

Disposing of a fire blanket is not as simple as throwing it in the trash. Fire blankets are made of fire-resistant materials that may have environmental and legal implications depending on how they are disposed of. 

Common methods of disposing of a fire blanket are recycling, landfilling, or incinerating. Recycling is the most eco-friendly option, as it reduces waste and saves resources. However, not all fire blankets are recyclable, and you need to check with the manufacturer or the local recycling center if they accept fire blankets. 

Landfilling is putting the fire blanket in the normal domestic household waste. However, this may cause pollution and take up space in the landfills. Incinerating is the most effective option, destroying the fire blanket completely and preventing reuse. However, this may produce harmful emissions and require special facilities and permits.

To dispose of a fire blanket properly, follow these steps:

  • Wrap the fire blanket in its original packaging or plastic bags to prevent contamination of the fire blanket or the surrounding environment.
  • Label the fire blanket clearly with the words “Fire Blanket” and “Do Not Reuse.” This will alert anyone who handles the fire blanket of its nature and condition.
  • Contact the local authorities for the best way to dispose of the fire blanket in your area. They may have specific regulations for fire blanket disposal or offer to collect and dispose of the fire blanket for you.
  • Follow the instructions the authorities gave and dispose of the fire blanket accordingly. Ensure to comply with safety and environmental standards and avoid illegal or improper disposal methods.

How to Store a Fire Blanket Properly

Storing a fire blanket properly is important to ensure its effectiveness and longevity. The storage place’s location, temperature, and humidity can affect the fire blanket’s performance and durability. 

  • The location should be convenient and visible so you can easily access the fire blanket in an emergency. 
  • The location should be away from direct sunlight or heat sources, such as windows, radiators, or stoves, as these may damage the fire blanket’s fire-resistant properties and materials. 
  • The temperature and humidity should be moderate and stable, as extreme or fluctuating conditions may cause the fire blanket to deteriorate or mold.

Some of the common mistakes in storing a fire blanket 

  1. Folding or rolling the fire blanket too tightly.
  2. Exposing the fire blanket to dirt, grease, or chemicals.
  3. Reusing or repairing a used or damaged fire blanket.

Conclusion

 We have introduced you to six fire safety accessories that enhance your protection and convenience with fire blankets. These accessories are fire blanket holders, bags, signs, hooks, gloves, and stickers. Each of these accessories has its own advantages and functions, such as protecting, storing, indicating, hanging, gripping, and labeling the fire blanket.

 Investing in these accessories and using them properly with your fire blanket can increase your chances of putting out small fires and preventing bigger disasters. 

We hope you have found this article useful and informative. Thank you for your attention and interest. If you have any feedback or questions, please share them with us in the comments section below. Stay safe and prepared with fire blankets and accessories.

Also Read:

  1. Fire Blanket for Kitchen Safety: 7 Essential Tips You Need to Know
  2. Fire Blanket vs Fire Extinguisher: 2024 Showdown Unleashed
  3. Step-by-Step Guide: How To Use a Fire Blanket for Quick Fire Suppression
  4. Tonyko Fire Blanket: Unlocking Its Powerful Uses and Benefits
  5. Why Every Home Needs a Prepared Hero Fire Blanket: All You Need To Know [Expert Reviews & Buyer’s Guide]
  6. Best Fire Blankets for home safety in 2023 [Expert Reviews & Buyer’s Guide]
Fire Blanket for Kitchen

Fire Blanket for Kitchen Safety: 7 Essential Tips You Need to Know

Fire Blanket for Kitchen Safety: Did you know that a fire blanket can save your life and kitchen from a fire? A fire blanket in your kitchen can help you deal with common fire hazards such as cooking oil, electrical appliances, and candles. 

According to the National Fire Protection Association, cooking is the leading cause of home fires and injuries in the US, accounting for 49% of all reported fires in 2018. 

That’s why having a fire blanket in your kitchen and knowing how to use it properly is essential. In this article, we will share 7 essential tips you need to know on kitchen safety. 

 By the end of this article, you will be well-equipped to handle any fire emergency in your kitchen with confidence and ease.

What is a Fire Blanket?

A fire blanket is a safety device made of fire-resistant fabric that can extinguish small fires or protect people from flames. When placed over a fire, it cuts off the oxygen supply that the fire needs to burn. 

A fire blanket can also be wrapped around a person whose clothes are on fire to stop the fire from spreading and handling common fire hazards in the kitchen, such as cooking oil, electrical appliances, or candles.

Purposes of fire blankets

  • To put out small fires in the kitchen, such as grease or oil fires, that cannot be extinguished with water or fire extinguishers.
  • To wrap around a person whose clothes are on fire, to stop the fire from spreading and causing further injuries.
  • To cover flammable materials or electrical equipment that may catch fire or explode to prevent them from worsening the situation.
  • To shield oneself from heat and flames when escaping a fire, to reduce the risk of burns or smoke inhalation.
  • To create a barrier or a partition between the fire and the unaffected areas to slow the fire spread and limit the damage.

7 Essential Tips for Safe Usage of Fire Blanket for Kitchen 

Tip 1: Choose the right size and type of fire blanket

Fire blankets come in different sizes and types, depending on the intended use and the fire class. You need a fire blanket for kitchen fires that can handle class F fires involving cooking oils and fats, and it has to be large enough to cover the fire completely without leaving any gaps. 

Choose a fire blanket at least one meter by one meter in size with high-quality materials that can resist high temperatures and flames. Check that the fire blanket has a certification mark meeting safety and performance requirements.

Tip 2: Install the fire blanket in an accessible location

Place the blanket in an easy-reach place but away from any potential sources of fire. The area should be easily accessible in an emergency. The best way to install the fire blanket is to mount it on a wall, preferably near the kitchen exit, so you can grab it and escape if needed. 

Follow the instructions on how to mount the fire blanket securely and safely, and use the correct signage to indicate its presence. 

Tips on how to mount the fire blanket 

  • Use screws or nails to fix the fire blanket package to the wall, making sure that it is stable and sturdy.
  • The fire blanket package should not obstructed by anything hindering its visibility.
  • Ensure the fire blanket package has clear and legible instructions on how to use it and a label showing the fire class, the size, the certification, and the expiry date.
  • Ensure it has two tabs hanging from the bottom that can be pulled quickly to release the blanket.
  • Ensure the package has a fire blanket symbol, such as a red square with a white letter F, indicating its purpose and location.

Tip 3: Learn how to use the fire blanket correctly

The basic steps of using the fire blanket are:

  1. Release the blanket by pulling quickly on the two tabs hanging from the bottom of the package.
  2. Protect your hands by rolling the blanket’s corners over them or wearing flame-retardant gloves.
  3. Place the blanket over the fire, starting from the near side and moving in. Do not throw it, but lay it down gently.
  4. Turn off the heat source, such as a stove burner or an oven.
  5. Leave the blanket in place for at least 15 minutes or until the fire is completely out.
  6. Call the fire department or emergency services to report the fire and check for damage or injuries.

Common mistakes to avoid

  • Do not use the fire blanket on large fires, such as sofa, curtain, or room fires instead, call the fire department and evacuate the premises immediately.
  • Do not use the fire blanket on flammable liquids or gases, such as petrol, diesel, or propane, as they may explode. In these cases, use a fire extinguisher suitable for the fire class.
  • Do not use the fire blanket on hot metals, as they may react with the fire blanket. In these cases, use a fire extinguisher, such as a metal fire extinguisher designed for the fire class.
  • Do not remove the fire blanket before it is completely out, as it may cause the fire to flare up again or spread to other areas.
  • Do not reuse the fire blanket, as it may be damaged or contaminated by the fire. Dispose of it properly and replace it with a new one.

Also Read: Step-by-Step Guide: How To Use a Fire Blanket for Quick Fire Suppression

Tip 4: Know when to use the fire blanket and when to call for help

1. When to use the fire blanket 

  • The fire is small and contained, such as a grease or oil fire in the kitchen. These are class F fires, which involve cooking oils and fats.
  • The fire is on a person’s clothing, and you can wrap the blanket around them to prevent it from spreading. 
  • When escaping from a fire, shield yourself from heat and flames or create a barrier between the fire and the unaffected areas to reduce the risk of burns or smoke inhalation, slow the fire spread, and limit the damage.

2. When not to use a fire blanket

  • The fire is large or spreading ( class A fires)  as it can quickly grow out of control and engulf the whole area.
  • Class B fires involving  flammable liquids or gases, such as petrol, diesel, or propane that can explode if not handled properly.
  • Class D fires where the fire is too hot for the blanket to withstand, such as a metal fire, a chemical fire, or a forest fire. 

When you are caught in a scenario where you cant use fire blanket, immediately call the emergency services and evacuate the premises. 

Also Read: Fire Blanket vs Fire Extinguisher: 2024 Showdown Unleashed

Follow the general fire safety rules

  • Stay calm and alert.
  • Activate the nearest alert system and inform others of the fire.
  • Follow the fire escape plan, and use the nearest and safest exit. Do not use elevators or escalators.
  • Close the doors and windows behind you to prevent the fire from spreading 
  • Stay low and crawl if there is smoke, covering your nose and mouth with a wet cloth or a mask.
  • Stop, drop, and roll if your clothes catch fire, and do not run or fan the flames.
  • Check the doors for heat before opening

Tip 5: Maintain and inspect the fire blanket regularly

Check your fire blanket at least once a year for any signs of damage like the  tears, burns, stains, or holes, that might affect the performance of the fire blanket. If you find any problem, replace it as soon as possible.

How to clean your fire blanket 

  • Clean your fire blanket with a soft cloth and mild soap, and rinse with clean water. Do not use corrosive substances like bleach, ammonia, or alcohol that might damage the fire blanket.
  • Dry your fire blanket thoroughly before storing it. Do not use heat sources that might melt or shrink the fire blanket.
  • Store your fire blanket in a cool, dry, and well-ventilated place. Do not expose it to direct sunlight, extreme temperatures, or humidity.
  • Dispose of your fire blanket properly when it is no longer usable. Do not throw it in the regular trash, as it might cause a fire hazard instead, contact your local fire department for advice on how to dispose of your fire blanket safely.

Tip 6: Complement the fire blanket with other fire safety measures

A fire blanket is a useful but is not a substitute for other fire safety measures, such as fire extinguishers, smoke alarms, fire escape plans, etc. Have a comprehensive fire safety plan that covers all aspects of fire prevention, detection, response, and recovery. 

Complementary  fire safety measures to implement in your kitchen:

  • Fire extinguishers: 

Have at least one fire extinguisher in your kitchen, and know how to use it properly. Choose a fire extinguisher for the  class F fires and ensure you maintain it regularly and replace it when it expires.

  • Smoke alarms: 

Install smoke alarm in your kitchen that is compatible with your fire blanket, such as a photoelectric or a dual-sensor alarm. Change the batteries of your smoke alarm every year, and replace the whole unit every 10 years.

Tip 7: Educate your family and guests on how to use the fire blanket

A fire blanket in your kitchen is useless if you or your loved ones do not know how to use it. Teach and practice using the fire blanket with your family and guests, and ensure everyone knows its location and instructions. 

Tips for teaching and practicing fire blanket safety 

  • Explain the purpose and benefits of having a fire blanket in your kitchen and the types of fires that can be handled.
  • Demonstrate the steps of using the fire blanket for small incipient fires and burning clothing, and let them try it with a simulation.
  • Emphasize the safety precautions and common mistakes to avoid when using the fire blanket.
  • Show them where the fire blanket is installed and how to access it quickly and easily.
  • Review the fire escape plan and safety measures with them, and remind them to call the fire department after using the fire blanket.

How to choose the best fire blanket for kitchen

When choosing a fire blanket, you should consider the following factors:

1. Material

Fire blankets are usually made of woven fiberglass, a fire-resistant material that can withstand high temperatures. Some fire blankets may also have a fire retardant film or coating layer to enhance performance. Avoid fire blankets made of wool or other flammable materials, as they may catch fire or melt when exposed to flames.

2. Quality

Fire blankets should be durable, easy to use, and effective in smothering fires. Look for fire blankets with smooth surfaces, strong stitching, and no holes or tears. Check the fire blanket’s weight and thickness, as it may affect handling and coverage. A good fire blanket should be light enough to carry and throw over a fire but thick enough to block the oxygen and heat from the fire.

3. Certification

Fire blankets should meet your country or region’s relevant safety standards and regulations. Look for fire blankets that have a certification mark from a reputable organization, such as the Underwriters Laboratories (UL), or the European Committee for Standardization (CEN). These marks indicate that an independent authority has tested and approved the fire blanket for its quality and performance.

4. Warranty 

Fire blankets should come with a warranty from the manufacturer, covering any  damages during normal use. Read the warranty terms and conditions carefully, and check the duration and coverage of the warranty. Keep the receipt and proof of purchase, as you may need them to claim the warranty.

Also Read: Best Fire Extinguishers for Kitchen Safety [Expert Reviews & Buyer’s Guide]

Examples of fire blanket

1. 15-Pack Fire Blanket Fiberglass Fire Emergency Blanket

The 15 Pack Fire Blanket offers a crucial layer of safety for homeowners, providing peace of mind in emergency situations. Measuring a convenient 39 x 39 inches, this flame-retardant blanket is designed for use in various settings, including kitchens, fireplaces, grills, cars, offices, and during camping trips.

Key Features:

  • Crafted from high-quality fire-resistant rebound fiberglass, it has two layers of fiberglass fabric and an inner flame-retardant sheet that enables the blanket to isolate high temperatures, heat sources, and flames effectively.
  • The blanket demonstrates impressive heat resistance, with the ability to withstand temperatures of up to 550 degrees Celsius or 1022 degrees Fahrenheit. 
  • Designed for user-friendly deployment. Simply pull the tab to release the blanket, spread it over the fire, and allow it to smother the flames. 
  • The product comes in 15, ideal for households, offices, and other settings. The conveniently packaged blankets are easy to store. This ensures quick accessibility in case of emergencies.

Benefits:

  • Effective against various fires, including liquid and grease fires. Its versatility makes it an essential safety tool for kitchens, fireplaces, grills, cars, camping, offices, and restaurants.
  • Besides fire suppression, the blanket can wrap around the body as a heat protectant. This multi-functional feature adds an extra layer of safety during emergency situations.

Fire Blanket for KitchenBuy On Amazon

2. Prepared Hero Emergency Fire Blanket – 8-Pack

The Prepared Hero Emergency Fire Blanket 8 Pack, is a reliable and mess-free solution for quickly extinguishing small fires. With dimensions of 40” x 40”, this fiberglass fire blanket is a versatile and essential addition to any home, kitchen, backyard, or vehicle, providing peace of mind in emergencies.

Key Features:

  • The simplicity of deploying this fire suppression blanket sets it apart. By pulling down the tabs, users can swiftly and effectively extinguish small fires without the mess associated with traditional fire extinguishers.
  • This fire suppression blanket is effective on various types of fires, including those caused by liquids or grease. 
  • Its lightweight design makes it easy to handle and can double as a heat shield, enhancing its usefulness in emergencies.
  • The blanket adheres to CE safety standards and comprises 100% quality flame retardant material.
  • Unlike traditional extinguishers, there is no need for replacements, adding to this safety tool’s convenience and long-term reliability.

Benefits:

  • The Prepared Hero Emergency Fire Blanket eliminates the mess associated with traditional fire extinguishers, providing a clean and efficient method for suppressing small fires.
  • With a hole slot for easy hanging on walls, this fire blanket can be strategically placed in various locations, ensuring quick accessibility. 
  • The non-expiry feature ensures that this fire blanket remains a dependable safety tool without needing replacements.

Potential Drawbacks: 

  • While the Prepared Hero Emergency Fire Blanket is a highly effective and convenient safety tool, it’s essential to ensure that users are familiar with its usage guidelines to maximize its effectiveness in emergency situations.

Fire Blanket for KitchenBuy On Amazon

Find more insights on Prepared Fire Blanket here: Why Every Home Needs a Prepared Hero Fire Blanket: All You Need To Know [Expert Reviews & Buyer’s Guide]

3. JJ CARE Fire Blanket – 10 Packs with Hooks and Gloves

JJ CARE’s Fire Blanket comes in a convenient 10 Packs, complete with hooks and gloves, making it a solution for home and kitchen fire safety. Designed to handle various fire types, this emergency fire blanket is a trademark of reliability, meeting the highest safety standards and providing peace of mind in fire emergencies.

Key Features:

  • These flame-retardant blankets from JJ CARE are crafted from top-notch fire-resistant materials. Their advanced design ensures effective fire suppression, tackling liquid, grease, and various fire types.
  • The suppression blankets can withstand temperatures up to 1076℉ (580℃), making them a reliable tool in high-heat situations.
  • The user-friendly design encourages quick and efficient responses to fire emergencies.
  • The set includes two 40×40-inch Fire Blankets paired with protective gloves and adhesive hooks for easy storage. The inclusion of hooks facilitates convenient storage, making the blankets easily accessible in case of emergencies.

Benefits:

  • JJ CARE’s commitment to safety is evident in its adherence to EN-1869:1997 standards. This ensures that users can trust the reliability and effectiveness of these fire blankets in suppressing various types of fires.
  • The easy deployment of the fire blanket, coupled with the included gloves and hooks, makes this product user-friendly and suitable for individuals of all ages. 
  • The non-toxic nature of the blankets extends their protection to adults, children, and pets.

Potential Drawbacks: 

  • While the JJ CARE Fire Blanket is designed for ease of use, users must familiarize themselves with the deployment process to ensure optimal effectiveness during emergencies.

Fire Blanket for KitchenBuy On Amazon

Also Read: Best Fire Blankets for home safety in 2023 [Expert Reviews & Buyer’s Guide]

How to test and dispose a fire blanket

A. Testing 

Inspect your fire blanket every six months to check if it is visible, accessible, clean, damage-free, and has clear instructions. Check the blanket’s weight, thickness, and material, which may affect its performance. To test the blanket, you can pull the tapes downwards to release it from its container and then fold it back properly. Do not use the blanket to cover any fire or heat source, as this may damage or cause it to catch fire.

B. Disposing 

Dispose of your fire blanket if it has been used to extinguish a fire or is torn, contaminated, or expired. Wait until the blanket has cooled down, or wet it thoroughly with water before disposing of it. You can throw away the blanket in the normal household waste, but recycle the plastic casing or packaging if possible. Replace your fire blanket with a new one as soon as possible.

How to prevent kitchen fires in the first place

1. Stay in the kitchen while cooking 

Do not leave the stove or oven on when you are not in the room, as this can increase the fire risk. If you must leave the kitchen, turn off the heat and move the cookware to a safe place. Monitor your food and avoid overcooking or burning it.

2. Keep the stove and appliances clean

Grease, oil, and food residue can build up on the stove, oven, hood, and vent, creating a fire hazard. Wipe up any spills and clean the surfaces regularly with white vinegar or a suitable cleaner. Inspect and service your appliances periodically and replace damaged cords.

3. Keep flammable items away from the heat

Items such as dish towels, paper towels, oven mitts, wooden utensils, plastic bags, or boxes can catch fire if they are too close to the stove, oven, or toaster. Store them away from the heat sources and keep the countertops clear of clutter. Avoid wearing loose or long sleeves, dangling jewelry, or long hair that can come in contact with the flames.

4. Use the right cookware and temperature

When frying, use a thermometer to monitor the oil temperature and keep it below 375°F, as higher temperatures can cause the oil to ignite. Use a heavy pot or pan with a lid that fits well, and avoid overfilling it with oil or food. If the oil starts to smoke or bubble, turn off the heat and move the pot or pan to a cool burner.

5. Have a fire extinguisher and smoke detectors

In case of a fire, have a fire extinguisher suitable for kitchen fires, such as a Class B or ABC extinguisher. Install smoke detectors on all home floors, especially near the kitchen and test them regularly and replace the batteries when needed.

Also Read: Kitchen Safety for Children: Explore 10 Essential Tips
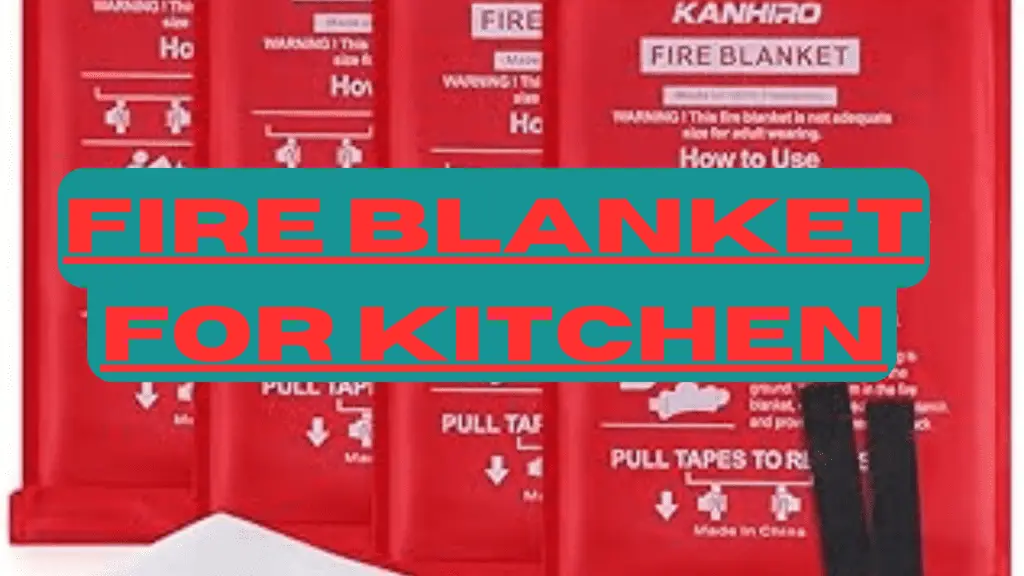
How to  use a fire blanket for small incipient fires and burning clothing

Here are the instructions for using a fire blanket for small incipient fires and for burning clothing:

For small incipient fires:

  • Release the blanket by pulling quickly on the two tabs hanging from the bottom of the package.
  • Protect your hands by rolling the blanket’s corners over them or wearing flame-retardant gloves.
  • Place the blanket over the fire, starting from the near side and moving in. Do not throw it, but lay it down gently.
  • Turn off the heat source, such as a stove burner or an oven.
  • Leave the blanket in place for at least 15 minutes or until the fire is completely out.
  • Call the fire department or emergency services to report the fire and check for damage or injuries.

For burning clothing:

  • Wrap someone whose clothes are burning in the fire blanket. Use the blanket’s edges to protect your hands from the fire and roll them in until it’s securely in place.
  • Have the person stop, drop, and roll. Instruct the person in danger to stop moving, drop to the ground, and roll until the fire is out.
  • Call the fire department or emergency services for medical assistance and check for burns or injuries.

Conclusion

Discover how to select the ideal kitchen fire blanket, ensuring its proper testing and disposal. This simple yet effective tool can extinguish small fires or shield you from flames. 

Maintain the blanket’s condition for emergency readiness. Adhere to fire safety guidelines, follow instructions meticulously, and promptly summon emergency services when needed. 

If you lack a kitchen fire blanket, secure one promptly, keeping it visible and accessible. This essential tool is ready to safeguard lives and property if used cautiously. Stay secure, adhere to fire safety guides and enjoy safe cooking with the indispensable addition of a fire blanket in your kitchen.

Fire Blanket vs Fire Extinguisher

Fire Blanket vs Fire Extinguisher: 2024 Showdown Unleashed

Regarding fire safety, you may wonder which device is better: a fire blanket vs fire extinguisher. Both are designed to put out small fires but have different advantages and disadvantages. 

This article will compare these two devices and help you choose the best one for your needs. We will explain fire blankets and extinguishers, how they work, and what types of fires they can extinguish. 

We will also discuss the pros and cons of each device, the scenarios where they are most effective, and the tips on using them safely. We will give you some factors to consider when choosing the right size and type of fire blanket or fire extinguisher for your situation. 

By the end of this article, you will better understand fire safety and be prepared to face any fire emergency.

Fire Blanket vs Fire Extinguisher

Fire Blanket

A fire blanket is a fire safety device that consists of a large piece of fabric made of fiberglass or wool that can extinguish small fires by covering them and cutting off the oxygen supply. By wrapping them around their bodies, fire blankets protect people from flames or hot objects.

Pros

1. Simple usage

Fire blankets are simple and easy to use. They do not require training or maintenance and can be operated by anyone, even children or the elderly.

2. Effectiveness

Fire blankets can put out small fires quickly and effectively. They can smother the fire quickly and prevent it from spreading or reigniting.

3. Prevent injuries

 They can be used to wrap around a person whose clothing is on fire and reduce the risk of burns and inhalation injuries. They shield a person from heat and help them escape fire.

4. Do not cause any mess or damage

Unlike fire extinguishers that spray water, foam, dry powder, or carbon dioxide, blankets do not leave any residue or harm the surrounding area. They are also reusable and environmentally friendly and can be washed and stored for future use.

Cons

1. Limited applications. 

They are only suitable for small fires like cooking oil, grease, or electrical fires. They are ineffective against larger or spreading fires involving flammable liquids, gases, or metals.

2. Can be hazardous if not used properly. 

They can cause more harm if thrown on fire or removed too soon, causing the fire to spread. They can also burn, releasing toxic fumes if exposed to high temperatures.

3. Hard to access and deploy in an emergency. 

They can be stored in hard-to-reach places and forgotten by the user. They can also be difficult to handle when large or heavy.

Also read this article: Best Fire Blankets for home safety in 2023 [Expert Reviews & Buyer’s Guide]

Fire extinguisher

A fire extinguisher is a portable device that can put out small fires by spraying a substance that can extinguish the fire. Fire extinguishers have different types and uses, depending on the class of fire they are designed to combat. 

Here are some of the pros and cons of fire extinguishers:

Pros:

1. Effective

Fire extinguishers are very effective at extinguishing small or large fires, depending on the size and type of the extinguisher. They can prevent the fire from spreading and causing more damage and injury.

2. Can tackle a variety of fire classes

Fire extinguishers can tackle a variety of fire classes, such as A (ordinary combustibles), B (flammable liquids), C (electrical equipment), D (flammable metals), and K (cooking oils and fats). They can be selected and used according to the type of fuel involved in the fire.

3. Reduce the damage 

Fire extinguishers can reduce the damage and spread of fire by cooling and displacing the oxygen. They can also create a barrier between the fire and the surrounding area, reducing the risk of ignition or re-ignition.

4. Provide control over

They can provide some degree of control over the fire until the firefighters arrive, help to contain the fire and make it easier for the professionals to extinguish it.

Cons:

1. Require regular inspection

They require regular inspection and maintenance to ensure they are in working order and have not expired. They must be checked for damage, leakage, corrosion, or pressure loss and replaced or refilled if necessary.

2. Difficult to use

Fire extinguishers can be difficult to use if the user is unfamiliar with the instructions or the fire class. Following the PASS method, they must be used correctly: Pull the pin, Aim the nozzle, Squeeze the handle, and Sweep from side to side.

3. Create a mess

Fire extinguishers can create a mess or damage the surrounding area, depending on the extinguishing agent used, such as water, foam, dry powder, or carbon dioxide. They can leave behind residues, stains, or odors or cause electrical short circuits, corrosion, or freezing.

4. Can pose health risks

Fire extinguishers can pose health or environmental risks, such as releasing toxic or corrosive substances or depleting the oxygen level in the room. They can cause irritation, burns, suffocation, or harm the wildlife or vegetation. They need to be disposed of properly and by the local regulations.

Also read this article: How Much is a Fire Extinguisher? [Buyer’s Guide]

Fire Blankets or Fire Extinguishers: Effectiveness

Fire Blankets

Fire blankets are more effective than fire extinguishers in the following situations:

  • A small fire on a stovetop, oven, or microwave caused by cooking oil, grease, or food. A fire blanket can cover the fire and prevent it from spreading, while a fire extinguisher may cause the oil or grease to splash and spread the fire.
  • A small fire in a trash can, wastebasket, or paper bin caused by cigarettes, matches, or candles. A fire blanket prevents it from igniting other combustible materials, while a fire extinguisher may not reach the source of the fire or may damage the container.
  • A small fire on an electrical appliance caused by a short circuit or overheating. A fire blanket isolates the fire and cuts off the electricity, while a fire extinguisher may cause an electric shock or damage the appliance.
  • A person whose clothing is on fire. A fire blanket can wrap around the person and protect them from the fire, while a fire extinguisher may injure the person or make the fire worse.

Our Top Picks:

Fire Blanket vs Fire ExtinguisherBuy On Amazon

Fire Blanket vs Fire ExtinguisherBuy On Amazon

Fire Blanket vs Fire ExtinguisherBuy On Amazon

Fire Extinguishers

Fire extinguishers are more effective than fire blankets in the following situations:

  • A large or spreading fire in a room. A fire extinguisher can spray a large amount of extinguishing agent and reduce the temperature and oxygen level of the fire, while a fire blanket may not be able to cover the entire fire or may catch fire itself.
  • A fire involving flammable liquids, gases, or metals. A fire extinguisher uses a specific type of extinguishing agent that can react with or displace the fuel, while a fire blanket may react with the fuel and cause an explosion.
  • A fire in a vehicle caused by a collision, engine malfunction, or fuel leak. A fire extinguisher reaches the fire and prevents it from spreading to other parts of the vehicle, while a fire blanket may burn due to the high temperature.
  • A fire in a public, such as a restaurant, office, or warehouse, where there are multiple fire hazards and occupants. A fire extinguisher can control the fire and allow the occupants to evacuate safely; the fire blanket may not be enough to extinguish the fire.

Our Top Picks:

Kidde Fire Extinguisher for Home, 1-A:10-B:C, Dry Chemical Extinguisher, Red, Mounting Bracket Included, 6 PackBuy On Amazon

First Alert Home1-2, Standard Home Fire Extinguisher, Red 2pk, White, 2PACKBuy On Amazon

4-Pack Buckeye 10914 ABC Multipurpose Dry Chemical Hand Held Fire Extinguisher with Aluminum Valve and Wall HookBuy On Amazon

Fire Blanket vs Fire Extinguisher: Tips on Usage

How to use Fire Blankets

Fire blankets are simple, effective devices that can smother small fires and protect people from flames or heat. To use a fire blanket safely and correctly, follow these steps:

  • Before using a fire blanket, ensure the fire is small enough to be covered by the blanket, and there is no risk of explosion or shock. If the fire is too large or involves flammable liquids, gases, or metals, use a fire extinguisher instead.
  • Turn off the heat source to prevent the fire from spreading.
  • Pull the handles to release the fire blanket from its container, and hold it by the corners, keeping your hands behind the blanket. Do not touch the fire or the blanket with your bare hands.
  • Place the fire blanket gently over the fire, covering it completely and sealing the edges to prevent any air from entering. Do not throw the blanket on the fire, which may cause the fire to flare up or spread.
  • Leave the fire blanket in place until the fire is completely out, and do not touch or move it, as it may be hot or cause the fire to flare up. Wait for at least 15 minutes before removing the blanket, and check for any signs of smoke or flames.
  • If the fire is on a person, wrap the blanket around them, covering their head and body, and roll them on the ground to smother the flames. Do not remove the blanket until the fire is out; seek medical attention.
  • Call the emergency services and report the fire and any injuries. Dispose of the fire blanket properly.

Also read this article: Step-by-Step Guide: How To Use a Fire Blanket for Quick Fire Suppression

How to use a Fire Extinguisher

Fire extinguishers are powerful and versatile devices that can spray a substance that can extinguish different types of fires. 

To use a fire extinguisher safely and correctly, follow these steps:

  • Before using a fire extinguisher, ensure you know the fire class and the type of extinguisher. If the fire is too large or involves electrical equipment, evacuate the area and call the emergency services instead.
  • Check the pressure gauge to ensure the pin or seal is intact, and the nozzle is clear. If the pressure is too low or the pin is broken, do not use the extinguisher, as it may not work properly.
  • Stand safely from the fire, and aim the nozzle at the base of the fire, not the flames. The distance may vary depending on the type and size of the extinguisher, but it is usually between 2 and 6 meters.
  • Squeeze the lever, sweep the nozzle from side to side, and cover the fire with the extinguishing agent. Do not spray the agent in short bursts, as this may reduce the effectiveness and increase the risk of re-ignition.
  • Release the trigger when the fire is out, and back away from the area, watch for any signs of re-ignition. If the fire re-ignites, repeat the process until the fire is completely out 
  • Call the emergency services and report the fire and any injuries. 

Fire Blanket vs Fire Extinguisher: How to Store and Maintain

Fire Blankets

  • Store the fire blanket in a visible and accessible location near the kitchen, fireplace, or workshop, and mark it with a label.
  • Keep the fire blanket away from heat, moisture, dust, or chemicals, and do not fold as this may damage the material.
  • Check the fire blanket regularly for any signs of wear and tear, such as holes, tears, or stains, and replace it if necessary.
  • Clean the fire blanket only if it is dirty, and follow the manufacturer’s instructions on washing and drying it.
  • Do not reuse the fire blanket if used on fire unless it is certified as reusable by the manufacturer.

Fire Extinguishers

  • Store the fire extinguisher in a visible and accessible location near the exit, and mark it with a sign.
  • Keep the fire extinguisher away from heat, moisture, dust, or chemicals. 
  • Do not expose it to direct sunlight, extreme temperatures, or vibrations, which may affect its performance or safety.
  • Check the fire extinguisher monthly for any signs of damage and replace it if necessary.
  • Follow the manufacturer’s instructions on how to test and recharge the fire extinguisher, and keep a record of the date and results of each inspection.

Also Read:

  1. Portable Fire Extinguishers: Your 2024 Ultimate Guide
  2. Tonyko Fire Blanket: Unlocking Its Powerful Uses and Benefits
  3. Wet Chemical Fire Extinguishers: Fire Safety 101 [Expert Reviews & Buyer’s Guide]
  4. The Power of a Dry Chemical Fire Extinguisher [Expert Reviews & Buyer’s Guide]
  5. Why Every Home Needs a Prepared Hero Fire Blanket: All You Need To Know [Expert Reviews & Buyer’s Guide]
  6. Best Fire Extinguishers for Kitchen Safety [Expert Reviews & Buyer’s Guide]

Conclusion

Both fire blankets and fire extinguishers are useful fire safety tools to help prevent or stop small fires. However, they have different pros and cons and are suitable for different scenarios. 

Fire blankets are ideal for smothering fires in closed containers, such as pots, pans, or trash cans. They are also effective for wrapping around a person whose clothes are on fire. Fire extinguishers are better for open fires larger than a blanket can cover, such as furniture, curtains, or electrical equipment. 

They can also be used from a safe distance. Therefore, it is advisable to have fire blankets and extinguishers in your home or workplace and know how and when to use them properly.

Hardwired smoke detectors

Hardwired smoke detectors for reliable and consistent performance

The smoke detectors are an important aspect of every home safety. With many smoke detectors in the market today, everyone is looking for an electrical system that provides unwavering protection. With all the confusion in the market, hardwired detectors emerge as the most reliable and consistent. 

This guide will unravel the mystery behind hardwired smoke detectors, the installation process, and today’s top-notch models. 

Picture a world where you never second-guess your home’s safety – that’s the promise of hardwired detectors. Curious? We thought so. Stay tuned as we dive into the details, answering questions about hardwired smoke detectors. 

What Is a Hardwired Smoke Detector?

These are smoke detector connected to your home’s electrical wiring and do not  rely on batteries. They always have power, even if the electricity goes out, as long as it has a backup battery. A hardwired smoke detector is interconnected in that if one detects smoke, all of them will sound an alarm, giving you more time to escape and prevent the fire from spreading.

These devices uses ionization, photoelectric, or dual-sensor sensors to detect smoke. The Ionization smoke detectors are more sensitive to flaming fires, while photoelectric smoke detectors are more sensitive to smoldering fires. Dual-sensor smoke detectors combine both types of sensors for better coverage. 

How to Install Hardwired Smoke Detectors

Since installation of  hardwired smoke detectors can be challenging, it is recommended that you hire a professional electrician. However, if you are confident in your DIY skills, you can follow these general steps to install hardwired smoke detectors:

  1. Turn off the power to the circuit you will work on at the main breaker panel.
  2. Choose the locations for your smoke detectors, following the manufacturer’s instructions and the local codes. 
  3. Install at least one smoke detector on each level of your home. Avoid placing them near sources of steam, dust, or cooking fumes, as they can cause false alarms.
  4. Drill holes in the ceiling or wall where you will mount the smoke detectors, and run the electrical wires from the nearest junction box to each hole. Use a wire coat hanger to pull the wires through the holes.
  5. Connect the wires from the junction box to the wires from the smoke detector, following the color coding and the wiring diagram provided by the manufacturer. 
  • Connect the black wire to the black wire, the white wire to the white wire, and the red wire to the red wire. 
  • The red wire is used for interconnection to enable smoke detectors to communicate with each other. 
  • If your smoke detector has a CO detector, connect a yellow wire to a yellow wire. Use wire nuts to secure the connections, and wrap them with electrical tape for extra safety.
  1. Attach the mounting bracket to the ceiling or wall with screws, and snap the smoke detector onto the bracket. 
  2. Install the backup battery in the smoke detector and test the device by pressing the test button. You should hear a loud beep from your home’s smoke detector and all the other interconnected smoke detectors. If not, check the wiring and the connections and try again.
  3. Restore the power to the circuit, and enjoy the peace of mind of having hardwired smoke detectors in your home.

Best Hardwired smoke detectors

There are many models of hardwired smoke detectors available on the market, but not all of them are equally reliable, effective, and user-friendly. To help you choose the best hardwired smoke detectors for your home. 

Here are our top picks:

1. Kidde Smoke & Carbon Monoxide Detector, Hardwired Interconnect, Combination Smoke & CO Alarm with Battery Backup, Voice Alerts, Contractor 6 Pack

The Kidde Smoke & Carbon Monoxide Detector is vital to any home or business, offering a comprehensive fire and carbon monoxide detection solution. With a hardwired interconnect system and a combination of features, this alarm prioritizes safety with voice alerts, an 85-decibel alarm, and a seamless integration with up to 24 other devices.

Kidde Smart Smoke & Carbon Monoxide Detector, WiFi, Alexa Compatible Device, Hardwired w/Battery Backup, Voice & App AlertsBuy On Amazon

Key Features:

  • Voice Alerts: The loud 85-decibel alarm is accompanied by clear voice alerts, ensuring immediate awareness with announcements like “Fire! Fire!” or “Warning! Carbon Monoxide!”
  • Hardwired with Battery Backup: This combo detector is hardwired into a 120V power source, ensuring continuous operation, with a 9V battery backup for uninterrupted protection during power outages.
  • Easy Installation: The front battery door facilitates quick and straightforward battery replacement, enhancing user convenience.
  • Advanced Detection: Equipped with a photoelectric smoke detector for visible fire particles and an electrochemical CO detector for accurate readings.
  • Interconnectivity: The detector can interconnect with up to 24 other Kidde devices, including smoke, CO, and heat alarms, creating a comprehensive safety network.

Benefits:

  • Voice and loud alarms ensure early detection, allowing occupants to respond to potential fire or carbon monoxide threats.
  • The hardwired system, backed by a 9V battery, ensures 24/7 protection, even during power outages.
  • Integration with multiple devices creates a network that enhances overall safety, providing a layered approach to detection.

Potential Drawbacks:

  • Some users may find the initial setup slightly complex, especially interconnecting multiple devices.
  • The circular shape may not be as discreet as some users prefer, impacting the overall aesthetics.

What We Liked Most: 

The seamless integration with other Kidde devices impressed us the most. Creating a network of interconnected alarms adds an extra layer of safety, especially in larger homes or commercial spaces.

What Could Be Improved: 

Streamlining the initial setup process and offering alternative shapes or finishes for those concerned with aesthetics could enhance the overall user experience.

2. Siterlink Hardwired Interconnected Smoke Detector Carbon Monoxide Detector Combo, 2 in 1 Smoke and CO Detector with 2 AA Batteries Back Up, AC Smoke and CO Alarm, Voice Alert, Self-Check, 6 Pack

The Siterlink Hardwired Interconnected Smoke and Carbon Monoxide Detector Combo offers a safety solution with the convenience of interconnectivity. With dual sensors providing 2-in-1 protection, replaceable battery backup, and user-friendly one-button control, this 6-pack ensures your home is well-equipped for emergencies.

Hardwired smoke detectorsBuy On Amazon

Key Features:

  • Connect up to 12 hardwired detectors, creating a synchronized system that activates all alarms when one detects an emergency.
  • 2-in-1 Protection: Equipped with dual sensors, to guards against a single unit’s smoke and carbon monoxide hazards.
  • One-Button Control: One unit’s Test/Mute button controls the entire interconnect system, streamlining the testing and muting processes for added convenience.
  • Replaceable Battery Backup: Ensures continuous protection during power outages, allowing the detector to monitor potential hazards throughout the home.
  • 85 dB Alarm & Self-Check Function: The self-check function eliminates manual testing, providing automatic notifications of probe failures. An 85-decibel alarm ensures audibility for all occupants.

Benefits:

  • Seamless Interconnectivity: The interconnected system guarantees that when one alarm is triggered, all units sound an 85-decibel alarm, ensuring everyone in the home is promptly alerted.
  • Fast Internet Connection: Easy pairing mode activation with a simple three-time test button press on any smoke alarm within two seconds.
  • Self-Checking Function: Automatic self-tests reduce the need for manual checks, enhancing overall reliability.

Potential Drawbacks:

  • Low Battery Warning Issue: Some users may encounter low battery warnings. Clearing the memory mode by pressing the test button three times in two seconds can resolve this, but it may be inconvenient for some.

What We Liked Most: 

The most commendable features were the ability to interconnect up to 12 detectors and the self-check function seamlessly. The automatic notification of probe failures enhances user confidence in the system’s reliability.

What Could Be Improved: 

Addressing the low battery warning issue to minimize user inconvenience would be a positive improvement, ensuring a smoother experience for homeowners relying on this advanced safety network.

3. FIRST ALERT BRK SC7010BV-3 Hardwired Talking Photoelectric Smoke and Carbon Monoxide Detector, 3-Pack

The FIRST ALERT BRK SC7010BV-3 is a set of three hardwired talking smoke and carbon monoxide alarms designed to enhance your home’s safety. With voice and location features, these detectors alert you to the danger and specify its nature and location within your house.

Hardwired smoke detectorsBuy On Amazon

Key Features:

  • Voice and Location Alerts: Equipped with voice and location capabilities, these detectors verbally notify you of the danger and pinpoint its origin among up to 11 pre-programmed locations in your home.
  • Electrochemical CO Sensing Technology: Uses advanced electrochemical Carbon Monoxide sensing technology for accurate detection, minimizing false alarms.
  • Photoelectric Smoke Sensor: Optimized to detect larger smoke particles produced by smoldering fires, reducing the likelihood of false alarms.
  • Interconnectivity: Can connect to other compatible BRK or First Alert detectors, ensuring a synchronized response when a threat is detected.

Benefits:

  • The talking feature clarifies emergencies, indicating whether the threat is smoke or carbon monoxide and specifying the location.
  • The combination of electrochemical CO sensing and photoelectric smoke detection enhances accuracy, reducing the chances of false alarms.
  • Connecting to other compatible detectors creates a network, ensuring all alarms sound when a threat is detected.

Potential Drawbacks:

  • While voice alerts are beneficial, some users may prefer additional visual indicators for enhanced accessibility, especially in noisy environments.

What We Liked Most: 

Integrating voice and location features is commendable. Providing clear information about the threat’s nature and location enhances these alarms’ overall effectiveness.

Here are some other smoke detectors to consider.

FAQ

1. What is the difference between hardwired, non-hardwired, and wireless smoke detectors?

Hardwired smoke detectors are connected to the home’s electrical wiring with a backup battery. Non-hardwired detectors plug into outlets, featuring backup batteries. Wireless detectors, powered by batteries, communicate through radio frequency or Wi-Fi. Hardwired models offer continuous power; non-hardwired ones are portable with varied power sources; wireless detectors provide flexibility without relying on home wiring. 

Hardwired smoke detectors
wireless smoke detector

Buy On Amazon

2. How do hardwired smoke detectors communicate?

Hardwired smoke detectors communicate through a red wire linking them to the same electrical circuit. This wired connection enables the detectors to share signals. If one unit detects smoke, it triggers a response in all interconnected detectors, causing them to sound simultaneous alarms. 

3. Why is hardwired better than wireless?

Hardwired smoke detectors are better than their wireless due to their reliability and consistency. Hardwired detectors maintain a constant power source independent of batteries or outlets, eliminating concerns about battery life or power interruptions. This ensures continuous monitoring, reducing the risk of lapses in protection. 

4. Do all smoke detectors need to be hardwired?

Not all smoke detectors need to be hardwired. Alternatives include battery-powered and plug-in detectors. However, fire safety experts often recommend hardwired smoke detectors for their reliability and consistency. Hardwired models, connected to the home’s electrical system with a backup battery, provide continuous power, reducing concerns about battery life or power outages. 

5. Why do hardwired smoke detectors need batteries?

Hardwired smoke detectors require batteries as a backup power source in case of electrical outages during a fire. Without batteries, these detectors would cease functioning when the power is cut, compromising their effectiveness. 

Conclusion

Hardwired smoke detectors are the most reliable and consistent option, seamlessly connected to your home’s electrical wiring with a crucial backup battery. Their interconnected feature provides an added layer of safety, ensuring that if one detects smoke, all respond with a sounding alarm, granting valuable time for evacuation and preventing the fire’s escalation. 

While the installation process can be challenging, especially for those unfamiliar with electrical wiring, the recommendation to enlist a professional electrician underscores the significance of precision in this task. Considerations like sensor type, voice alarms, battery backup, test buttons, and self-check functions are pivotal when choosing the right hardwired smoke detectors

Investing in and maintaining these devices is prudent, as they are vital in safeguarding lives and property by promptly alerting you to potential fire hazards. Your commitment to proper installation and upkeep ensures a safer living environment. If you have any inquiries or feedback, please comment below. Stay secure, and have a wonderful day

How to administer fire drill

How to Administer Fire Drill: 2024 Step-by-Step Guide

Question: How to administer fire drill?

Fire drills are essential for ensuring the safety of everyone in a building in case of a fire emergency. They help people practice evacuating quickly and calmly and follow the instructions of the fire wardens and the emergency services. 

This article will explain a fire drill, its importance, and how to administer it effectively. We will also provide a step-by-step guide on planning, conducting, and evaluating a fire drill and some tips and best practices to make your fire drill successful. 

Following this guide, you can confidently and competently administer a fire drill in 2024.

What Is a Fire Drill?

A fire drill is a simulated fire emergency that tests the preparedness and response of the occupants of a building. It involves activating the fire alarm, evacuating the building, assembling at a designated area, and accounting for everyone. 

A fire drill may include the fire department’s participation or other emergency services, depending on the type and size of the building. A fire drill is not the same as a fire alarm test, which only checks the functionality of the alarm system and does not require evacuation. 

A fire drill is also different from a fire evacuation drill, a more realistic and complex scenario involving fire extinguishers, smoke machines, and live fire.

How to administer fire drill

The following is a step-by-step guide on how to administer fire drills effectively and efficiently:

Step 1: Activate the fire alarm:

Activate the fire alarm to signal and initiate the fire drill. The fire team can activate the fire alarm automatically by the fire alarm system. The fire alarm should be loud, clear, and distinct, indicating the fire drill’s type and location. If applicable, the fire alarm must be synchronized with the fire department or other emergency services. Explore some of the best smoke detectors.

How to administer fire drill
A Fire Alarm

Buy On Amazon

Step 2: Evacuate the building: 

Move everyone out of the building to a safe place quickly and calmly, following the fire safety instructions and procedures and the evacuation routes leading to the exit signs. The evacuation must avoid any hazards that may hinder the evacuation. Here is how to design a fire evacuation plan.

Step 3: Assemble at the designated area: 

Assemble at the designated area located at a safe distance and have enough space and facilities to accommodate everyone. The area should be visible and have a sign that indicates the name and number of the building.

Step 4: Account for everyone:

Check and verify the presence and condition of everyone who participated in the fire drill. Use a checklist to do the counting including the names and details of the occupants, to confirm and report the status of everyone. The fire wardens then identify and report any missing, injured, or trapped persons and notify the fire team.

Step 5: Deactivate the fire alarm: 

The fire warden can deactivate the alarm to signify the end of the simulation. The fire alarm should be followed by an announcement to inform and instruct everyone about the fire drill’s completion and results. Indicate whether the occupants can return to the building or need to wait for further instructions.

How to administer fire drill

Post-Drill Evaluation

1. Data and Feedback Collection:

Sources of Information:

  • Fire alarm system and equipment data
  • Fire wardens and team observations
  • Occupant experiential feedback
  • Input from the fire department or emergency services

Methods:

  • Use charts, reports, surveys, videos, etc.
  • Collect and review data promptly after the drill

2. Identifying Strengths and Weaknesses:

Critical Aspects:

  • Functional fire alarm system and equipment
  • Clear evacuation routes and signs
  • Prompt and orderly occupant evacuation
  • Competent fire wardens and team
  • Effective coordination with emergency services

Important Aspects:

  • Comprehensive and realistic fire drill plan
  • Adequate facilities in designated areas
  • Accurate accounting and reporting
  • Informative drill completion announcements

Minor Aspects:

  • Clear and consistent information and education
  • Effective data collection and recording
  • Prepared contingency plans and emergency procedures

3. Areas of Improvement and Recommendations:

Common Suggestions:

  • Update or replace faulty fire alarm systems and equipment.
  • Clear hazards hindering emergency response.
  • Provide additional training for occupants, fire wardens, and the fire team.
  • Enhance communication and coordination with emergency services.
  • Adjust the frequency and complexity of drills based on performance.
  • Minimize disruption and inconvenience during future drills.

Types of Fire Drills

Different fire drills can be conducted depending on the drill’s purpose, frequency, and complexity. Some of the common types of fire drills are:

1. Scheduled fire drill

This is a planned and announced fire drill conducted at regular intervals. The date and time of the drill are communicated to everyone in advance, and the drill is conducted during normal working hours. 

A scheduled fire drill allows everyone to prepare and participate and minimizes the disruption and inconvenience to normal building operations but it may not reflect the conditions and challenges of a real fire emergency.

2. Unscheduled fire drill 

An unannounced fire drill is conducted at a random date and time without prior notice to anyone and conducted outside normal working hours. The advantage of an unscheduled fire drill is that it simulates the unpredictability and urgency of a real fire emergency and tests the readiness and reaction of everyone in the building. The unscheduled fire drill may cause inconvenience, annoyance, or anxiety to some people.

3. Partial fire drill 

This drill involves a part of the building and tests a specific aspect of the fire safety plan, such as the evacuation route, the assembly point, or the communication system. 

This drill allows a more focused and detailed evaluation of the fire safety procedures and reduces the disruption and interference to the rest of the building. 

The partial fire drill may not cover all the possible scenarios and situations in a full-scale fire emergency, the interaction and coordination between different parts of the building.

4. Full fire drill 

A full fire drill involves the entire building and is conducted to test the overall effectiveness and efficiency of the fire safety plan, and to ensure the cooperation and collaboration of everyone in the building. 

This drill provides a realistic assessment of the fire safety performance and identifies any gaps or weaknesses that must be addressed. However, it requires a lot of planning, coordination, and resources, and it may cause significant disruption and impact to the normal operations of the building.

Importance of Fire Drills

Fire drills are important for several reasons:

1. Saving lives: 

Fire drills can save lives by teaching people how to evacuate safely during an emergency. They prevent injuries by reducing the risk of panic during a fire emergency. Fire drills can also help protect the lives of firefighters and emergency responders by facilitating access and intervention.

2. Complying with the law: 

Fire drills are required in many countries and regions for public and commercial buildings. Failing to conduct fire drills may result in legal penalties. Fire drills are also part of the fire safety standards and regulations enforced by the fire authorities and the insurance companies.

3. Improving the fire safety culture: 

Fire drills can improve the fire safety culture of a building by raising the awareness of the occupants about the fire hazards and prevention measures. They can also foster a sense of responsibility and accountability among the occupants for their own safety and others. Fire drills can also enhance the trust and confidence of the occupants in the building’s fire safety systems and procedures.

What entails a Proper Administration

Proper administration of fire drills ensures the effectiveness and efficiency of the fire safety plan. It is also important to ensure the safety and well-being of the participants and the observers of the fire drill. 

Proper administration of fire drills involves:

1. Planning: 

Planning entails setting the fire drill’s objectives, goals, scope, and the drill’s date, time, and duration. It creates a plan that outlines the roles and actions of the fire wardens, the fire team, and the occupants during the drill. It also involves coordinating with the fire department and informing and educating the occupants about the drill.

How to administer fire drill

2. Conducting: 

This is executing the fire drill according to the plan by activating the fire alarm, evacuating the building, assembling at the designated area, and accounting for everyone. It involves monitoring and recording the performance and behavior of the participants and the observers during the drill and any problems or issues that arise during the drill.

3. Evaluating: 

It is about assessing and analyzing the results of the fire drill. Evaluating involves collecting and reviewing the data and feedback from the participants and the observers. During this process, identify the strengths and weaknesses of the fire safety plan, areas of improvement, and recommendations for future fire drills.

How to Prepare for a Fire Drill

Preparing for a fire drill is a crucial step for ensuring the success and safety of the fire drill. Preparing for a fire drill involves the following tasks:

1. Setting Objectives and Goals: 

The objectives and goals should be specific, measurable, achievable, relevant, and time-bound (SMART). For example, some of the common objectives and goals of a fire drill are:

  • To test the functionality and reliability of the fire alarm system and the fire equipment.
  • To measure the evacuation time and the assembly time of the occupants.
  • To evaluate the compliance and cooperation of the occupants with the fire safety instructions and procedures.
  • To identify any hazards, risks, or obstacles that may hinder the evacuation or the fire response.
  • To improve the awareness and knowledge of the occupants about the fire safety plan and the fire emergency procedures.

2. Creating a Fire Drill Plan: 

Create a fire drill plan entailing the details of the steps and actions of the fire drill. The fire drill plan should include the following information:

  • The type, frequency, and complexity of the fire drill.
  • The date, time, and duration of the fire drill.
  • The roles and responsibilities of the fire wardens, the fire team, and the occupants during the fire drill.
  • The evacuation routes, the exit signs, and the assembly points for the fire drill.
  • The communication methods and channels for the fire drill include the public address system, the intercom, and the phone.
  • The fire alarm activation and deactivation procedures for the fire drill.
  • If applicable, the fire department or other emergency services involvement and coordination for the fire drill.
  • The data collection and recording methods and tools for the fire drill, such as the checklists, the timers, or the cameras.
  • The contingency plans and the emergency procedures for the fire drill in case of any incidents or accidents during the drill.

3. Informing and Educating the Occupants: 

Inform and educate the occupants about the fire drill, explaining the purpose and the expectations of the fire drill to the occupants. 

The information and education include:

  • The benefits and importance of the fire drill for the safety and well-being of the occupants and the building.
  • The objectives and goals of the fire drill and how they will be evaluated.
  • The fire drill plan and how to access and follow it during the fire drill.
  • The fire safety instructions and procedures, and how to comply and cooperate with them during the fire drill.
  • The fire safety roles and responsibilities, and how to perform and support them during the fire drill.
  • The fire safety tips, best practices, and how to apply and adopt them during the fire drill.

The information and education should be delivered in a clear, concise, and consistent manner, using various methods and channels,

  • Emails, memos, or newsletters.
  • Posters, flyers, or brochures.
  • Meetings, workshops, or trainings.
  • Videos, audio, or animations.
  • Websites, apps, or social media.

Conclusion

Fire drills are super important to keep everyone safe in a fire. They help us practice getting out of a building quickly and safely. Fire drills also ensure we know when fire wardens and emergency helpers tell us what to do. 

It’s like a practice to find and fix any problems, like blocked doors or broken alarms. To do a fire drill right, follow a guide that helps plan, do, and check the drill. Tell everyone about it before, so they know what’s going on. After, look at the info and what people say about the drill

This helps make sure everyone can stay safe in 2024. If you have questions, just ask. Thanks for reading, and be safe!

Scroll to Top