January 2024

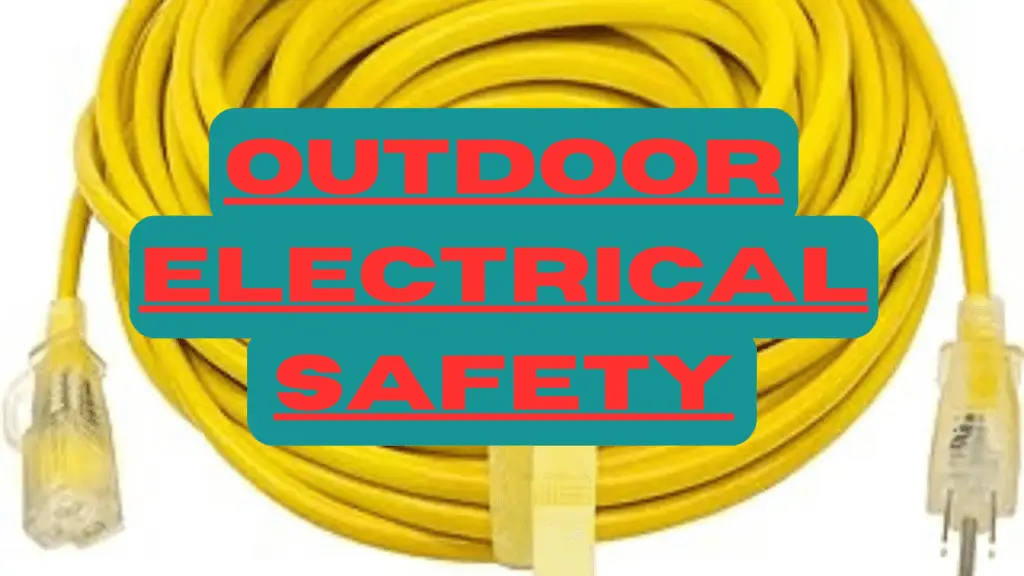
Outdoor Electrical Safety

Outdoor Electrical Safety: 6 Crucial Tips for a Shock-Free Environment

Electricity is a powerful and valuable resource but can also be deadly if not handled carefully. Outdoor electrical safety is essential, as outdoor conditions can pose additional risks for electric shocks and fires. The moisture, dirt, debris, animals, and vegetation can all damage or interfere with electrical equipment and wiring, creating hazards for anyone nearby. 

Outdoor activities such as gardening, landscaping, swimming, and power tools can connect with electrical sources that may not be properly insulated.

Follow some basic safety rules and precautions to prevent outdoor electrical accidents. By following these rules, you can enjoy the benefits of electricity outdoors without putting yourself or others in danger.

6 Crucial Tips For Ensuring Outdoor Electrical Safety

TIP 1. Weatherproofing Your Outdoor Outlets

Outdoor outlets are exposed to rain, snow, ice, wind, dust, and insects, which can damage them and cause short circuits, sparks, or shocks. 

To protect your outdoor outlets from the elements,

  • Use outdoor-rated outlets designed to withstand harsh weather conditions. These outlets have special covers that seal them when not in use and prevent water and debris. You can also use weather-resistant receptacles with a self-closing lid that shuts when the plug is removed.
  • Install outdoor outlets in locations sheltered from direct sunlight, rain, and snow. Avoid placing them near sprinklers, pools, or ponds, and mount them at least one foot above the ground to prevent flooding and animal damage.
  • Replace any damaged outlets, as they pose a severe fire and shock hazard. If you notice any signs of corrosion, discoloration, or burning on your outlets, call a licensed electrician to inspect and repair them.

SURAIELEC Outdoor Outlet Box, 20 AMP WRTR GFCI Receptacle, Rainproof 3R Enclosure, Weatherproof All Metal Electrical Outle...Buy On Amazon

TIP 2. Proper Use of Outdoor Extension Cords

Extension cords help power outdoor appliances and tools but can be dangerous if used incorrectly. Improper use of extension cords can cause overheating, fire, shock, or electrocution. 

For safe use of outdoor extension cords;

  • Use extension cords designed for outdoor use.

Use extension cords rated for outdoor use as heavy-duty materials resist moisture, temperature changes, and abrasion. Indoor extension cords are unsuitable for outdoor use and can easily get damaged or cause shocks.

Outdoor Electrical SafetyBuy On Amazon

  • Use extension cords with great power capacity.

Outdoor extension cords must have the same or greater power capacity as the devices you plug in. Check the wattage of your appliances and tools and compare it with the rating of your extension cord. Do not overload your extension cord or use multiple cords together, as this can reduce their power capacity and cause overheating or fire.

  • Use grounded (three-pronged) extension cords

Only use grounded extension cords and plug them into grounded outlets for outdoor purposes. These cords have a third prong that connects to the ground wire in your electrical system and provides an extra layer of protection against shocks. 

  • Regular inspection.

Inspect your extension cords before using them and ensure they are in good condition. Look for cracks or exposed wires that could cause shock and replace them. Do not attempt to repair a damaged cord with tape, as this is unsafe.

  • Keep the extension cord safe.

Do not run your extension cords through water, snow, or wet grass, as this can cause a shock or a fire. Do not staple, nail, or hang your extension cords on walls, fences, or trees, as this can damage or puncture the cord.

TIP 3. Ground Fault Circuit Interrupter (GFCI) Outlets

The ground fault circuit interrupter (GFCI) outlet is one of the most essential outdoor electrical safety devices. A GFCI outlet is a particular type that monitors the flow of electricity and shuts off the power if it detects a ground fault. 

A ground fault occurs when electricity leaks from a faulty appliance and travels through an unintended path. It can cause a severe or fatal electric shock in wet conditions. A GFCI outlet prevents this by cutting off the power in a fraction of a second, before a shock can occur.

NineLeaf GFCI Outlet Black 10 Pack, 15amp WR Weather Resistant with LED Lndicator, Ground Fault Circuit Interrupters with ...Buy On Amazon

How to Install GFCI Outlets in Outdoor Spaces

Step 1. Hire a licensed electrician to do the job. 

  • Installing or replacing outlets is not a DIY project and requires professional skills and knowledge. 
  • A licensed electrician will ensure that the GFCI outlets are installed correctly and comply with the code and safety standards.

Step 2. Choose the correct type of GFCI device for your needs

Three primary GFCI devices are GFCI receptacles, GFCI circuit breakers, and GFCI portable cords.


  • GFCI receptacles have a GFCI sensor and switch built into them. They are easy to install and protect one or more outlets on the same circuit. 
  • GFCI circuit breakers have a built-in GFCI sensor and switch. They are installed at the breaker panel and can protect the entire circuit. 
  • GFCI portable cords have extension cords with a GFCI sensor and switch built into them. They are helpful for temporary or mobile power sources and protect any device.

Step 3. Test your GFCI outlets regularly 

  • GFCI outlets have a test button and a reset button on their face. To test a GFCI outlet, plug in a device (such as a lamp or a radio) and turn it on. 
  • Press the test button on the outlet. The device should turn off, and the reset button should pop out. This means the GFCI outlet detected a simulated ground fault and tripped. 
  • To restore the power, press the reset button on the outlet. The device should turn on again. If the device does not turn off or on or the buttons do not work, the GFCI outlet is faulty and needs to be replaced.

TIP 4. Pool and Water Feature Safety

Pool and water feature safety is another vital aspect of outdoor electrical safety, as water and electricity are deadly. Pools, fountains, and ponds can all pose a risk of electric shock if not correctly installed. 

Prevention measures for pool and water feature accidents

  • Hire a licensed electrician. 

Hire a professional to install and inspect your pool and water feature wiring and equipment. Your pool and water feature wiring and equipment must comply with the Ontario Electrical Safety Code and the Canadian Electrical Code, which have specific rules and requirements for pools and water features. A licensed electrician will ensure that your pool and water feature wiring and equipment are safe, grounded, and protected by GFCI devices.

  • Keep electrical devices and cords away from water sources

Do not use or plug in electrical devices near your pool or water feature, as they can fall into the water and cause a shock. If you need an electrical device near your pool or water feature, use a battery-operated or cordless one or a GFCI portable cord and keep it as far away from the water as possible.

  • Avoid using your pool during a thunderstorm.

Lightning can strike your pool and electrify the water, causing a shock or an electrocution. If you hear thunder or see lightning, get out of the water immediately and seek shelter indoors. Do not touch any metal objects near your pool or water feature, as they can conduct electricity and shock you. Wait 30 minutes after the last thunder or lightning before resuming your activities.

TIP 5. Outdoor Power Tools and Equipment

Outdoor power tools can also be hazardous if not used properly. They can cause injuries, such as cuts, burns, or shocks. 

How to use outdoor power tools and equipment safely:

  • Use power tools and equipment rated for outdoor use as they have double insulation, grounding, or GFCI protection features. 
  • Read and follow the manufacturer’s safety warnings for your power tools and equipment. 
  • Wear appropriate protective gear, such as gloves, goggles, ear plugs, and boots, to prevent injuries.
  • Do not use it when you are tired, distracted, or under the influence of alcohol or drugs. 
  • Do not leave power tools and equipment plugged in or turned on when not in use.
  • Store and maintain your power tools and equipment properly. After using, clean them, inspect them for any damage or wear, and repair any faulty parts. 

TIP 6. Emergency Procedures for Outdoor Electrical Incidents

Accidents can still happen despite your best efforts to prevent them. Therefore, you must be prepared and know what to do in an emergency. 

Here are some general guidelines for emergency procedures for outdoor electrical incidents:

1. If someone is shocked

  • Do not touch the source of electrocution, but instead, call 9-1-1 and turn off the power at the main switch
  • Check the person’s breathing and pulse, and perform CPR.

2. If a power line falls on your car

  • Stay inside, and do not touch any metal parts. 
  • Call 9-1-1 and disconnect the power. If you have to get out of the car because of fire or other danger
  • Jump out of the vehicle with both feet together and land on the ground. 
  • Do not touch the car and the ground simultaneously, as this could create a path for electricity to flow through you. 
  • Shuffle away from the car, keeping your feet close together until you are at least 10 meters (33 feet) away from the car and the power line.

3. If an electrical fire breaks out

  • Do not use water to extinguish it. 
  • Use a fire extinguisher rated for electrical fires, such as a Class C or ABC extinguisher. 
  • If you do not have a fire extinguisher, smother the fire with baking soda, sand, or dirt. 
  • If the fire is too large or out of control, evacuate the area and call 9-1-1.

Conclusion

Outdoor electrical safety is a serious matter that requires your attention and action. By following the tips and precautions we have shared in this article, you can reduce the risk of outdoor electrical accidents and enjoy the benefits of electricity outdoors without compromising your safety. 

Remember to weatherproof your outdoor outlets, use outdoor extension cords correctly, install and test GFCI outlets, be careful around power lines and buried cables, and know what to do in an emergency. Doing so can create a shock-free environment for yourself and your loved ones.
Portable Fire Extinguishers

Portable Fire Extinguishers: Your 2024 Ultimate Guide

Fire safety is vital to any home, office, or vehicle. Fire can cause severe damage to property, injuries, or even death. According to the World Health Organization, fire-related deaths account for about 180,000 deaths per year globally. Therefore, having the necessary equipment and knowledge to prevent and fight fires is essential.

The portable fire extinguisher is one of the most common and effective fire-fighting tools containing a pressurized agent that can be sprayed to extinguish fire. They are easy to use, store, transport, and control small fires before they spread.

However, there are different types of fires and extinguishers, and using the wrong one can be dangerous or ineffective. Therefore, knowing how to choose and use a suitable portable fire extinguisher for the situation is essential.

By the end of this article, you will have a comprehensive understanding of portable fire extinguishers and how to use them effectively and safely.

What is a portable fire extinguisher?

A portable fire extinguisher is a device that contains a pressurized agent that can be sprayed on a fire to extinguish it. The agent can be a liquid, a powder, a gas, or a foam that works by either cooling, smothering, or interrupting the chemical reaction of the fire.

Anyone can use portable fire extinguishers during a fire emergency as they are small, lightweight, and easy to handle and can be stored and carried in various places, such as homes, offices, cars, boats, and planes. They can be mounted on walls, cabinets, or vehicles or placed in accessible locations.

Portable fire extinguishers are intended for small localized fires and are only effective if appropriately used before the fire becomes uncontrollable.

Significance of Portable Fire Extinguishers

  • They can save lives and property by controlling small fires before they spread. 
  • Reduce the risk of fire-related injuries, burns, smoke inhalation, and death by minimizing exposure to fire and its effects.
  • Reduce the environmental and economic impacts of fire-related incidents.
  • Enhances people’s fire safety awareness and preparedness by providing them with a simple and effective fire-fighting tool and encouraging them to learn and practice how to use it.

Types of Fires and Suitable Extinguishers

Fires are classified into different classes based on the burning material. Each type of fire has different characteristics, behaviors, and hazards. Therefore, each type of fire requires a different kind of extinguisher to put out.

The following are the common types of fires and the suitable extinguishers for each one:

  1. Class A fires: 

These fires occur through combustible materials like wood, paper, cloth, rubber, and plastic and can be extinguished by water, foam, or dry chemical extinguishers. The extinguishers are labeled with a green triangle with the letter A.

  1. Class B fires

These fires are triggered by flammable liquids like gasoline, oil, paint, and alcohol and can be extinguished by foam, dry chemicals, or carbon dioxide extinguishers. They are labeled with a red square with the letter B.

  1. Class C fires

These fires are caused by energized electrical equipment, such as wires, appliances, computers, and generators. Dry chemical or carbon dioxide extinguishers labeled with a blue circle with the letter C can extinguish these fires. 

  1. Class D fires

These fires involve combustible metals like magnesium, aluminum, and titanium. These fires can be extinguished by special dry powder extinguishers designed for specific metals. The extinguishers are labeled with a yellow star with the letter D.

  1. Class K fires

These fires involve cooking oils and fats, such as vegetable oil, animal fat, and grease. Wet chemical extinguishers can extinguish them by creating a foam layer to smother the fire. These extinguishers are labeled with a black hexagon with the letter K.

Some extinguishers are multi-purpose and can be used for more than one type of fire. For example, a dry chemical extinguisher can be used for class A, B, and C fires. It is essential to use the correct type of extinguisher for the fire. Using the wrong type of extinguisher can be dangerous. 

Factors To Consider When Choosing the Portable Fire Extinguisher

Choosing the right portable fire extinguisher depends on several factors, such as:

1. The type of fire

Different types of fire require different extinguishers. Choose an extinguisher that matches the fire you will likely encounter in your location. Have a class K extinguisher for cooking oil and fat fires in a kitchen and a class B extinguisher in a garage for flammable liquid fires.

2. The size of the fire

The size of the fire determines the amount of agent and the duration of discharge needed to extinguish. The most appropriate extinguisher has enough capacity and pressure to cover the fire area and last long enough to put it out. If you live in a large room with multiple fire sources, have a large extinguisher with a high rating and a long discharge time, while those in a small space can have a small extinguisher.

3. The ease of use: 

A fire extinguisher should be simple and convenient to operate and handle. If you are in a car, have a compact and lightweight extinguisher that can be stored and reached quickly. If you are in an office, have a visible and accessible extinguisher that can be activated quickly and safely.

4. The maintenance and inspection: 

Choose a durable, reliable extinguisher requiring minimal maintenance and inspection. For example, in a remote environment, have a sturdy and sealed extinguisher that can withstand the conditions and does not need frequent refilling. Those in a regulated environment can have a certified and compliant extinguisher that meets the standards and regulations and can be inspected and serviced regularly.

Best 4 Portable Fire Extinguishers

Many portable fire extinguishers are available on the market, but not all are effective, reliable, or suitable for your needs. To help you choose the best portable fire extinguisher, we have reviewed and compared the top 4 portable fire extinguishers you can buy on Amazon in 2024. 

Here are our recommendations:

1. Portable 45 LB Pack Of 15 Large Fire Extinguisher Ball, Quick Fire Off/Automatic Fire Extinguishing Fire Suppression Device with Bracket for House, Car, Kitchen, Garage, And home

This product is a pack of 15 fire extinguisher balls that can extinguish various types of fires, such as class A, B, C, and E. The fire extinguisher balls are made of a dry chemical powder that is activated by heat and releases a fire-fighting agent when thrown into a fire. 

The fire extinguisher balls can also self-activate and burst when exposed to a fire for more than 3 seconds, creating a loud noise and a flash that can alert people and scare away animals. The fire extinguisher balls are easy to use, store, and transport. They come with a bracket that can be mounted on walls, ceilings, or vehicles. They are suitable for homes, cars, kitchens, garages, and other places where fires may occur.

Pros:

  • The fire extinguisher balls are versatile and can be used for multiple types of fires.
  • The fire extinguisher balls are convenient and can be thrown or rolled into a fire from a safe distance or self-activate when exposed to a fire.
  • The fire extinguisher balls are effective and can extinguish a fire within 3 to 5 seconds, covering an area of 86 to 107 square feet.
  • The fire extinguisher balls are durable and have a shelf life of 5 years.

Cons:

  • They are expensive and cost $1,199.99 for a pack of 15.
  • They are heavy and weigh 45 pounds for a pack of 15.

2. Fire Blanket Fiberglass Fire Emergency Blanket Flame Retardant Fire Suppression Blanket Fireproof Emergency Survival Safety Cover for Kitchen Home Car Office Camping, 39 x 39 Inch (Red,20 Pack)

The 15-Pack Fire Blanket is a crucial safety device designed for emergencies, offering versatile protection for various environments, including kitchens, fireplaces, grills, cars, offices, and camping sites. Measuring approximately 39 x 39 inches, this collection of fire safety blankets is crafted from quality fire-resistant rebound fiberglass, ensuring reliable flame-retardant capabilities.

Key Features:

  • Packed with 15 fire safety blankets, providing extensive coverage for multiple locations.
  • Composed of two layers of fiberglass fabric and an inner flame-retardant sheet, capable of resisting temperatures up to 550 degrees Celsius or 1022 Fahrenheit.
  • Easy to Use: Pull the tab, spread the blanket over the fire, and let it sit for a few seconds to smother the flames. Suitable for various fire types, including liquid and grease fires.
  • They are non-toxic and conveniently packaged, making them easy to store and taking up minimal space. 
  • Quick to open for emergency use.
  • Versatile, suitable for different environments and fire scenarios, offering preventive measures and protection.

Benefits:

  1. With 15 fire safety blankets, users can ensure ample coverage in multiple locations, enhancing overall safety.
  2. Capable of withstanding temperatures up to 550 degrees Celsius, providing effective protection in various fire situations.
  3. Compact and easy to store, making it a practical and accessible safety solution.
  4. Simple pull-tab activation and quick deployment make these blankets user-friendly in emergency situations.
  5. Suitable for a wide range of fires, including liquid and grease fires, making it an ideal safety tool for diverse environments.

Potential Drawbacks:

  1. While effective, each blanket may only be used once, necessitating the purchase of replacements after use.

What We Liked Most

The convenience and versatility of the 15-Pack Fire Blanket stand out, providing users with a compact and easily deployable safety solution. Its extensive coverage, high-temperature resistance, and user-friendly design make it a valuable addition to home and workplace safety measures.

Product Information:

  • Material: Fiberglass
  • Color: Red
  • Size: 39 x 39 inches

Sponsored Ad - Fire Blanket, Fiberglass Fire Emergency Blankets, Suppression Flame Retardant Fireproof Survival Safety Fir...Buy On Amazon

3. First Alert EZ Fire Spray, Extinguishing Aerosol Spray, Pack of 2, AF400-2

The First Alert EZ Fire Spray Portable Fire Extinguisher is a game-changer in home fire safety. Designed to provide an extended fire-fighting time, this extinguisher delivers a remarkable 32 seconds of discharge, four times longer than traditional fire extinguishers. Its lightweight aerosol can design ensures ease of use and makes it an ideal choice for various spaces, including kitchens, garages, boats, RVs, dorms, and more. This versatile fire safety tool can extinguish paper, fabric, wood, grease, and electrical fires.

Key Features:

  • Thirty-two seconds of fire-fighting time, outperforming traditional extinguishers.
  • The light aerosol can is easy to hold, carry, and use in emergency situations.
  • Effectively tackles fires involving paper, fabric, wood, grease, and electrical sources.
  • The extinguishing formula is environmentally friendly and safe.
  • Backed by a 3-year limited warranty.

Benefits:

  1. Extended Discharge Time: 32 seconds of fire-fighting time, surpassing traditional extinguishers.
  2. Lightweight Design: Easy to handle, carry, and use, even in high-stress situations.
  3. Multi-Purpose Functionality: Effectively tackles fires involving paper, fabric, wood, grease, and electrical sources.
  4. Biodegradable and Non-toxic Formula: Environmentally friendly and safe for users.
  5. Warranty Assurance: Backed by a 3-year limited warranty, providing peace of mind.

First Alert EZ Fire Spray, Extinguishing Aerosol Spray, Pack of 2, AF400-2Buy On Amazon

Potential Drawbacks:

  1. Limited Coverage Area: It may not be suitable for large-scale fires; users should assess specific needs.

4. FIRST ALERT AUTO5 Car Fire Extinguisher, FESA5, UL RATED 5-B:C, Red, 1-Pack

The First Alert Auto5 Car Fire Extinguisher, designated FESA5, is a reliable and compact safety tool for vehicular fire emergencies. With a UL Rating of 5-B: C, this 1-Pack extinguisher can handle various fire types commonly encountered in automotive settings.

Key Features:

  • Engineered to meet demanding needs, the metal head ensures durability and long-lasting performance.
  • The color-coded gauge is easily read, providing accurate measurements while resisting corrosion.
  • Equipped with a safety seal to prevent accidental discharge and discourage tampering, ensuring reliability in critical moments.
  • The package includes a secure extinguisher mount, bracket, and strap, ensuring stable placement within the vehicle.
  • Easy-to-follow instructions with a label resistant to chemicals and water, featuring a 4-step guide that won’t deteriorate over time.

Benefits:

  1. Automotive Tailored Design: Specifically designed for car environments, addressing the unique fire risks associated with vehicles.
  2. Durable Construction: The metal head and corrosion-resistant gauge ensure longevity and reliability.
  3. Secure Placement: The included mount, bracket, and strap provide a secure and accessible location for the extinguisher within the vehicle.
  4. Clear Instructions: Chemical-resistant and waterproof instructions ensure easy understanding and usage in emergency situations.

Potential Drawbacks

  1. Single Use: Like many compact fire extinguishers, this model may be for single use only, requiring replacement after discharge.

What We Liked Most 

The First Alert Auto5 Car Fire Extinguisher impresses with its tailored design, combining durability, clear instructions, and the backing of a trusted brand. Including a secure mounting system enhances its accessibility and readiness in critical situations.

Product Information:

  • Manufacturer: First Alert
  • Model Number: FESA5
  • UL Rating: 5-B: C
  • Colour: Red
  • Package Quantity: 1-Pack

Portable Fire ExtinguishersBuy On Amazon

How to operate Portable Fire Extinguishers

Operating portable fire extinguishers is not difficult, but it requires some basic knowledge and skills. Always follow the instructions and warnings on the label of the extinguisher and the general guidelines below:

  • Ensure the fire is small, confined, and not spreading. If the fire is too large, evacuate and call the fire department.
  • Have a clear and safe exit path. If the fire blocks your escape route, do not attempt to fight the fire. Leave the area and close the door behind you.
  • Have the right type of extinguisher for the type of fire. Check the label and the color code of the extinguisher and match it with the type of fire. Do not use the wrong type of extinguisher.
  • To use a portable fire extinguisher, follow the PASS technique for Pull, Aim, Squeeze, and Sweep. 

Here are the steps:

  1. Pull the pin of the extinguisher to unlock the valve or the nozzle.
  2. Aim the nozzle at the fire’s base, not at the flames. Stand at a safe distance from the fire, usually 6 to 10 feet, depending on the type and size of the extinguisher.
  3. Squeeze the lever or the handle of the extinguisher to release the agent. Do not release the lever until the agent is fully discharged.
  4. Sweep the nozzle from side to side, covering the entire fire area with the agent. Move closer to the fire as it diminishes.
  • Ensure that the fire is completely out and that no hot spots can reignite the fire. If the fire rekindles, use another extinguisher or call the fire department.
  • After using a portable fire extinguisher, dispose used extinguisher properly. Do not reuse or refill the extinguisher yourself unless it is designed to be reusable or refillable.

Also find out how to use a fire blanket.

Safety Precautions

  1. Do not use a portable fire extinguisher if you are not trained. Seek help from someone trained or call the fire department.
  2. Do not use it if you are not physically able or comfortable to handle it. 
  3. Do not use it if you have a medical condition or a disability that can impair your vision, hearing, breathing, or mobility. 
  4. Do not use under the influence of alcohol, drugs, or medication that can impair your judgment, reaction, or coordination.
  5. Do not use if the fire is too hot, smoky, or toxic. If you feel any signs of heat exhaustion, smoke inhalation, or poisoning, such as dizziness, nausea, coughing, or difficulty breathing, stop using the extinguisher and get out of the area. 
  6. Do not use if the fire involves hazardous materials, such as explosives, chemicals, or radioactive substances. These materials can react with the agent or create additional hazards. Leave the area and call the fire department and the appropriate authorities.
  7. Do not use a portable fire extinguisher if the fire involves flammable gases, such as propane, natural gas, or hydrogen. These gases can ignite or explode if exposed to the agent or the air. If possible, turn off the gas supply and use a dry chemical or a carbon dioxide extinguisher.

FAQs

  • What are the 5 portable fire extinguishers?

The five portable fire extinguishers cater to distinct fire classes. Water extinguishers, filled with water, combat class A fires by cooling and reducing the fire’s temperature. Using foam as the agent, foam extinguishers tackle class A and B fires by smothering flames and creating an oxygen barrier. Dry chemical extinguishers containing a powder interrupt the chemical reaction in class A, B, and C fires. Carbon dioxide extinguishers, employing CO2, displace oxygen in class B and C fires. Wet chemical extinguishers with a wet chemical agent combat class K fires by creating a smothering foam layer for cooking oils and fats, preventing re-ignition.

  • What is the difference between a portable and a mobile fire extinguisher?

A portable fire extinguisher is a compact, lightweight device for easy handling and versatile storage in homes, offices, vehicles, or aircraft. It can be mounted on surfaces and intended for small, localized fires. A mobile fire extinguisher is larger, heavier, and equipped with wheels for transport on vehicles like trucks or trailers. 

  • How do I identify a portable fire extinguisher?

To identify a portable fire extinguisher, examine its label and color code. The label typically includes the manufacturer’s name and address, extinguisher type and capacity, agent type and amount, operating instructions, warnings, rating, classification, and manufacturing or servicing date. 

  • What are two types of fires where portable water extinguishers should not be used?

Avoid using portable water extinguishers on Class B fires (involving flammable liquids like gasoline), as water can worsen these fires, potentially causing explosions. Similarly, using water for Class C fires (involving energized electrical equipment) can lead to electrocution or short circuits due to its conductivity.

Conclusion

Portable fire extinguishers are essential fire-fighting tools that can save lives and property by controlling small fires before they spread. However, there are different types of fires and extinguishers, and using the wrong one can be dangerous. Therefore, knowing how to choose and use the right portable fire extinguisher.

We hope this article has helped you understand portable fire extinguishers and how to use them effectively and safely. Remember, portable fire extinguishers are only effective if used properly and promptly before the fire grows out of control. If you are in doubt, do not hesitate to call the fire department and seek professional help. Stay safe and fire smart.

Fire Safety Catalog

The Fire Safety Catalog: Your Complete Guide to Essential Products

Fire safety is a big deal, whether chilling at home, working, or out and about. Fires can mess up stuff, hurt people, and even take lives. In 2020, the U.S. Fire Administration counted a crazy 1.3 million fires, causing 3,700 folks to lose their lives, 16,600 to get hurt, and property damage hitting $14.8 billion.

Now, to dodge these fire troubles, you’ve gotta gear up with the right stuff. But where do you even start? That’s where this fire safety catalog saves the day. It’s your guide to fire safety, from snuffing out flames with extinguishers to sounding the alarm with smoke detectors and more. 

Get ready to determine your fire safety needs, make your own catalog, pick the best gear, and be set for emergencies. Stick with this guide, make smart choices, and level up your fire safety game

Exploring Fire Safety Needs

Before shopping for fire safety products, find your fire safety needs. Different settings and situations may require different types of products and equipment. For example, a residential building may have different fire safety needs than a commercial or industrial facility. 

To explore your fire safety needs, you need to consider the following factors:

  • Fire risk: 

Fire risk is the likelihood and severity of a fire in a given situation. To evaluate your fire risk and identify potential fire hazards, fire risk depends on various factors, such as the presence and type of combustible materials, ignition sources, ventilation, occupancy, and human behavior.

  • Fire code: 

A fire code is a set of rules and regulations that govern fire safety in buildings and structures. Fire code specifies the minimum requirements and standards for fire prevention, protection, and suppression. Fire codes may vary depending on the location, jurisdiction, and type of building or structure. Consult your local fire authority or a fire safety professional to determine the fire code requirements and compliance for your setting.

  • Fire safety goals: 

These are the objectives and outcomes to achieve with your fire safety products. These goals include preventing fires from starting, detecting them early, containing them to a limited area, controlling them until they are extinguished, evacuating people safely, and minimizing property damage and environmental impact. You can define your fire safety goals based on your fire risk, fire code, and personal preferences.

Building Your Fire Safety Catalog

Fire safety catalog lists fire safety products and equipment you need for your setting and situation. Your fire safety catalog should include the following categories:

1. Essential fire safety products: 

2. Specialized and additional items:

3. Selecting the right products: 

Essential Fire Safety Products

These are the basic and most important products every setting and situation should have. They include fire extinguishers, smoke alarms, carbon monoxide detectors, fire blankets, and escape ladders. These products are designed to prevent, detect, and respond to fires and protect yourself and others from fire hazards

  1. Fire Extinguishers

Fire extinguishers are portable devices that can put out small fires by spraying a substance that smothers the flames and cools the fuel. Fire extinguishers are one of the most effective and widely used fire safety products, as they can prevent fires from spreading and causing more damage.

Different fire extinguishers are classified by the type of fire they can extinguish. The most common types are:

Class A: 

These fire extinguishers extinguish fires involving ordinary combustible materials, such as wood, paper, cloth, and plastic. They usually contain water or foam as the extinguishing agent.

Amerex B240 Stored Pressure Water Fire Extinguisher, 2.5 gallon for Class A FiresBuy On Amazon

Class B: 

These involve flammable liquids like gasoline, oil, paint, and solvents. They contain carbon dioxide or dry chemicals as the extinguishing agent.

Amerex B417, 2.5 lb. ABC Dry Chemical Class A B C Fire Extinguisher with Wall Bracket, 2 PackBuy On Amazon

Class C: 

These fire extinguishers can put out fires involving electrical equipment, such as appliances, wires, and circuits. They are made of carbon dioxide or dry chemicals as extinguishing agents, which do not conduct electricity.

Amerex B402 5 lb. ABC Dry Chemical Class A B C Fire Extinguisher, with Wall Bracket, 2 PackBuy On Amazon

Class D: 

Class D extinguishers fires involving combustible metals like magnesium, aluminum, and titanium. They contain a special powder as the extinguishing agent, which reacts with the metal and forms a crust that isolates the fire.

Firexo Cooking Pan Fire Extinguisher Sachet - Fire Blanket Alternative - Emergency Fire Extinguisher for Oil & Grease Kitc...Buy On Amazon

Class K: 

These fire extinguishers can put out fires involving cooking oils and fats, such as vegetable oil, animal fat, and grease. They have a wet chemical as the extinguishing agent, which creates a foam that covers the fire and prevents re-ignition.

FIRST ALERT KITCHEN5 Fire Extinguisher, KFE2S5, UL RATED 5-B:C, White, 1-PackBuy On Amazon

2. Smoke Alarms

Smoke alarms detect smoke and sound an alarm when a fire is present. Smoke alarms are one of the most essential and lifesaving fire safety products, as they can alert you of a fire in its early stages, giving you more time to escape and call for help.

There are different types of smoke alarms based on the technology they use to detect smoke. The most common types are:

  • Ionization smoke alarms: 

These alarms use a small amount of radioactive material to create an electric current inside a chamber. When smoke enters the chamber, it disrupts the current and triggers the alarm. 

First Alert 0827B Ionization Smoke Alarm with 10-Year Sealed Tamper-Proof Battery , White , Pack of 1Buy On Amazon

  • Photoelectric smoke alarms: 

They use a light source and a sensor inside a chamber. When smoke enters the chamber, it scatters the light and activates the sensor, which triggers the alarm. Photoelectric smoke alarms are more sensitive to smoldering fires, which produce large and slow-burning particles.

Ecoey Smoke Alarm Fire Detector, Battery Included Photoelectric Smoke Detector with Test Button and Low Battery Signal, Sm...Buy On Amazon

  • Dual-sensor smoke alarms: 

They combine ionization and photoelectric technologies, making them more responsive to flaming and smoldering fires.

Some are interconnected and can communicate with each other and sound the alarm simultaneously when one of them detects smoke. 

FIRST ALERT Dual Sensor Smoke and Fire Alarm, SA3210 , WhiteBuy On Amazon

3. Carbon Monoxide Detectors

Carbon monoxide detectors detect carbon monoxide produced by incomplete combustion of fuels, such as wood, coal, gas, oil, and charcoal. Carbon monoxide can cause headaches, dizziness, nausea, confusion, and even death. 

There are different types of carbon monoxide detectors based on the technology they use to detect carbon monoxide. The most common types are:

Sponsored Ad - SITERWELL Carbon Monoxide Detector, 7-Year Product Life CO Detector with LED Indicator, CO Alarm with Test...Buy On Amazon

  • Electrochemical carbon monoxide detectors: 

These detectors use an electrochemical sensor that reacts with carbon monoxide and produces an electric current, which triggers the alarm. They are the most accurate and reliable type, as they measure the level and duration of carbon monoxide exposure.

  • Biomimetic carbon monoxide detectors: 

They use a synthetic material that changes color when exposed to carbon monoxide, which activates a sensor that triggers the alarm. They are less sensitive and durable than electrochemicals but are cheaper and easier to maintain.

  • Metal oxide semiconductor carbon monoxide detectors: 

They are made of a semiconductor chip that heats up when exposed to carbon monoxide, which lowers its resistance and triggers the alarm. They are the least sensitive and reliable and can be affected by humidity, temperature, and other gases.

4. Fire Blankets

These are large pieces of fabric used to smother small fires or wrap around a person on fire. They are made of fire-resistant materials, like wool, fiberglass, or aramid fibers, and can extinguish fires without creating a mess or damaging the surroundings.

Fire blankets can put out fires involving class A, B, and K materials. However, they are ineffective for fires involving electrical equipment or combustible metals, as they may conduct electricity or react with the metal. 

Sponsored Ad - Prepared Hero Emergency Fire Blanket - 4 Pack - Fire Suppression Blanket for Kitchen, 40” x 40” Fire Blanke...Buy On Amazon

How to use the fire blanket safely:

  • Turn off the heat source, if possible.
  • Pull the fire blanket out of the container or pouch by the tabs.
  • Hold the fire blanket before you, with your hands behind the tabs.
  • Cover the fire completely with the fire blanket, leaving no gaps for air to enter.
  • Leave the fire blanket in place until the fire is completely out and cool.
  • If the fire is too large or out of control, call the fire department and evacuate the area.

5.Escape Ladders

Escape ladders are used to climb down from a window or balcony in case of an emergency. They are made of metal or plastic and consist of rungs and hooks attached to the window railing to provide an alternative exit route when the stairs or doors are blocked or unsafe.

Different types of escape ladders are based on length, width, weight, and design. The most common types are:

a) Two-story escape ladders: 

These escape ladders are about 13 to 15 feet long and can reach the ground from a second-floor window or balcony. They can support up to 1,000 pounds and accommodate one or two people at a time.

First Alert Two-Story Fire Escape Ladder, 14 Feet, Steel, Anti-Slip, BlackBuy On Amazon

b) Three-story escape ladders: 

They are about 23 to 25 feet long and can reach the ground from a third-floor window or balcony and accommodate one or two people at a time.

First Alert Three-Story Fire Escape Ladder, 24 Feet, Steel, Anti-Slip, BlackBuy On Amazon

c) Four-story escape ladders: 

They are about 33 to 35 feet long and can reach the ground from a fourth-floor window or balcony and accommodate one or two people at a time.

banapoy 32.8ft Fire Escape Ladder, 4 Story Retractable Emergency Safety Exit Ladder with Maxload 450kg, Wide Step, Reusabl...Buy On Amazon

How to use the escape ladder effectively

  • Open the window or balcony door, and remove any obstacles or screens.
  • Take the escape ladder out of the box or bag and unfold it carefully.
  • Attach the hooks or brackets to the window railing and ensure they are secure and stable.
  • Throw the escape ladder out of the window or balcony, and make sure it reaches the ground and is not tangled or twisted.
  • Climb the escape ladder slowly and cautiously, holding the rungs firmly and facing the building.
  • Help others climb the escape ladder, starting with the youngest or the most vulnerable.
  • Move away from the building and call for help.

Specialized and Additional Items

The safety products and equipment are specific to certain settings, situations, or fire safety goals. They include fire doors, fire sprinklers, fire alarms, fire hoses, fire pumps, fire hydrants, and fire suppression systems. 

These products enhance fire prevention, protection, and suppression and facilitate fire safety management and coordination

1.  Fire Doors

Fire doors can resist fire and smoke for 30, 60, or 90 minutes. They are fire-resistant and have special features like seals, hinges, locks, and closers. and are designed to prevent the spread of fire and smoke between different building rooms and provide occupants with a safe exit route.

Kinchoix Fireplace Door, Fire Places Doors with Screen and Glass Decor Iron Mesh Guard and Magnetic Panels Fits Masonry fo...Buy On Amazon

Different types of fire doors are based on function, location, and rating. The most common types are:

  • Single-action fire doors: 

These fire doors can be opened in one direction only, inward or outward, and are suitable in areas where the traffic flow is one-way, such as stairwells, corridors, or exits.

  • Double-action fire doors: 

They can be opened in both directions, inward and outward, and are suitable for two-way traffic flow, such as lobbies, halls, or entrances.

  • Sliding fire doors: 

These doors can be opened by sliding horizontally, either to the left or to the right, and can be used for limited space, such as warehouses, factories, or garages.

  • Swinging fire doors: 

These types of doors can be opened by swinging vertically, either up or down. They are designed for areas where access is restricted, such as attics, basements, or roofs.

2. Fire Sprinklers

Fire sprinklers spray water or other extinguishing agents when a fire is detected. They are connected to a network of pipes and valves that supply water or other extinguishing agents from a source. 

Fusible links or glass bulbs activate fire sprinklers that break or melt when the temperature reaches a certain threshold, usually 135 to 165 degrees Fahrenheit. Fire sprinklers are designed to control or extinguish fires automatically, without human intervention.

(2 Pack) FM Approved & UL/CUL Listed TUNA Fire Sprinkler Head Pendent Spray 1/2” NPT 155°F (68°C) K=5.6 K80 Standard Respo...Buy On Amazon

There are different types of fire sprinklers based on the pattern, pressure, and activation. The most common types are:

  • Wet pipe fire sprinklers: 

These fire sprinklers have water-filled pipes that are always under pressure. When a fire sprinkler is activated, water is released until the fire is out. Wet pipe fire sprinklers are the most common and reliable type, as they are simple and fast to operate.

  • Dry pipe fire sprinklers: 

These fire sprinklers have air-filled pipes that are under pressure. When a fire sprinkler is activated, air is released first, followed by water. Dry pipe fire sprinklers are suitable for areas where the water may freeze, such as attics, basements, or garages.

  • Pre-action fire sprinklers: 

These fire sprinklers have water-filled pipes that are not under pressure. When a fire sprinkler is activated, water is released only after a separate detection system, such as a smoke alarm, confirms the fire. Pre-action fire sprinklers are suitable for areas where the water may cause damage, such as museums, libraries, or data centers.

  • Deluge fire sprinklers: 

These fire sprinklers have empty pipes that are not under pressure. This fire sprinkler releases water from all the fire sprinklers in the system, creating a deluge of water. Deluge fire sprinklers are suitable for areas where the fire may spread rapidly, such as warehouses, factories, or theaters.

Selecting the Right Products

Choosing the best fire safety products and equipment for your fire safety catalog, based on your needs and goals. Consider various factors, such as the type, size, capacity, quality, performance, features, cost, and availability of the products. You must also compare products and brands, read reviews and ratings, and seek expert advice and recommendations.

  1. Type

The product’s classification is based on its function, purpose, or design. Fire extinguishers are classified by the type of fire they can extinguish, such as class A, B, C, D, or K, while the pattern, pressure, and activation, such as wet pipe, dry pipe, pre-action, or deluge, classify the fire sprinklers. 

Fire doors are classified by function, location, and rating, such as single-action, double-action, sliding, or swinging.

Choose the product that matches the fire you are most likely to encounter in your setting. Also, consider each type of product’s advantages and disadvantages, effectiveness, reliability, convenience, and maintenance.

2. Size

Buy the product size that fits the space and storage available in your setting and situation. Consider the ease and comfort of handling and using the product, such as the weight, portability, and accessibility.

3. Capacity

The product’s capacity is the volume it can hold. Fire extinguishers are rated by the amount of extinguishing agent they contain and the size of fire they can extinguish. The fire sprinklers are rated by the flow rate and pressure of the water or other extinguishing agents they can spray. 

Fire hoses are rated by the diameter and length of the hose and the nozzle. Consider the efficiency and effectiveness of the product by checking the duration, coverage, and performance before buying.

4. Quality

This is the degree of excellence of the product based on its material, construction, or durability. Most fire extinguishers are made of metal, plastic, or composite materials, fire blankets are made of wool, fiberglass, or aramid fibers, while fire doors are made of metal, wood, or glass.

Choose a highly reliable product, certified and approved by the relevant authorities and organizations, such as the NFPA, the Underwriters Laboratories (UL), or the International Organization for Standardization (ISO). Check the warranty and guarantee of the product, the expiration date, the replacement policy, and the customer service.

5. Performance

The product’s performance refers to the product’s result based on functionality and accuracy. Fire extinguishers are rated by the discharge time, range, and pattern, fire sprinklers by the activation time, temperature, and distribution, and fire alarms by the detection time, sensitivity, and volume.

Check for the product’s performance for reputable authorities and organizations, such as the NFPA, the UL, or the ISO. Also, check the feedback and evaluation of the product, such as the reviews, ratings, and recommendations.

6. Features

The product’s features refer to the product’s additional attributes, like the design, color, or style. Fire extinguishers may have features such as a pressure gauge, a safety pin, or a wall bracket; fire blankets may have features such as a container, a pouch, or a handle; and escape ladders may have features such as a hook, a bracket, or a stabilizer.

Choose the product’s features that are useful and beneficial for your fire safety needs and goals and compatible and complementary with your setting and situation. 

7. Cost

The amount of money required to purchase or maintain the product. A fire extinguisher may cost from $10 to $200, depending on the type, size, capacity, quality, performance, and features; fire blankets may cost from $5 to $50, depending on the size, quality, and features, and escape ladders may cost from $20 to $100, depending on the length, width, quality, and features.

Emergency Preparedness

These are steps and actions for responding to a fire or emergency using the fire safety products and equipment in your fire safety catalog. Follow the four phases of emergency management: prevention, mitigation, response, and recovery.

  1. Prevention

Prevention is trying to prevent a fire from happening in the first place. You need to do the following:

  • Identify and eliminate fire hazards, like flammable materials, ignition sources, clutter, and faulty wiring.
  • Install and maintain fire safety products and equipment, like fire extinguishers, smoke alarms, carbon monoxide detectors, fire blankets, and escape ladders.
  • Follow fire safety rules and regulations.
  • Educate others about fire safety, risks, types, products, and procedures

2. Mitigation

This is when you try to reduce the damage of a fire if it does happen by; 

  • Activate fire safety products and equipment, such as fire extinguishers, fire blankets, fire doors, and fire sprinklers.
  • Contain and control the fire by isolating the fire area, closing the doors and windows, and cutting off the power and gas supply.
  • Alert and inform others about the fire by calling the fire department, sounding the fire alarm, and notifying the occupants and authorities.
  • Protect yourself and others from fire hazards.

3. Response

Response is the phase where you try to survive and escape from a fire or emergency if it is out of control or threatening your safety by using the following steps

  • Follow the fire escape plan or find the nearest and safest exit route.
  • Use fire safety products and available equipment, like fire blankets, escape ladders, and fire hoses.
  • Evacuate the building or seek refuge in a safe area
  • Help and assist others to evacuate, especially the young, the old, the disabled, and the injured.
  • Stay calm and alert, and follow the instructions of the fire department and the emergency responders.

4. Recovery

Recovery is when you try to restore and rebuild your life and property after a fire or emergency. You need to do the following:

  • Assess and document the damage and loss through taking photos, videos, or notes and filing insurance claims or reports.
  • Repair and replace fire safety products and equipment.
  • Clean and sanitize the fire area by removing debris, ash, soot, and odor and disinfecting surfaces, fabrics, and objects.
  • Seek and receive support and assistance, counseling, financial aid, legal advice, and community resources.

Final Word

This catalog is your complete guide to essential fire safety products, from fire extinguishers and smoke alarms to fire doors and sprinklers. You have learned to explore your fire safety needs, build your catalog, select the right products, and prepare for emergencies. By following this guide, you have made informed decisions and enhanced your fire safety.

We hope that this fire safety catalog has been useful and helpful for you. We also hope that you will never have to face a fire or emergency in your life. But if you do, we hope that you will be ready and safe, thanks to the fire safety products and equipment in your fire safety catalog. Thank you for reading, and stay safe!


How To Use a Fire Blanket

Step-by-Step Guide: How To Use a Fire Blanket for Quick Fire Suppression

A fire blanket is a sheet of fire-resistant material you place over a fire to smother and stop it from spreading. They are easy to use, require no training, and can be reused after washing.

Fire blankets can save your life and property from the devastating effects of fire. According to the latest fire statistics, heating pads and electric blankets cause around 500 fires yearly, and kitchen fires account for 49% of home fires. A fire blanket can help you extinguish these fires quickly and safely before they get out of control.

This guide will show you how to use a fire blanket for different fire scenarios, such as cooking oil fires, clothing fires, and electrical fires. Follow these simple steps and learn to protect yourself and your loved ones from fire hazards.

What is a Fire Blanket?

A fire blanket is a woven fire-resistant material designed to extinguish small fires. It puts out small fires unsuitable for water or fire extinguishers in kitchen, clothing, electrical, car, and camping. A fire blanket works by cutting off the fire’s oxygen supply, reducing the fire’s heat, and preventing the fuel of the fire from igniting or re-igniting.

What are the Benefits of Fire Blankets?

  • They are easy to use and only require placing the blanket over the fire and leaving it until it is out.
  • Easy to maintain and do not need regular servicing or refilling like fire extinguishers.
  • They are reusable. They can be washed and dried after use unless damaged by the fire.
  • They can be used for different fires and situations, such as cooking, welding, camping, or escaping.
  • They are cost-effective, cheaper than fire extinguishers, and can last long.
  • They are environmentally friendly and do not produce harmful chemicals or residues when used.

How To Use a Fire Blanket for Quick Fire Suppression

Step 1: Choose the Right Fire Blanket for Your Needs

Different types and sizes of fire blankets are available, depending on the material, the fire rating, and the purpose of the blanket. Here are some factors to consider when choosing a fire blanket:

  • Material

Fire blankets are made of fiberglass, wool, leather, or ceramic. Fiberglass is the most common material, as it is lightweight, durable, and resistant to high temperatures. Wool and leather are also suitable materials, as they are natural and can provide insulation and comfort. Ceramic is a newer material that can withstand very high temperatures and is suitable for industrial and laboratory settings.

  • Fire rating

Different fire ratings indicate how much heat and fire they can resist. Fire ratings are usually expressed in letters and numbers, such as 5B, 13A, or 75F. The letter indicates the fire class, which is the type of fuel involved in the fire, such as A for solid materials, B for liquids, C for gases, D for metals, E for electrical equipment, and F for cooking oils. The number indicates the fire size; the higher the number, the larger the fire the blanket can extinguish.

  • Durability: 

Fire blankets have different levels of durability, indicating how long they can last and how often they can be reused. Durability depends on the material, the quality, and the maintenance of the blanket. Some fire blankets are disposable and can only be used once and discarded, while others are reusable and can be washed and dried after use and then repacked for future use. 

  • Storage: 

Fire blankets have different storage options. Storage depends on the size, shape, and packaging of the blanket. Some fire blankets are stored in a pouch, a box, or a wall-mounted container with quick-release tabs or handles for easy access. Some fire blankets are stored in a backpack or a belt with a hood or a hole for the head for easy escape. Some fire blankets are stored in a metal case or a wall-mounted cabinet, with eyelets or straps for hanging or securing.

Here are some examples of fire blankets for different purposes, along with a table to compare their features and prices:

  • Kitchen fire blankets are small and square ones suitable for extinguishing cooking fires, such as grease, oil, or food. They are made of fiberglass and have quick-release tabs for easy access. They are often stored near the stove or oven for convenience.
  • Industrial fire blankets are large and rectangular, suitable for extinguishing welding, cutting, or grinding fires, such as sparks, slag, or molten metal. They are usually made of leather or ceramic and have eyelets or straps for hanging or securing. 
  • Emergency fire blankets are medium and square ones suitable for extinguishing clothing, electrical, or car fires, such as fabric, wire, or fuel. They are usually made of fiberglass or wool and have pull-down tabs or handles for easy access. 
  • Escape fire blankets are large and square for protecting oneself from flames and heat when escaping a fire. They are usually made of fiberglass or wool and have a hood or a hole for the head. 
  • Children and pets fire blankets are small and square for protecting against fires involving children and pets. They are usually made of wool or cotton and have a soft and comfortable texture. 

Type: Kitchen  

Size: 1 x 1m

Material: Fiberglass

Fire Rating: 5B

Durability: Disposable

Storage: Pouch

Price: $10-$20

Sponsored Ad - DIBBATU Fire Blanket for Home and Kitchen, Fire Blankets Emergency for Home, Emergency Fire Retardant Blank...Buy On Amazon

Type: Industrial

Size: 1.8 x 1.2m

Material: Leather or Ceramic

Fire Rating: 13A

Durability: Reusable

Storage: Case or Box

Price: $50-$100

HOFENTIGU Welding Blanket Fireproof Tarp Heat Resistant Material Up to 1800°F Flame Retardant Fabric Carbon Felt for Grill...Buy On Amazon

Type: Emergency

Size: 1.2 x 1.2m

Material: Fiberglass or Wool

Fire Rating: 8B

Durability: Reusable

Storage: Pouch or Bag

Price: $20-$40

Sponsored Ad - Prepared Hero Emergency Fire Blanket - 4 Pack - Fire Suppression Blanket for Kitchen, 40” x 40” Fire Blanke...Buy On Amazon

Type: Escape

Size: 1.8 x 1.8m

Material: Fiberglass or Wool

Fire Rating: 13A

Durability: Reusable

Storage: Backpack or Belt

Price: $40-$80

Sponsored Ad - JJ CARE Fire Blanket – 5 Packs with Hooks – Emergency Fire Blanket for Home & Kitchen, High Heat Resistant ...Buy On Amazon

Type: Children and Pets

Size: 1 x 1m

Material: Wool or Cotton

Fire Rating: 5B

Durability: Reusable

Storage: Drawer or Closet

Price: $10-$20

Sponsored Ad - ELDAR 4-Pack Fire Blanket - X-Large Fiberglass Fire Blanket Fire Suppression Blanket - Fire Blankets Emerge...Buy On Amazon

Step 2: Store Your Fire Blanket in a Convenient and Accessible Location

Storing your fire blanket in a convenient and accessible location is very important, as it can save you precious time and effort in a fire emergency. Store your fire blanket where you can easily see and reach it, such as near the potential fire source or the exit, and in a way that protects it from dust, moisture, and damage, such as in a pouch, a box, or a wall-mounted container.

Here are some possible locations for storing your fire blanket, depending on the type and purpose of the blanket:

  • Kitchen fire blankets are small and should be stored near the stove or oven, where most kitchen fires start. Store your kitchen fire blanket in a box with quick-release tabs for easy access. Avoid storing your kitchen fire blanket in a drawer that can be hard to open or reach in a fire emergency.
  • Industrial fire blankets should be stored near the work area in a wall-mounted case or a metal box with straps for hanging. 
  • Emergency fire blankets should be stored in the bedroom. 
  • Escape fire blankets: store your escape fire blanket near the exit, where you can grab it and wrap it around yourself. 
  • Children and pet fire blankets should be stored in the closet, where you can easily reach and use them. You should also keep your children’s and pets’ fire blankets in a soft and comfortable material, such as wool or cotton, which can provide insulation and comfort. 

Here are some tips on maintaining your fire blanket:

  • Check your fire blanket regularly for any signs of damage, such as tears, holes, stains, or fraying. If your fire blanket is damaged, replace it as soon as possible, as it may not work correctly in a fire emergency.
  • Clean your fire blanket after use if it is contaminated by the fire, such as by oil, grease, or smoke. Follow the manufacturer’s instructions on how to clean your fire blanket, and avoid using bleach, detergent, or fabric softener, as they may damage the fire-resistant material.
  • Dry your fire blanket thoroughly after washing and avoid ironing, wringing, or folding it, as they may damage the fire-resistant material of the blanket.
  • Fold your fire blanket neatly and carefully after drying if it is reusable, and avoid twisting, rolling, or crumpling your fire blanket, as they may damage the fire-resistant material of the blanket.
  • Repack your fire blanket securely and properly after folding if it is reusable. 

Step 3: Use Your Fire Blanket to Put Out Small Fires

To use your fire blanket, follow these general steps:

  • Pull the tabs or handles to release the fire blanket from storage.
  • Cover your hands with the corners of the fire blanket to protect them from the fire.
  • Place the fire blanket over the fire, covering it entirely and leaving no gaps for air to enter.
  • Leave the fire blanket on the fire until it is completely out, and do not remove it until it is cool.
  • Call the fire department if the fire is large, out of control, or involves gas or electricity.

Depending on the type of fire, you may need to adjust your actions accordingly. Here are some sub-sections for different types of fires, along with some dos and don’ts of using your fire blanket:

How to Use a Fire Blanket for Kitchen Fires

Kitchen fires involve cooking oil, grease, or food. They are very common and can spread quickly if not handled properly.

Do: 

  • Turn off the heat source, such as the stove or oven, if it is safe. 
  • Use a fire blanket to cover the fire, such as the frying pan, the pot, or the oven. 
  • Leave the fire blanket on the fire until it is out and cool. 
  • Call the fire department if the fire is large or involves gas.

Don’t 

  • Use water, flour, or baking soda to extinguish the fire, which can cause the fire to flare up or explode. 
  • Move or touch the fire, such as the frying pan, the pot, or the oven, as they can be very hot and cause burns. 
  • Remove the fire blanket from the fire until it is cool, which can cause the fire to re-ignite.

How to Use a Fire Blanket for Clothing Fires

Clothing fires start on a person’s clothing, usually involving candles, cigarettes, or sparks. They are very dangerous and can cause serious injuries or death if not treated quickly.

Do

  • Wrap the person with the fire blanket, covering their whole body and exposing only their face. 
  • Make the person stop, drop, and roll on the ground to smother the fire. 
  • Check the person for injuries, such as burns, smoke inhalation, or shock. 
  • Call the fire department or an ambulance if the person is hurt or unconscious.

Don’t

  • Use water, alcohol, or oil to put out the fire, as they can worsen the burns or cause infection. 
  • Remove the person’s clothing unless it is stuck to the skin, as it can cause more damage or pain. 
  • Remove the fire blanket from the person until it is out and cool, which can cause the fire to re-ignite.

How to Use a Fire Blanket for Electrical Fires

Electrical fires start from electrical equipment, such as wires, sockets, or appliances. They are very hazardous and can cause electrocution, power outage, or explosion if not handled properly.

Do

  • Unplug the power source, such as the cord, the switch, or the breaker, if it is safe. 
  • Use a fire blanket to cover the fire, such as the wire, the socket, or the appliance. 
  • Leave the fire blanket on the fire until it is out and cool. 
  • Call the fire department if the fire is large or involves gas.

Don’t

  • Use water, metal, or conductive materials to put out the fire, as they can cause electric shock, short circuit, or explosion. 
  • Touch or move the fire, such as the wire, the socket, or the appliance, as they can be live and dangerous. 
  • Remove the fire blanket from the fire until it is cool, which can cause the fire to re-ignite.

How to Use a Fire Blanket for Camping Fires

Camping fires involving campfires, stoves, or lanterns are common and can cause forest fires, wildlife damage, or injury if improperly handled.

Do

  • Choose a suitable location for your fire, such as a fire pit, a clearing, or a metal container. 
  • Keep a safe distance from your fire, such as 3 meters, and do not leave it unattended. 
  • Use a fire blanket to cover the fire, such as the campfire, the stove, or the lantern. 
  • Leave the fire blanket on the fire until it is out and cool. 
  • Extinguish the fire completely before leaving by pouring water, sand, or dirt over it.

Don’t: 

  • Use flammable materials, such as gasoline, alcohol, or aerosol, to start or fuel your fire, as they can cause it to flare up or explode. 
  • Throw or burn garbage in your fire, such as plastic, paper, or food, as they can cause toxic smoke, sparks, or embers. 
  • Remove the fire blanket from the fire until it is cool, which can cause the fire to re-ignite.

How to Use a Fire Blanket for Children and Pets

Children and pets are vulnerable to fires, as they may be curious, playful, or accidental. They may start or get involved in fires by playing with matches, candles, or lighters or knocking over lamps, heaters, or stoves. They may also panic, hide, or run away from fires, making it harder to rescue them.

Do

  • Educate your children and pets about fire safety by teaching them to stay away from fire sources, stop, drop, and roll if their clothing catches fire, and call for help if they see a fire. 
  • Supervise your children and pets around fire sources by keeping them in sight, locking away fire hazards, and installing smoke alarms. 
  • Comfort your children and pets if they are scared or hurt by a fire, such as hugging them, talking to them, or taking them to a vet.

Don’t: 

  • Use your fire blanket to cover your children or pets unless they are on fire or need protection from flames and heat. 
  • A fire blanket may be too heavy, hot, or suffocating for them and cause more harm than good. Instead, use a soft and comfortable material, such as wool or cotton, to wrap or cover them. 
  • Remove the fire blanket or the material from your children or pets until the fire is out and cool, as it can cause the fire to re-ignite.

Step 4: Dispose or Reuse Your Fire Blanket After Use

After using your fire blanket, you may wonder whether you can reuse it. The answer depends on several factors, such as the material, the damage, and the manufacturer’s instructions for your fire blanket. 

Here are some steps to determine whether your fire blanket is reusable or disposable:

Step 1: Check the material of your fire blanket. 

Fire blankets are usually made of fiberglass, wool, leather, or ceramic. Fiberglass is the most common material, as it is lightweight, durable, and resistant to high temperatures. However, fiberglass fire blankets are often disposable, as they can lose their fire-resistant properties after use. Wool, leather, and ceramic fire blankets are more likely reusable, as they can withstand higher temperatures and repeated use.

Step 2: Check the damage of your fire blanket. 

If your fire blanket is damaged, you should not reuse it, as it may not work properly in a fire emergency. Check your fire blanket’s fire rating, which indicates how much heat and fire it can resist, and if your fire blanket has a low fire rating, such as 5B, it may not be able to extinguish a larger or hotter fire. It may be reusable if your fire blanket is undamaged and has a high fire rating, such as 13A.

Step 3: Check the manufacturer’s instructions for your fire blanket. 

Fire blankets come with instructions from the manufacturer, which tell you how to use, store, clean, and dispose of or reuse your fire blanket. Follow the manufacturer’s instructions, as they are based on your fire blanket’s specific features and quality. Some fire blankets are designed for single use only, while others are designed for multiple uses. Some fire blankets have an expiry date, while others do not. 

For disposable, follow these guidelines to dispose of it safely:

  • Wrap your fire blanket in a plastic bag and seal it tightly. This will prevent fire residues or fibers from escaping or contaminating the environment.
  • Label your fire blanket as hazardous waste, and write the date and reason for disposal. This will inform the waste collectors or authorities of the nature and source of your fire blanket.
  • Contact your local authority and ask them how to dispose of your fire blanket. Different regions may have different regulations and facilities for disposing of fire blankets. 

For reusable blankets, follow these guidelines to reuse them safely:

  • Wash your fire blanket if it is contaminated by oil, grease, or smoke. Follow the manufacturer’s instructions on washing your fire blanket, and avoid using bleach, detergent, or fabric softener, as they may damage the fire-resistant material of your fire blanket.
  • Dry your fire blanket thoroughly by hanging it in a well-ventilated area or drying it on low heat. Avoid ironing, wringing, or folding your fire blanket, as they may damage the fire-resistant material of your fire blanket.
  • Fold your fire blanket neatly and carefully if it is reusable. Follow the manufacturer’s instructions on how to fold your fire blanket, such as folding it in half, quarters, and then in eighths. Avoid twisting, rolling, or crumpling your fire blanket, as they may damage the fire-resistant material of your fire blanket.
  • Repack your fire blanket securely and properly if it is reusable by inserting it into the pouch, the box, or the wall-mounted container. 

When to replace your fire blanket, regardless of whether it is reusable or not:

  • Replace it after it gets damaged by a fire, as it may not work properly in a fire emergency. Check your fire blanket regularly for any signs of damage, such as tears, holes, stains, or fraying. 
  • Replace your fire blanket after a certain period of time, as it may lose its fire-resistant properties over time. If your fire blanket has no expiry date, experts recommend replacing it seven years after it’s commissioned.
  • Replace your fire blanket after several uses, as it may wear or degrade. If your fire blanket is not limited, experts recommend replacing it after three uses.

Conclusion

A fire blanket at home can save lives, property, and money. It can help you extinguish a fire quickly and safely without causing any mess or damage. It can also help you escape a fire by wrapping it around yourself or a loved one. A fire blanket is a simple and effective way to prevent fire disasters and protect your family and belongings.

Understanding Fire Risk Assessment Process in 2024: A Step-by-Step Guide

Fire is one of the most devastating and unpredictable hazards that can affect your home. It can cause serious injuries, deaths, and property damage in a matter of minutes. That’s why fire safety is not something you can afford to ignore or postpone. Let’s dive into Fire Risk Assessment Process.

Fire risk assessment is a legal requirement for all non-residential buildings and the common areas of multi-family residential buildings. The Bipartisan Infrastructure Law of 2021 introduced new fire safety responsibilities for building owners and managers, such as conducting and sharing fire risk assessments and safety plans.

This article will explain fire risk assessment, its importance, and how to conduct one in 2024. By the end of this article, you will better understand fire safety and be prepared to face any fire emergency.

What is Fire Risk Assessment Process?

Fire risk assessment is a process of finding and assessing the fire hazards and risks in a premises and taking actions to prevent or control them.  The assessment helps protect the people, property, and environment from fire. 

The fire risk assessment is a legal requirement for many premises but is also a good practice for any home or workplace and should be done regularly.

Why is Fire Risk Assessment Important?

  • It helps you identify and reduce the fire hazards and risks in your home, such as flammable materials, electrical faults, or blocked exits, and prevent them from causing or worsening a fire.
  • It protects the safety and well-being of yourself and your family, neighbors, and visitors by ensuring adequate fire detection, protection, and evacuation systems.
  • It helps you comply with the legal obligations and standards for fire safety and avoid penalties or lawsuits for negligence of duty.
  • It saves money and time by avoiding costly repairs, fines, or closures due to fire incidents and reducing insurance premiums, claims, or losses.
  • It improves your fire safety culture and awareness by educating yourself and your family about the fire risks and safety measures.

Fire Risk Assessment Process

How to Conduct Fire Risk Assessment

Fire risk assessment can be done by yourself or a professional fire risk assessor, depending on the complexity and size of your premises. The assessment involves five main steps: identifying fire hazards, identifying people at risk, evaluating and reducing the risks, recording and communicating the findings, and reviewing and updating the assessment.

To conduct a fire risk assessment. The assessment should be;

  1. Comprehensive, covering all the potential sources and consequences of fire and the people affected by it.
  2. Provide clear and relevant conclusions and actions based on evaluating the fire risks and the existing fire safety measures aimed at preventing or minimizing the fire incidents and their impacts.
  3. Identify any group of individuals at particular risk, such as children, elderly, disabled, or pregnant people, and provide them with adequate protection and assistance.
  4. Recorded in writing if you have five or more employees, and include the details of the fire hazards, the people at risk, the risk evaluation, the risk reduction measures, and the review and update dates.
  5. Regularly review and update any significant change in your premises or workplace, and communicate these changes to all the relevant people.

The fire risk assessment process consists of five main steps:

Step 1: Identify Fire Hazards

  • Fire hazards are anything that can start a fire, such as electrical equipment, flammable materials, or ignition sources.
  • Inspect your premises for any potential fire sources.
  • You can use a checklist to help you identify fire hazards.

Step 2: Identify People at Risk

  • People at risk are anyone who may be affected by a fire, such as occupants, visitors, or neighbors.
  • To identify people at risk, consider how many people are on your premises, where they are located, and how they may react to a fire.
  • Consider any vulnerable groups, like children, elderly, disabled, or pregnant people, who may need special assistance.

Step 3: Evaluate and Reduce the Risks

  • Estimate the likelihood and severity of a fire occurring and the potential consequences for the people and property involved.
  • To reduce the risks, implement appropriate fire safety measures and controls, such as fire alarms, fire extinguishers, fire doors, fire escape routes, or fire training.
  • You can use a risk matrix or a rating system to help you evaluate and reduce the risks.

Step 4: Record and Communicate the Findings

  • Document the results of your fire risk assessment, including the fire hazards, the people at risk, the risk evaluation, and the risk reduction measures.
  • Communicate the findings, inform and educate all the relevant people about the fire risk assessment, the safety measures, the emergency plan, and the roles and responsibilities.
  • Use a report or a form to help you record and communicate the findings.

Step 5: Review and Update the Assessment

  • To review the assessment, monitor and evaluate the effectiveness of your fire risk assessment and fire safety measures, and check for any changes or improvements.
  • Update the assessment by revising and modifying your fire risk assessment and fire safety measures, and communicate the changes or updates to all the relevant people.
  • Review and update your fire risk assessment at least once a year or whenever a significant change in your premises.

Fire Risk Assessment ProcessBuy On Amazon

The Benefits and Challenges of Using Digital Tools and Software for Fire Risk Assessment

Digital tools and software, such as apps, cloud-based platforms, or artificial intelligence, are emerging technologies that can help streamline and improve fire risk assessment. Digital tools and software can offer various benefits.

Benefits

  • Saving time and resources by automating or simplifying tasks, such as data collection, analysis, or reporting.
  • Enhancing accuracy and consistency by reducing human errors, biases, or variations.
  • Facilitating collaboration and communication by enabling real-time sharing, feedback, or updates among different stakeholders.
  • Supporting compliance and accountability by providing evidence and audits of the fire risk assessment process and outcomes.

Challenges

  • These digital platforms can expose confidential information to unauthorized access, theft, or misuse.
  • Compatibility and reliability depend on the devices’ network systems’ availability, functionality, and quality.
  • Training and support by requiring adequate skills, knowledge, or guidance to use the tools or software effectively and safely.

The Common Mistakes and Pitfalls to Avoid When Conducting Fire Risk Assessment

Mistakes can compromise the quality and validity of the assessment and lead to serious consequences in case of a fire. 

Some of the common mistakes are;

  1. Overlooking hidden hazards, such as faulty wiring, blocked vents, or overloaded sockets, that may not be visible but can cause or worsen a fire.
  2. Underestimating the fire risks by assuming that a fire is unlikely or existing fire safety measures are sufficient without conducting an objective evaluation.
  3. Failing to communicate the findings and educate the relevant people about the fire risk assessment, the fire safety measures, and the emergency plan, and not updating any changes.

The Best Practices and Tips for Fire Risk Assessment Process

Following some best practices and tips can ensure a comprehensive and effective assessment and demonstrate compliance with legal and ethical standards. 

Here are some of them:

  • Involve relevant stakeholders, the employees, contractors, customers, or neighbors, who may have valuable insights and suggestions on the fire risk assessment process and outcomes.
  • Use a systematic approach, follow a clear and consistent methodology, use reliable and relevant sources of information, and apply appropriate tools and techniques.
  • Document the evidence and record the fire risk assessment outcomes, the fire hazards, the people at risk, the risk evaluation, and the review and update dates.

How to manage fire safety on a shared premise

Managing fire safety in shared premises is a legal and moral responsibility for all the occupants and owners of the building. You need to cooperate and coordinate to identify and reduce the fire risks, implement and maintain the fire safety measures, and plan and communicate the emergency procedures. 

Fire Risk Assessment Process

Here are some steps you can take to manage fire safety in shared premises:

1. Carry out a fire risk assessment of the premises.

 Identify the ignition, fuel, and oxygen sources and the people at risk. Evaluate the risks and decide how to eliminate or reduce them. Record your findings and actions, and share them with the other responsible persons.

2. Put in place and maintain appropriate fire safety measures. 

These may include installing a fire alarm, setting up a sprinkler system, ensuring fire-resistant flat entrance doors, providing fire extinguishers and blankets, and displaying fire safety signs and notices. Check the fire safety equipment regularly and keep a record of the maintenance.

3. Plan for an emergency. 

Establish a clear and effective evacuation plan that covers all the possible scenarios and routes. Consider the needs of vulnerable persons, such as children, elderly, disabled, or pregnant people. 

Assign roles and responsibilities to the staff and occupants, such as fire wardens, first aiders, or assembly point managers. Conduct fire drills at least once a year and evaluate the results.

4. Provide staff and occupants with information

 Inform them of the fire risks, the fire safety measures, and the emergency procedures. Make sure they know how to use the fire equipment, how to raise the alarm, how to evacuate safely, and where to assemble. Provide written instructions or handouts, and update them on any changes or improvements.

Conclusion

Fire risk assessment is a legal requirement for all non-residential buildings and the common areas of multi-family residential buildings. It involves identifying fire hazards, evaluating the risks, and implementing appropriate fire safety measures

The Bipartisan Infrastructure Law of 2021 introduces new fire safety responsibilities for building owners and managers, such as conducting and sharing fire risk assessments and fire safety plans. 

To comply with the law and ensure people’s and property safety, building owners and managers should follow the guidance issued by federal and state agencies and use the available fire risk assessment tools and resources.

How to Install Arlo Video Doorbell

Step-by-Step Guide: How to Install Arlo Video Doorbell in 12 Easy Steps

Question: How to Install Arlo Video Doorbell?

Upgrade your home security effortlessly with the Arlo Video Doorbell. In a world where safety is paramount, the Arlo Video Doorbell is a guardian at your entrance. 

Arlo video doorbell is a smart device that lets you see, hear, and speak to visitors at your door from anywhere. It also has motion detection, night vision, and video recording features.

Installing the Arlo video doorbell is not difficult, but it does require some tools and skills. In this article, we will show you how to install an Arlo video doorbell in 12 easy steps, whether you have an existing doorbell or not.

Ready to redefine your security game? Let’s dive into the simplicity of Arlo Video Doorbell installation together

How to Install Arlo Video Doorbell

How to Install Arlo Video Doorbell Step 1: Choose the right Arlo video doorbell for your home

There are two types of Arlo video doorbells: wired and wire-free. The wired version connects to your doorbell wiring and requires a power adapter. The wire-free version runs on a rechargeable battery and does not need any wiring. Choose the one that suits your needs and preferences. 

Here are some pros and cons of each type:

Wired Arlo video doorbell:

Pros:
  • No need to worry about battery life
  • Supports continuous video recording
  • Works with most existing doorbell chimes

How to Install Arlo Video DoorbellBuy On Amazon

Cons:
  • Requires wiring and power adapter
  • It may not fit some door frames
  • More expensive than the wire-free version

Wire-free Arlo video doorbell:

Pros:
  • Easy to install and move
  • No wiring or power adapter is needed
  • Fits any doorframe
Cons:
  • The battery needs to be recharged every few months
  • Does not support continuous video recording
  • It may not work with some existing doorbell chimes

How to Install Arlo Video DoorbellBuy On Amazon

How to Install Arlo Video Doorbell Step 2: Download the Arlo Secure app and create an account

The Arlo Secure app is the main interface for setting up and controlling your Arlo video doorbell. You can download it for free from the App Store or Google Play. Create an account and sign in to access the app’s features, or use the app to view live and recorded videos, receive notifications, and adjust settings.

How to Install Arlo Video Doorbell Step 3: Remove your existing doorbell (if you have one)

If you have an existing doorbell, you will need to remove it before installing your Arlo video doorbell. 

How to remove existing doorbell:

  • Turn off the power to your doorbell at the circuit breaker or fuse box
  • Unscrew the doorbell button from the wall and disconnect the wires
  • Cover the exposed wires with wire nuts or electrical tape
  • Keep the doorbell button and wires in case you want to reinstall them later

How to Install Arlo Video Doorbell Step 4: Install the power adapter (if you have a wired Arlo video doorbell)

If you have a wired Arlo video doorbell, you need to install the power adapter that comes with it. The power adapter converts the low-voltage doorbell wiring to the high-voltage required by the Arlo video doorbell. 

Steps to install power adapter:

  • Locate your doorbell transformer, which is usually in the basement, attic, or garage
  • Turn off the power to the transformer at the circuit breaker or fuse box
  • Unscrew the transformer from the wall and disconnect the wires
  • Connect the power adapter wires to the transformer wires using the wire connectors provided
  • Screw the power adapter to the wall near the transformer
  • Turn on the power to the transformer and check if the power adapter LED is green

How to Install Arlo Video DoorbellBuy On Amazon

How to Install Arlo Video Doorbell Step 5: Install the mounting plate (for both wired and wire-free Arlo video doorbells)

The mounting plate is the base that holds your Arlo video doorbell to the wall. Install it using the screws and anchors provided using the following steps:

  • Hold the mounting plate against the wall where you want to install your Arlo video doorbell
  • Use a level to make sure the mounting plate is straight
  • Mark the screw holes on the wall with a pencil
  • Drill pilot holes on the marked spots using a 3/16-inch drill bit
  • Insert the anchors into the holes and tap them gently with a hammer
  • Screw the mounting plate to the wall using the screws provided

How to Install Arlo Video DoorbellBuy On Amazon

How to Install Arlo Video Doorbell Step 6: Connect the wires (if you have a wired Arlo video doorbell)

If you have a wired Arlo video doorbell, connect the wires from the power adapter to the mounting plate. 

Follow these steps:

  • Strip about 1/4 inch of insulation from the ends of the wires
  • Loosen the screws on the back of the mounting plate
  • Wrap the wires around the screws and tighten them
  • Make sure the wires are secure and not touching each other

How to Install Arlo Video Doorbell Step 7: Attach the Arlo video doorbell to the mounting plate (for both wired and wire-free Arlo video doorbells)

The Arlo video doorbell snaps onto the mounting plate with a click. Attach the Arlo video doorbell to the mounting plate by:

  • Aligning the Arlo video doorbell with the mounting plate
  • Push the Arlo video doorbell firmly onto the mounting plate until you hear a click
  • Make sure the Arlo video doorbell is secure and level

How to Install Arlo Video Doorbell Step 8: Sync the Arlo video doorbell with the Arlo Secure app (for both wired and wire-free Arlo video doorbells)

The Arlo Secure app will guide you through syncing your Arlo video doorbell with your account and network. You can follow these steps:

  • Open the Arlo Secure app and tap the “+” icon
  • Select “Doorbell” and choose your Arlo video doorbell model
  • Follow the on-screen instructions to scan the QR code on the back of your Arlo video doorbell
  • Wait for the app to find and connect your Arlo video doorbell
  • Name your Arlo video doorbell and choose a location
  • Follow the on-screen instructions to adjust the settings and preferences of your Arlo video doorbell

How to Install Arlo Video Doorbell Step 9: Test the Arlo video doorbell (for both wired and wire-free Arlo video doorbells)

Test your Arlo video doorbell by pressing the button and checking if you receive a notification on your phone. Run tests for the video and audio quality, the motion detection, and the night vision. If you encounter any issues, troubleshoot them using the Arlo Secure app or the Arlo support website.

How to Install Arlo Video Doorbell Step 10: Install the chime kit (if you have a wired Arlo video doorbell)

If you have a wired Arlo video doorbell, install the chime kit. The chime kit allows your existing doorbell chime to work with your Arlo video doorbell. 

Follow these steps to install the chime:

  • Locate your doorbell chime, which is usually in the hallway, living room, or kitchen
  • Turn off the power to your doorbell chime at the circuit breaker or fuse box
  • Unscrew the cover of your doorbell chime and remove it
  • Disconnect the wires from the terminals labeled “Front” and “Trans.”
  • Connect the chime kit wires to the terminals labeled “Front” and “Trans” using the wire connectors provided
  • Stick the chime kit to the inside of your doorbell chime using the adhesive tape provided
  • Replace the cover of your doorbell chime and screw it back
  • Turn on the power to your doorbell chime and check if it works with your Arlo video doorbell

How to Install Arlo Video DoorbellBuy On Amazon

How to Install Arlo Video Doorbell Step 11: Install the battery (if you have a wire-free Arlo video doorbell)

If you have a wire-free Arlo video doorbell, you will need to install the battery that comes with it. The rechargeable battery lasts up to six months on a single charge. 

How to install the battery:

  • Press the release button on the bottom of your Arlo video doorbell and slide it off the mounting plate
  • Open the battery compartment on the back of your Arlo video doorbell and insert the battery
  • Close the battery compartment and make sure it is secure
  • Slide your Arlo video doorbell back onto the mounting plate until you hear a click

How to Install Arlo Video Doorbell Step 12: Enjoy your Arlo video doorbell (for both wired and wire-free Arlo video doorbells)

You have successfully installed your Arlo video doorbell. You can now enjoy its features and benefits, such as:

  • See who is at your door in HD video and HDR
  • Hear and speak to visitors with two-way audio and noise cancellation
  • Receive alerts when motion is detected or someone presses the button
  • Record and store videos in the cloud or on a local storage device
  • Customize the settings and preferences of your Arlo video doorbell using the Arlo Secure app
  • Integrate your Arlo video doorbell with other smart home devices and platforms

How to Install Arlo Video Doorbell without existing chime: 

The Arlo video doorbell requires a voltage between 16-24V AC to operate and is designed to replace an existing wired doorbell. However, to install your Arlo video doorbell without an existing doorbell or chime, you can use a plug-in AC transformer that provides 16-24V AC with at least 1A output. You can follow these instructions to install your Arlo video doorbell with a plug-in AC transformer.

  1. Keep the Arlo video doorbell onboarding process in the Arlo app open.
  2. Route the AC wires to the desired location for your Arlo video doorbell with the plug-in AC power adapter unplugged.
  3. If you need the AC power adapter plugged in, turn off the power at the breaker.
  4. Install your Arlo video doorbell with or without the mounting wedge.
  5. Connect the AC wires to the terminals on the back of the doorbell.
  6. Secure the doorbell to the mounting plate and insert the security release pin.
  7. Plug in the AC power adapter and turn on the power at the breaker.
  8. Follow the Arlo app to complete the setup process.

Can you Install the Arlo doorbell without a power kit? 

The power kit is a device that allows you to send 16-24V AC to the doorbell constantly but only sends it to the chime when the button is pressed. This prevents the chime from ringing or buzzing when the doorbell is not pressed and protects the chime from damage. 

If you have a traditional wired chime, install the power kit to ensure the proper functioning of your Arlo video doorbell. However, some users have reported that their doorbell and chime work fine without the power kit, depending on the type and wiring of their doorbell system. 

Suppose you install the Arlo doorbell without the power kit, regularly monitor the battery level and chime performance, and contact Arlo support if you encounter any issues.

How to Install Arlo Video DoorbellBuy On Amazon

Can I use the Arlo doorbell without WiFi?

 No, you cannot use the Arlo doorbell without WiFi. The Arlo video doorbell requires a WiFi connection to stream video, receive calls, send alerts, and communicate with the Arlo app and other smart devices. 

If your WiFi connection is unstable, you may experience poor video quality and delays. To improve your WiFi connection, try the following tips.

  • Place your router closer to your doorbell, or use a WiFi extender or mesh network.
  • Reduce the number of devices connected to your WiFi network or use a dual-band router.
  • Change your router’s WiFi channel or frequency to avoid interference from other networks or devices.
  • Update your router firmware and Arlo app to the latest version.
  • Restart your router and doorbell by unplugging and plugging them back in.

How to Troubleshoot Arlo video doorbell: 

If your Arlo video doorbell is offline, troubleshoot with the following steps

  • Check your Wi-Fi connection and ensure your router is working.
  • Check the power source; the doorbell should get enough voltage, and the power kit should be installed correctly.
  • Check the battery level and charge the doorbell if needed.
  • Check the doorbell settings and disable the do not disturb mode.
  • Restart the doorbell by pressing and holding the sync button for 10 seconds until the LED flashes amber.
  • Remove and re-add the doorbell from the Arlo app.
  • Contact Arlo support if the problem persists.

Can you use the Arlo video doorbell with Google? 

You can use the Arlo video doorbell with Google Home and Google Assistant and stream video from your doorbell to a smart display, receive motion alerts, and give voice commands to control your doorbell. 

Follow these steps to connect your Arlo video doorbell with Google Home.

  • Open the Google Home app on your smartphone or tablet.
  • Tap the “+” icon on the Home screen to add devices.
  • Tap “Set up device” and then “Works with Google.”
  • Search for “Arlo” and tap on it.
  • Log in to your Arlo account and allow Google to access your Arlo information.
  • Choose the Arlo doorbell you want to connect to Google Home, assign it to a group, and give it a name.
  • You can now view the live video from your doorbell in the Google Home app.

How to Connect Arlo doorbell to phone: 

To receive calls from your Arlo doorbell, install and log in to the Arlo Secure App on your mobile phone

When a visitor presses your Arlo doorbell button, your phone receives a call that displays as Arlo Doorbell or your Arlo doorbell name. 

You can accept or decline the call the same as you do for other calls. To change the Arlo doorbell call settings, you can follow these steps.

  • Launch the Arlo Secure App and tap Devices.
  • Select your Arlo doorbell and tap the settings icon.
  • Tap Call Settings and choose the options you want.
  • You can enable or disable silent mode, do not disturb mode, call waiting, and call forwarding.

What is the Arlo doorbell battery life? 

The battery life depends on several factors, such as the frequency of video recordings, the setup environment, the WiFi connection, and the power source. The average battery life for the Arlo Essential Video Doorbell Wire-Free is 6 months, and for the Arlo Video Doorbell (2nd Generation) is 3 months. 

To extend the battery life of your Arlo video doorbell, 

  • Charge the doorbell to 100% before the first use and whenever the battery level is low.
  • Place the doorbell in an area with good WiFi coverage and avoid direct sunlight or extreme temperatures.
  • Adjust the motion sensitivity and video quality settings to reduce the number of recordings and the data usage.
  • Use a plug-in AC power adapter or a solar panel to provide constant power to the doorbell.
  • Enable the battery optimization feature in the Arlo app to conserve battery power when the doorbell is not in use.

FAQs

  • How to adjust the motion sensitivity and video quality of your Arlo video doorbell

To fine-tune your Arlo video doorbell performance, navigate to the Arlo app, select your device, and access the settings. Here, you can customize motion sensitivity, minimizing false alerts or ensuring comprehensive coverage. Tweak video quality settings based on your preference and bandwidth considerations. Striking the right balance ensures optimal surveillance tailored to your specific needs.

  • How to use a solar panel to power your Arlo video doorbell

Arlo offers compatible solar panels designed for seamless connectivity. Simply mount the solar panel in a location with ample sunlight, connect it to your doorbell, and enjoy continuous, sustainable power. This not only reduces battery changes but also contributes to a more environmentally conscious security system

  • How to integrate your Arlo video doorbell with Amazon Alexa

Linking the devices enables voice commands for tasks like displaying the doorbell feed on Alexa-enabled screens. Head to the Alexa app, select ‘Skills & Games,’ locate Arlo and follow the prompts to complete the setup. Now, effortlessly monitor your doorstep with voice commands, adding an extra layer of convenience to your home security setup.

  • How to share access to your Arlo video doorbell with other users

 In the Arlo app, open ‘Settings’ and select ‘Grant Access.’ Input the email addresses of intended users and define their access level, whether full control or limited viewing rights. This feature is invaluable for households or businesses, ensuring multiple users can stay connected to the video doorbell feed, enhancing overall security coordination.

  • What is the price of Arlo video doorbell? 

The price of the Arlo Essential Video Doorbell Wire-Free is $149.99 on the official Arlo website and $99.99 on Amazon. The price of the Arlo Essential Wired Video Doorbell is $129.99 on the Arlo website and $79.99 on Amazon. These two choices cater to diverse preferences, ensuring wireless and wired enthusiasts can elevate their home security without breaking the bank. 

Conclusion

Setting up your Arlo Video Doorbell is super easy with our 12-step guide. We’ve made it simple for you to make your home safer. From taking it out of the box to finishing the last step, you’ve got through it all smoothly. Now, your front door is guarded with high-tech protection. Feel good knowing that your home is safer. With the Arlo Video Doorbell, keeping your home secure is not hard—it’s something any homeowner can do easily.

Tonyko Fire Blanket

Tonyko Fire Blanket: Unlocking Its Powerful Uses and Benefits

Fire blankets are simple yet effective tools that can save lives and property in a fire. They are made of fire-resistant materials that can cover and suffocate small fires, cutting off the oxygen supply and stopping the flames from spreading. One of the best fire blankets on the market is the Tonyko fire blanket.

Tonyko fire blanket has been tested and proven to work on various types of fires, including liquid and grease. According to the U.S. Fire Administration, there were 1,353,500 fires in the U.S. in 2021, resulting in 3,800 deaths and $14.8 billion in losses. 

Having a fire blanket like the Tonyko fire blanket in your home, car, or workplace can make a big difference in preventing such tragedies. 

In this article, we will explore the features, advantages, and applications of the Tonyko fire blanket and show you why it is a must-have item for fire safety.

Are Tonyko fire blankets good?

Tonyko fire blankets are good for emergency fire protection. They are made of fiberglass fabric that can resist high temperatures and smother various fires, are easy to use and store, and come in different sizes to suit different needs. 

Tonyko fire blankets are a good choice for fire safety but are not a substitute for professional fire advice or training. 

Tonyko Fire BlanketBuy On Amazon

Features of the Tonyko Fire Blank

  • It is made of 100% fiberglass fabric, which can resist high temperatures and smother fires, including liquid and grease.
  • It comes in different sizes, ranging from 39.3 by 39.3 inches to 78.7 by 78.7 inches, to suit different needs and scenarios, such as kitchen, fireplace, grill, car, camping, etc.
  • It is easy to use and store, as it has pull straps that allow you to quickly and forcefully pull down the fire blanket from its wall-mounted case.
  • It meets the EN-1869:1997 standard for cooking fire suppression, which means it has been tested and proven to work on liquid and grease fires.

Advantages of the Tonyko Fire Blanket

The Tonyko fire blanket has many benefits over other fire extinguishing methods, such as:

  • It does not create any mess

Unlike fire extinguishers or water, it creates no mess or damage to the surroundings. Fire extinguishers can leave chemical residue that can damage the equipment. Water can cause electrical shock or spread the fire if it is a liquid or grease fire. The fire blanket simply covers and smothers the fire, leaving no trace or harm.

  • It does not have any expiration date

The blanket has no expiration date or maintenance. Fire extinguishers must be checked and refilled regularly to ensure they work properly. They also have a limited shelf life and can lose their pressure or effectiveness over time. The fire blanket, however, does not need any maintenance or inspection. It can last long and be ready to use whenever needed.

  • Shields the body

The blanket can be wrapped around the body and act as a heat shield in case of escape. Fire extinguishers or water cannot protect the person from the heat or flames if they need to escape a fire. The fire blanket can be wrapped around the body as a heat shield, preventing burns or injuries. It can also rescue someone trapped by the fire by covering them with a fire blanket and dragging them to safety.

  • Versatility

The Tokyo blanket can extinguish various types of fire, including liquid and grease fire. Fire extinguishers or water may not work on some types of fire, such as liquid or grease fire, which can be common in the kitchen or grill. 

The fire blanket, however, can work on any type of fire as long as it is small enough to be covered by the fire blanket. It can reduce the oxygen supply and stop the fire from spreading or reigniting.

Applications of the Tonyko Fire Blanket

The Tonyko fire blanket can be used in various situations and places with a fire risk. Some of the examples and scenarios are:

  • To put out stove or microwave fires in the kitchen. 

These are some of the most common causes of home fires, and they can be very dangerous if not handled properly. The Tonyko fire blanket can cover and smother the fire, preventing it from spreading or causing more damage. It can also protect the person from the heat or flames if they need to escape from the kitchen.

  • In the fireplace, to smother sparks

Fireplaces can create a cozy and warm atmosphere, but they can also pose a fire hazard if not maintained or supervised. The Tonyko fire blanket can smother any sparks that fly out of the fireplace and land on the carpet, furniture, or curtains. It can also cover the fireplace when it is not in use to prevent any accidental ignition or rekindling of the fire.

  • In the grill, to control flare-ups

The Tonyko fire blanket can control flare-ups or grease fires on the grill by covering and smothering the fire. It can also protect the person from the heat if they need to move away from the grill.

  • In the car, to extinguish engine or electrical fires 

Cars can be prone to fire for various reasons, such as mechanical failure, electrical malfunction, or collision. The Tonyko fire blanket can extinguish fires in the car by covering and smothering the fire. It can also wrap around the body and act as a heat shield if someone needs to exit the car.

  • In camping, to put out bonfires

The Tonyko fire blanket can put out any bonfires or lanterns that may cause a fire by covering and smothering the fire or protecting the person from the heat or flames if they need to escape from the tent or the campsite.

To use the Tonyko fire blanket safely and effectively, follow these tips and instructions:

  1. Hold the pull straps with both hands and pull down the fire blanket quickly and forcefully. This will release the fire blanket from its wall-mounted case and allow you to access it easily.
  2. Extend the fire blanket and cover the fire completely, leaving no gaps for air. This will reduce the oxygen supply and stop the fire from spreading or reigniting.
  3. Press the fire blanket firmly around the edges to seal the fire. This will prevent any smoke or flames from escaping and causing more damage or injury.
  4. Leave the fire blanket in place until the fire is completely out, ensure the fire is fully extinguished, and avoid any risk of re-ignition.
  5. Call the fire department if the fire is too large or out of control. The fire blanket is only suitable for small fires covered by the fire blanket. Call for professional help and evacuate the area if the fire is beyond your control.

How to Choose the Right Size and Quantity of Tonyko Fire Blankets for Different Situations

The size and quantity of fire blankets can affect how well they cover and smother the fire and how much material and space they require. Choosing the right size and quantity of fire blankets can help to extinguish the fire faster and more efficiently, and avoid wasting or lacking fire blankets.

  • Small fires

Use a small fire blanket for small fires, such as candles, lamps, or toasters (39.3 by 39.3 inches). This size is enough to cover and smother the fire without wasting too much material or space.

  • Medium fires

You can use a medium fire blanket for medium fires, such as stoves, ovens, or microwaves (47.2 by 47.2 inches). This size is suitable for covering and smothering most kitchen fires, which can be dangerous and hard to control.

  • Large fire

Use a large fire blanket for large fires (59 by 59 inches or 70.9 by 70.9 inches), such as grills, fireplaces, or engines. This size is ideal for covering and smothering large and intense fires, which can cause severe damage or injury.

  • Extra large fires

You can use a large fire blanket for extra large fires, such as bonfires, tents, or sheds (78.7 by 78.7 inches). This size is perfect for covering and smothering large and widespread fires, which can be life-threatening or catastrophic.

  • Personal protection

For personal protection, use a fire blanket that is large enough to cover your body (at least 47.2 by 47.2 inches). This size can be used to wrap around the body and act as a heat shield in case of escape or rescue. It can also protect someone trapped by the fire by covering them with the fire blanket and dragging them to safety.

  1. Multiple fires

For multiple fires, use more than one fire blanket for multiple fires to cover the fire completely. This can be done by overlapping the fire blankets and pressing them firmly around the edges to seal the fire. This can help extinguish multiple or complex fires, such as electrical or chemical ones.

How to Clean and Reuse the Tonyko Fire Blanket After Use

Cleaning and reusing the fire blanket can extend its lifespan and performance and reduce waste and cost. However, following the proper steps and precautions is important to ensure the fire blanket is safe and effective for future use.

Steps to clean the fire blanket:

Wait to cool:

  • Wait until the fire blanket is completely cool. 
  • Do not touch or remove the fire blanket until it is no longer hot or smoldering, as it can cause burns or injuries.

Rinse: 

  • Rinse the fire blanket with water and mild soap. Use a hose or a sink to wash off any dirt, ash, or residue from the fire blanket. 
  • Use a mild soap or detergent to scrub the fire blanket gently, but do not use bleach, ammonia, or abrasive cleaners, as they may damage the fire blanket.

Drying:

  • Hang the fire blanket to dry in a well-ventilated area. 
  • Do not use a dryer or a heater to dry the fire blanket, as this may shrink or melt the fire blanket. Instead, hang the fire blanket in a sunny, airy place and let it dry naturally and completely.

Check for holes:

  • Check the fire blanket for any holes or damage. Inspect the fire blanket for wear and tear, such as holes, tears, frays, or burns. 
  • If the fire blanket is intact, you can fold it and store it in its case. 
  • If the fire blanket is damaged, dispose of it and replace it with a new one.

Tips and warnings on how to clean and reuse the fire blanket

  • Do not reuse it if damaged or contaminated, which may compromise its effectiveness and safety.
  • Do not wash the fire blanket too frequently or harshly; it may weaken its fabric and structure.
  • Do not store the fire blanket in a damp or humid place, it may cause mold or mildew to grow on the fire blanket.
  • Do not fold or crease the fire blanket, affecting its performance.

How to Store and Maintain the Tonyko Fire Blanket Properly

Storing and maintaining the fire blanket properly can help to preserve its quality and effectiveness, and ensure its readiness for use in case of fire emergencies. However, following the proper tips and advice is important to avoid damaging or degrading the fire blanket.

Tips on how to store and maintain the fire blanket

  • Choose a convenient and accessible location to hang the fire blanket, such as near the stove, fireplace, or grill. This will allow you to reach and use the fire blanket quickly and easily when needed.
  • Avoid exposing the fire blanket to direct sunlight, moisture, or heat sources. These can cause the fire blanket to fade, warp, or deteriorate over time.
  • Do not fold or crease the fire blanket, affecting its performance. Folding or creasing the fire blanket can create weak spots or gaps that may reduce its ability to smother the fire.
  • Inspect the fire blanket regularly for any signs of wear and tear. Check the fire blanket for holes, tears, frays, or burns that may compromise its effectiveness and safety.
  • Replace the fire blanket if it is expired, damaged, or contaminated. The fire blanket has a shelf life of about 5 years, after which it may lose its fire resistance or heat insulation.

Comparing Tonyko Fire Blanket with Other Brands and Models of Fire Blankets

Comparing the Tonyko fire blanket with other fire blankets can help you choose the best one for your needs and preferences and get the best value for your money.

Different fire blankets may have different features, such as price, size, material, ratings, and so on, that may affect their performance and suitability for different situations and places.

Brand: Tonyko

Price: $11.99 – $33.99

Size: 39.3 by 39.3 inches to 78.7 by 78.7 inches

Material: 100% fiberglass fabric

Features: Flame retardant, heat resistant, easy to use and store, meets EN-1869:1997 standard

Tonyko Fire BlanketBuy On Amazon


Brand: JJ Care

Price: $16.92 – $85.99 

Size: 40 by 40 inches to 78.7 by 78.7 inches 

Material: Premium silica fiberglass cloth 

Features: Flame retardant, heat resistant, easy to use and store, meets EN-1869:1997 standard, comes with hooks and gloves 

Tonyko Fire BlanketBuy On Amazon


Brand: DIBBATU

Price: $21.99 – $74.81 

Size: 39 by 39 inches to 78.7 by 78.7 inches 

Material: Fiberglass cloth 

Features: Flame retardant, heat resistant, easy to use and store, meets EN-1869:1997 standard 

Tonyko Fire BlanketBuy On Amazon


Brand: AOOHOOA

Price: $24.99 – $85.94 

Size: 39 by 39 inches to 78.7 by 78.7 inches

Material: Fiberglass cloth 

Features: Flame retardant, heat resistant, easy to use and store, meets EN-1869:1997 standard, comes with hooks and gloves 

Tonyko Fire BlanketBuy On Amazon


Brand:  Inf-way

Price:  $9.99 – $49.99 

Size: 39.3 by 39.3 inches to 70.8 by 70.8 inches 

Material: Fiberglass cloth 

Features: Flame retardant, heat resistant, easy to use and store 

Tonyko Fire BlanketBuy On Amazon


The Tonyko fire blanket is comparable to the other fire blankets in size, material, and features, but it has a wider range of prices depending on the size.

  • The JJ Care fire blanket is similar to the Tonyko fire blanket, but it offers some extra accessories, such as hooks and gloves, that may enhance its convenience and safety.
  • The DIBBATU fire blanket is similar to the Tonyko fire blanket but has a lower price range and a simpler design.
  • The AOOHOOA fire blanket is almost identical to the JJ Care fire blanket but has a slightly higher price range and a different color option.
  • The Inf-way fire blanket is the cheapest and the simplest fire blanket among the five, but it has the smallest size range and the lowest ratings.

Conclusion

The Tonyko fire blanket is a fire safety tool that can extinguish various types of fire by suffocating it. It is made of 100% fiberglass fabric, a material that can resist high temperatures and smother various types of fires, including liquid and grease fires.

 It has many features, advantages, and applications that make it a reliable and effective option for fire protection. It can be used in different situations and places, such as the kitchen, fireplace, grill, car, or camping. It can also be used to wrap around the body and act as a heat shield in case of escape or rescue.

Having a fire blanket like the Tonyko fire blanket in your home, car, or workplace can make a big difference in preventing or dealing with fire emergencies. It can save lives and property and reduce the risk of injury or damage. It can also be easy to use and store and last long.


Difference between Arlo Pro 3 and Arlo Pro 4

Difference between Arlo Pro 3 and Arlo Pro 4? What You should Know! [Expert Reviews & Buyer’s Guide]

If you are looking for a smart home security camera, you might have heard of Arlo Pro 3 and Arlo Pro 4. These are two of the most popular models from Arlo, a leading brand in the industry. But what is the difference between Arlo Pro 3 and Arlo Pro 4, and which should you buy?

This article will compare the designs, features, and performance of the Arlo Pro 3 and Arlo Pro 4. We will also provide a summary of the pros and cons of each model and a recommendation for the best one for different scenarios. Read on to find out more.

The Key Difference Between Arlo Pro 3 and Arlo Pro 4

The following are some of the key differences between Arlo Pro 3 and Arlo Pro 4:

Design and installation

Arlo Pro 3 and Arlo Pro 4 have a similar design, with a white, oval-shaped body and a black, circular lens. They are both weather-resistant and can be used indoors or outdoors. However, there are some differences in their dimensions and weight. 

Arlo Pro 3 measures 3.5 x 2 x 3 inches and weighs 0.72 pounds, while Arlo Pro 4 measures 3.3 x 2 x 3.1 inches and weighs 0.68 pounds. This means that Arlo Pro 4 is slightly smaller and lighter than Arlo Pro 3, which could make it easier to mount and adjust.

Both cameras come with a magnetic mount that can be attached to any metal surface or a screw mount that can be drilled into a wall or ceiling. They also have a built-in magnet on the back that can stick to the magnetic mount. 

Installation and Setup with Arlo App or Web Browser 

Let’s explore the installation and setup of Arlo Pro 3 and Arlo Pro 4:

Arlo Pro 3:

  1. Using the Arlo app, download the app, follow the on-screen instructions, and sync the camera to the base station.
  2. For web browser setup, log in to your Arlo account, add the device, and complete the guided setup.

Advantages

  • Arlo Pro 3’s compact design ensures inconspicuous placement.
  • Seamless integration with the Arlo app streamlines the setup, making it accessible for all users.

Disadvantages 

  • Some users may find the dimensions limiting in specific installation scenarios.
  • Limited customizability might be a drawback for users seeking more advanced settings.

Arlo Pro 4:

  1. The Arlo app simplifies the setup process. Download, follow the prompts, and pair the camera with the base station.
  2. Web browser setup mirrors the app process, providing users with flexibility in how they initiate and complete the installation.

Advantages 

  • Arlo Pro 4 design maintains a user-friendly and versatile appearance.
  • Enhancements in the app and web browser setup improve the installation experience.

Disadvantages:

  • Users may find certain limitations in customization.
  • As with any new release, there may be a learning curve for users accustomed to the Arlo Pro 3.

Features and Functionality

Arlo Pro 3 and Arlo Pro 4 differ in features and functions. Some of the different features are the video quality, field of view, night vision, zoom, and audio. Check for the best features to help you make an informed choice for your home security needs.

Comparing video quality

Difference between Arlo Pro 3 and Arlo Pro 4 in terms of video quality:

Arlo Pro 3:

  • Video Quality: Crystal-clear 2K HDR video ensures sharp details in all footage.
  • Field of View: A wide-angle lens with [insert degrees] coverage captures more of your surroundings.
  • Night Vision: Enhanced night vision provides clear images even in low-light conditions.
  • Zoom: Digital zoom lets you focus on specific areas without compromising quality.
  • Audio: Two-way audio facilitates communication through the built-in microphone and speaker.

Arlo Pro 4:

  • Video Quality: The Arlo Pro 4 maintains impressive 2K HDR video quality.
  • Field of View: Similar wide-angle lens coverage ensures comprehensive monitoring.
  • Night Vision: Improved night vision capabilities for precise imaging in darkness.
  • Zoom: Digital zoom functionality remains, allowing users to zoom in on details.
  • Audio: Two-way audio supports communication via the integrated microphone and speaker.

Comparing the Integration 

Arlo Pro 3 and Arlo Pro 4:

  • Arlo SmartHub: Both cameras integrate with the Arlo SmartHub, providing a centralized hub for connectivity and security.
  • Arlo App: The Arlo app allows users to monitor, control, and customize camera settings remotely.
  • Smart Home Devices: Both cameras support integration with various smart home ecosystems, enhancing overall home automation.

Comparing Charging and Storage Options

Difference between Arlo Pro 3 and Arlo Pro 4 in terms of charging and storage:

Arlo Pro 3:

  • Charging Options: Convenient rechargeable battery with various charging options.
  • Storage Options: Flexible storage options include cloud storage plans and local storage via USB.

Arlo Pro 4:

  • Charging Options: Similar rechargeable battery with versatile charging options.
  • Storage Options: The Arlo Pro 4 offers flexible solutions, including cloud subscriptions and local storage.

Advantages and Disadvantages of Features and Functionality 

Arlo Pro 3:

  • Advantages: Proven 2K HDR video, robust night vision, and wide-angle coverage.
  • Disadvantages: Limited advancements in certain features; may need more cutting-edge technologies.

Arlo Pro 4:

  • Advantages: It continues the legacy of excellent video quality, potential improvements in night vision, and additional features.
  • Disadvantages: Limited drastic changes from its predecessor may offer a small technological leap.

Performance and reliability

Securing your home goes beyond visuals and extends into intelligent detection and reliability. About the Arlo Pro 3 and Arlo Pro 4 performance and reliability. This comparison explores motion detection, activity zones, notifications, and siren capabilities.

Comparing Motion Detection, Activity Zones, Notifications, and Siren Comparison

Difference between Arlo Pro 3 and Arlo Pro 4 in terms of motion detection, activity zones, notifications, and siren: 

Arlo Pro 3:

  • Arlo Pro 3 employs advanced motion detection technology to alert you to potential threats.
  • Customizable activity zones let you focus on specific areas for more precise monitoring.
  • Instant notifications keep you informed about any detected motion or events.
  • The built-in siren serves as a deterrent and alerts you to potential threats.

Arlo Pro 4:

  • Arlo Pro 4 enhances motion detection capabilities, ensuring accurate alerts.
  • Like its predecessor, Arlo Pro 4 supports customizable activity zones for targeted monitoring.
  • Real-time notifications keep you in the loop with any detected activity.
  • Arlo Pro 4 continues the tradition of a built-in siren for added security.

Comparing Performance in Different Weather Conditions, Lighting Situations, and Wi-Fi Connectivity 

Arlo Pro 3 and Arlo Pro 4:

  • Both cameras are designed to withstand various weather conditions, ensuring outdoor use in rain or shine.
  • Adaptive technology ensures effective performance in lighting conditions, including low and bright sunlight.
  • Both cameras support stable Wi-Fi connectivity, with compatibility across standard routers.

Comparing Security and Privacy Considerations 

Arlo Pro 3:

  • Arlo Pro 3 incorporates encryption and secure connections to protect your footage.
  • Advanced privacy features, such as customizable activity zones, enhance privacy.

Arlo Pro 4:

  • Arlo Pro 4 prioritizes secure connections and data encryption.
  • Continued emphasis on privacy with customizable activity zones and robust security features.

Advantages and Disadvantages of Performance and Reliability 

Arlo Pro 3:

  • Advantages: Established reliability, proven motion detection, and customizable activity zones.
  • Disadvantages: Limited significant advancements in performance; may need more cutting-edge technologies.

Arlo Pro 4:

  • Advantages: It has enhancements in motion detection and additional features.
  • Disadvantages: The improvements may need to make significant leaps in performance.

Price and value

When investing in a home security camera, you must balance cost, value, and the overall package. We will break down the price, warranty, customer service, and value proposition of the Arlo Pro 3 and Arlo Pro 4, including the essential Arlo Smart plan.

Comparing Cost, Warranty, and Customer Service Comparison 

Arlo Pro 3:

  • Cost: The Arlo Pro 3 has a competitive price tag, providing a balanced package for its features.
  • Warranty: Arlo Pro 3 offers a warranty that ensures your peace of mind.
  • Customer Service: Arlo’s customer service is renowned for responsiveness and helpful assistance.

Arlo Pro 4:

  • Cost: The Arlo Pro 4 is priced competitively, offering a similar cost structure to the Arlo Pro 3
  • Warranty: Similar to the Arlo Pro 3, the Arlo Pro 4 often has a warranty period.
  • Customer Service: Arlo maintains consistent customer service quality, ensuring users receive timely support.

Comparing Arlo Smart Plan Subscription Requirements 

Arlo Pro 3 and Arlo Pro 4:

  • Both cameras require a subscription to the Arlo Smart plan to unlock certain advanced features, such as extended cloud storage, advanced motion detection, and more.
  • Discuss the pricing structure of the Arlo Smart plan and its tiers.

Advantages and Disadvantages of Price and Value 

Arlo Pro 3:

  • Advantages: Balanced cost, comprehensive features, and a reliable warranty.
  • Disadvantages: Requires a subscription for certain features; may lack cutting-edge technologies.

Arlo Pro 4:

  • Advantages: Competitive pricing, reliable features, and customer-friendly warranty.
  • Disadvantages: Subscription is needed for select features, which may not offer an increase in value.

Dual-band Wi-Fi

Dual-band Wi-Fi operates on two frequency bands, 2.4 GHz and 5 GHz. This dual-band capability allows devices to choose between the two bands based on their specific needs, providing more flexibility and reducing potential interference.

Benefits for Arlo Pro 4 and Arlo Pro 5S Cameras

  • Dual-band Wi-Fi enables faster data transfer speeds and greater bandwidth, ensuring smoother streaming and video transmission for Arlo Pro 4 and Arlo Pro 5S.
  • The ability to switch between bands minimizes interference from other devices and networks, contributing to a more stable connection.
  • Arlo Pro 4 and Arlo Pro 5S can leverage the dual-band capability to optimize their performance based on network conditions.

Comparing Wi-Fi Performance and Compatibility 

Arlo Pro 3:

  • Wi-Fi Features: The Arlo Pro 3 operates on a single band (2.4 GHz).
  • Compatibility: Suited for standard Wi-Fi networks but may experience more interference in congested environments.

Arlo Pro 3Buy On Amazon 

Arlo Pro 4:

  • Wi-Fi Features: Arlo Pro 4 supports dual-band Wi-Fi (2.4 GHz and 5 GHz).
  • Compatibility: Enhanced performance in various network environments with multiple connected devices.

Buy On Amazon 

Arlo Pro 5S:

  • Wi-Fi Features: Similar to Arlo Pro 4, Arlo Pro 5S supports dual-band Wi-Fi.
  • Compatibility: Optimized for performance in diverse network conditions, offering stability and speed.

Arlo Pro 5SBuy On Amazon 

Advantages and Disadvantages of Dual-Band Wi-Fi

Advantages:

  • Ideal for bandwidth-intensive tasks like video streaming.
  • Minimizes potential disruptions from other devices.
  • Optimizes device performance based on network conditions.

Disadvantages:

  • The 5 GHz band may have a shorter range than 2.4 GHz.
  • Some older devices may only support 2.4 GHz, limiting their compatibility.

Floodlight

The floodlight feature in Arlo Pro cameras is a built-in, high-intensity light source designed to illuminate the surroundings when triggered by motion detection or user commands. This feature significantly enhances security by providing clear visibility during nighttime or low-light conditions, acting as a deterrent and aiding in identifying potential threats.

Arlo Pro 3:

  • The floodlight in Arlo Pro 3 delivers a powerful brightness.
  • Colour Options feature white light, providing clear and natural illumination.
  • Adjustable settings allow users to customize the duration and sensitivity of the floodlight.

Arlo Pro 4:

  • The Arlo Pro 4 maintains a competitive brightness level, similar to its predecessor.
  • Colour Options: Generally offers a white light option for optimal visibility.
  • Users can customize the floodlight settings, tailoring them to specific preferences.

Arlo Pro 5S:

  • Brightness: The floodlight in Arlo Pro 5S continues the tradition of delivering powerful illumination.
  • Colour Options: Typically features a white light for adequate visibility.
  • Settings: Adjustable settings provide users with control over the floodlight’s behaviour.

Advantages and Disadvantages of the Floodlight Feature

Advantages:

  • It acts as a deterrent and aids in identifying potential threats.
  • Ensures clear visibility during nighttime or low-light conditions.
  • Adjustable settings offer flexibility in tailoring the floodlight to specific needs.

Disadvantages:

  • In residential areas, the powerful floodlight may cause disturbance to neighbours.
  • Continuous use of the floodlight may contribute to increased power consumption.

Are Arlo Pro 3 and Pro 4 compatible?

Yes, Arlo Pro 3 and Pro 4 are compatible with each other. You can connect both cameras to the same Arlo SmartHub, Base Station, or Wi-Fi router.

However, there are some differences between the two models, such as the dual-band Wi-Fi and the local storage features that are only available on the Arlo Pro.

How to set Arlo camera with base station

Setting up your Arlo camera with SmartHub or Base Station is easy and convenient. Connect your camera to the SmartHub or Base Station using the Arlo Secure App. 

Here are the steps you need to follow:

  • Launch the Arlo Secure App and tap Add New Device.
  • Select your camera from the list and follow the in-app instructions.
  • When prompted, press the Sync button on your camera and wait for the LED to blink blue.
  • Check your camera’s live stream in the app to verify the connection.
  • Insert the camera into the housing and secure it.

Can you use Arlo cameras without subscriptions?

You can use Arlo cameras without a subscription, but you will miss some features and benefits. Without a subscription, you can only stream live video from your camera to your smartphone via the Arlo app and store recorded footage locally if you have an Arlo base station. 

However, you will not have access to cloud storage, advanced motion detection, customizable motion zones, or 24/7 monitoring. These features are only available with an Arlo Smart subscription, which starts from $2.99 per month per camera.

 Depending on your needs and preferences, consider getting a subscription to unleash the full potential of your Arlo cameras.

Can you use third-party apps with Arlo cameras?

The short answer is no; you cannot use third-party apps with Arlo cameras. Arlo cameras are designed to work only with the Arlo app, the Arlo web portal, and the Arlo SmartHub or Base Station. 

This ensures the security and privacy of your video footage and personal data. Using third-party apps may compromise the functionality and performance of your Arlo cameras and violate the terms of service.

However, you can use Arlo cameras with third-party smart home platforms like Amazon Alexa, Apple HomeKit, Google Home Assistant, IFTTT, and Samsung SmartThings. These platforms allow you to integrate your Arlo cameras with other smart devices and control them with voice commands or automation.

Difference between Arlo Pro 3 and Arlo Pro 4Buy On Amazon 

You can also view live streams, receive notifications, and access some features of your Arlo cameras on compatible devices, such as smartwatches, phones, TVs, and speakers. To use Arlo cameras with these platforms, you must link your account with the app and follow the instructions.

Arlo cameras are incompatible with other third-party platforms or apps not officially supported by Arlo. Suppose you want to use Arlo cameras with other platforms or apps. In that case, you need to check the compatibility and availability of Arlo products in your region and follow the guidelines from Arlo support.

Conclusion

Arlo Pro 3 and Arlo Pro 4 offer robust security solutions with distinct features. Arlo Pro 3, a reliable and proven performance option, suits those seeking a cost-effective solution. Arlo Pro 4, building on its predecessor, introduces incremental improvements and dual-band Wi-Fi for enhanced connectivity.

For top-tier features, the Arlo Pro 5S stands out. Recommendation: Arlo Pro 3 is for budget-conscious users, Arlo Pro 4 is for balanced performance, and Arlo Pro 5S is for premium features. Explore further details on the Arlo website for an informed decision tailored to your security needs.


Scroll to Top