August 2023

How to Choose a Home Security System

How to Choose a Home Security System for Your Safety [Buyer’s Guide]

How to Choose a Home Security System! A home security system no longer requires holes in your wall and wires running to the entrance and windows. Today, you can install security cameras in a few minutes thanks to these devices’ smart and wireless nature. Even better, you enjoy better prices and better devices as manufacturers try to outdo their competitors. 

The modern home security system works as a smart home hub. You can control the lights, locks, and thermostats from the same security smartphone app. You will encounter several DIY systems as you consider ways to improve home security. Knowing which system is best for your home can be the difference between your peace of mind and burglars breaking into it. Read on to learn more. 

Assessing Your Security Needs 

Is your home secure? Do you need a home security system? 

You need a home security assessment to answer the questions above. A complete assessment will help you determine any vulnerabilities in and around the home. When a home is secure, criminal activities will slow down. Security cameras may even deter criminals from coming into your home. 

A good home security assessment should focus on the house and the neighborhood. Some factors you need to consider include:

  • Valuables in your home 
  • Visibility and amount of lighting in the home 
  • Security of the doors and windows 
  • Presence or absence of monitored security alarms
  • Factors that could make burglars target your home 

A home needs several security layers to keep valuables and homeowners safe. If you have two or more security systems, burglars will find it challenging to break into your home. The nature and number of systems you need will depend on how secure the neighborhood is. Some of the factors that you need to consider include:

  • Recent break-ins in the neighborhood 
  • Street lighting 
  • Neighborhood watch programs 
  • Location of your home in a neighborhood 

Criminals always watch and recreate successful break-ins. If a house in your neighborhood has had a break-in, there is a chance that burglars will try breaking into a similar house. This calls for you to improve your security systems. Again, if your street doesn’t have sufficient lighting, criminals can hide in the shadows and plan their attacks. With sufficient lighting, neighbors and the police can easily observe criminals in their acts. 

Some neighborhoods have watch programs—their brothers’ keepers. When the neighbors work together to fight crime in a neighborhood, the risks of break-ins reduce. During the security assessment, check the following areas of your home:

The Outdoor Living Space

Is it easy for burglars to access your yard? Do you have secure locks for gates in your yard? Are there bushes around your house? Is your yard well-lit? You must keep your lawn mowed and clean; collect any newspapers, leaves, and debris that may make burglars think you are not home. Your house number needs to be visible so police can identify it quickly. If you work with electricians and other professionals, vet them properly to ensure they are not a security risk. 

You need to consider whether there are exterior security features that can deter burglars from breaking into your home. For instance, having alarm company signs, video doorbells, exterior security cameras, and motion detectors can deter criminals. 

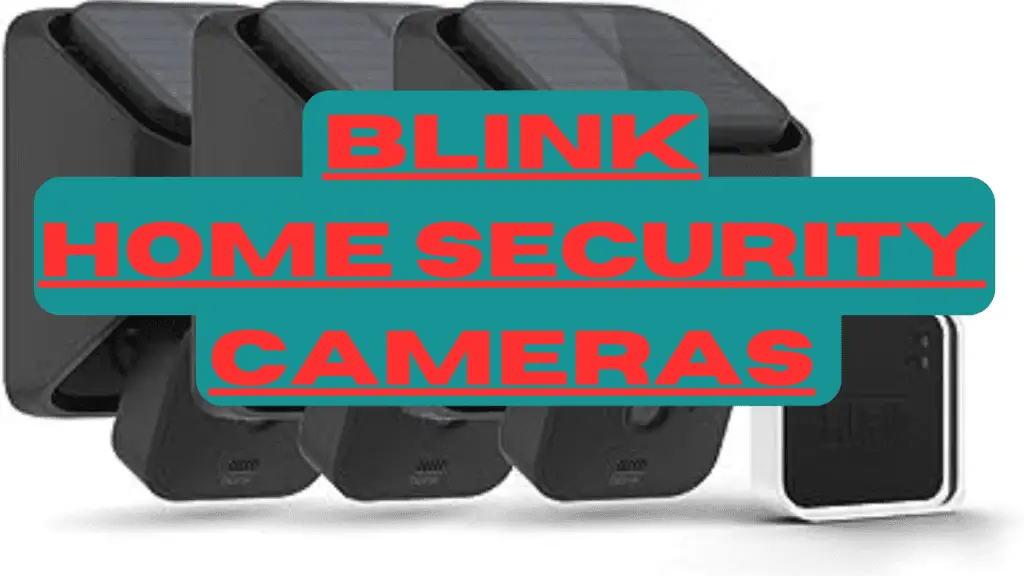
Blink Home Security Cameras

Buy On Amazon

Windows 

Are your windows safe? Do they have secondary locking devices? Do you have glass breakers and motion sensors in your windows? Burglars might want to pass through windows to avoid tripping an alarm system in your home. As such, you must ensure that you have several security systems to keep your windows secure. These systems include security bars, secondary locking devices, solar screens, double-paned windows, and security window films. 

Doors 

How easy can it be for burglars to break into your home through the door? Is your door made of solid wood or steel? Do you have security features such as an anti-kick solution, a peephole, and an entrance door camera? You need to have a picture of who is at the door, so install a video doorbell and ensure the door is not easy to break. 

Home’s Interior 

Burglars move quickly to carry your valuables before you call for emergency backup. They will move fast to your bedroom, where you keep your valuables. To deter them, you need a monitored home security alarm system. The alarm needs to work even when there is no power. Installing security panels where intruders can see them through the window can deter them from breaking them. Invest in a secondary security panel in a less secure neighborhood and often change alarm codes. 

Defensive Plan 

If a burglar attacks your home today, do you have any plans to fight them? Everyone in the household should know their responsibilities in case of an attack. A safe room should be designated as a safe house where members can meet in case of an attack. Do you have a dog? Are there weapons in the house? Do you know how to use weapons in the house? Does everyone in the house know basic security protocols, such as keeping doors locked after 7 p.m.? If you have no plan, create one as you consider improving your home security system. 

Garage and Vehicle Safety 

Burglars can access your home through the garage. As such, you need a secure garage door with an emergency release. You need to change the factory security settings so no one will have access when driving off to work. The door that links your garage and your house should be safe—either solid-core wood or steel. 

Part of your home security assessment can be how safe you feel when you are home or away. If you do not feel safe, there is a high chance your home has several vulnerabilities that you need to address. 

You can also contact a security company to assess your home’s security state and give you a report. These companies come with a checklist that checks the security systems in your home for effectiveness. After the assessment, the company will give recommendations on how to improve home security. 

How to Choose a Home Security System: Factors to Consider 

What is your budget, and what are your home security goals? After a thorough security assessment, deciding how to improve home security and the best systems to pick will be easier. Here are factors to consider:

Budget and Cost Considerations

Although you can get an effective home security system on a budget, you should always maintain your safety at a lower price. Consider the one-time installation fee and the monthly security system monitoring fees when considering your budget. You must read the fine print before you sign a deal with any security company to ensure you can meet the costs. When working out the costs of a home security system, consider the following:

Cost of Equipment 

You need devices such as indoor and outdoor cameras, motion sensors, video doorbells, and floodlights. When shopping, you may go for a whole-house system that brings all the necessary devices, or you can go for one device at a time. You will need a base station, security cameras to match the size of your house, and a video doorbell. Other devices include a motion detector, contact sensor, panic button, and glass break sensor.

Installation

You can pay between $100 and $400 for security system installation. However, most systems today are DIY friendly, so you never have to pay for installation. Even better, most companies offer free installation, so you can cut down on costs and save for monthly subscriptions. 

Activation and Monitoring Fees 

Some security systems require an activation fee. If you are on a budget, go for systems that do not require that. Instead, concentrate on comparing monthly monitoring fees from different companies. Monitoring companies offer round-the-clock services, so your home is safe even when you are away. When the security alarm goes off, the surveillance company will alert emergency response services. Depending on the level of security you need, monthly subscriptions can cost between $20 and $60. 

Smart Home Features 

Automation features are relatively more expensive. Modern systems integrate with smart home features and are safer. You may need smart locks, smart lights, smart smoke and CO detectors, and smart doorbells. Even for such systems, the costs vary from one brand to the next; some cost as little as $15, while others cost as much as $500 

Today, wired home security systems cost more because the cost of installation is high. The popularity of wireless systems has increased competition between brands, leading to reduced prices. 

Other factors that determine the cost of security systems include: 

  • The brand you choose
  • The cost of maintenance 
  • The need for permits and their costs
  • Cancellation fees

How to Choose a Home Security System

Buy On Amazon

Scalability and Expandability

A la carte home security systems are common. These systems allow you to purchase the equipment you can afford and add more when your budget allows. You can shop for motion sensors, security cameras, and glass break sensors for as little as $80 and then scale the system from there. 

Scalability allows you to add devices to your security system to create an effective security system. Today, wireless security systems make it easier for you to expand in the future. The wireless systems are customizable and flexible enough to add or remove devices from the network. The benefit of these wireless systems is ease of installation, as you can mount them or place them on a surface quickly and add them to the network. 

Wired security systems take time to scale. Unlike the smart wire-free systems that you can place on a surface, wired systems require more work. You need a system that is flexible enough to accommodate additional devices. 

Technology advances are rapid, and you need a system that evolves with your security needs. Go for smart devices for the best scalability. Again, look for a brand that integrates with your existing security devices. 

Ease of Installation and Use

Modern home security systems are wireless. These systems use Wi-Fi, cellular communications, and radio frequencies to keep your home safe. You can still get wired systems, but these have become less common. It is easier for burglars to cut a landline than hack radio frequencies. Without wires, you can install home security systems in minutes. After installation, these systems are not easy to disarm, making them safer. 

Use a wireless smart system if you need a system that installs quickly. The cameras, sensors, detectors, and alarm systems connect to your smartphone through Wi-Fi. Most of these will use a Sync Module to connect to Wi-Fi and, consequently, to your smartphone through an app. You can then add or remove devices from your security network and change the settings of cameras and other devices from the app. Most apps feature simple interfaces that make them easy to use, so you can customize your security system in a few minutes. 

Professionals install wired security systems. Unless you only need one or two standalone cameras, a whole-house home security system will be challenging for the average homeowner to install. Professionally-installed systems will be more expensive for you compared to DIY units. If your budget allows, go for professionally installed systems and save time and effort. When you are on a budget, pick DIY options, as they are cheaper. 

How to Choose a Home Security System

Buy On Amazon

Monitoring Options

You can opt for professional monitoring or self-monitoring. Professional monitoring is excellent for a hands-free security experience. With professionals looking after your home’s security, you will have peace of mind, especially when you are away from home. This monitoring option ensures that you get a notification, and the security company also gets one. Wherever you are, the security surveillance company will contact emergency responders to avert the threat.  

A self-monitoring home security system comes with a smartphone app that can recommend ways to improve home security. You can monitor the home’s security from a smartphone app. You may never pay a dollar for monitoring, but the notifications only come to you when you are miles away from home. If you are on a budget, choose self-monitoring. 

Home Automation Integration

You need a home security system that you can control from anywhere. Most modern home security systems connect to a mobile app, from which you can control them. The app should be reliable and accommodate other automation tools in your home. 

Using the same brand for all your security systems will make it easy to control smart lights, cameras, smart locks, and thermostats from one app. In most cases, brand apps only accommodate devices from their brand. However, in some instances, you can use one app for devices from different brands. Even better, most smart home systems integrate with Amazon Alexa and Google Assistant. 

If you choose a system that does not integrate with your smart home systems, you will miss out on the scalability of modern systems. 

Customer Support and Reputation

You need a reputable provider for your home’s security system. Companies such as ADT and Brinks are famous for their services and devices. For such companies, you are sure to find sufficient information online about their services and products. With that information, you can decide which company best suits your needs. 

You may enjoy personalized monitoring services if you choose a smaller regional or local company. However, you need to ensure that they have a valid license. Having a license means the company complies with local laws and regulations, and you are safe. Further, you can check their certifications. Certifications from different security organizations prove that a security company delivers the services it promises. These small local companies may have reviews online; read them before signing up. 

You can tell how promptly a company responds to queries and complaints from online reviews on third-party sites such as Google Reviews. 

Researching and Comparing Home Security Providers 

If you know how to improve home security, the next step should be picking a brand for your home security systems. Take your time comparing brands online and consider the following areas:

Range of Equipment 

You need several devices to create a comprehensive whole-house security system. For starters, you need a set of indoor and outdoor cameras to monitor who comes in and leaves the house. When comparing these, check the camera quality, sensitivity of the camera sensors, and two-way audio features. Today, most brands offer 1080p HD resolution, but you might find a company that offers 2K or 4K video quality.

You also need contact sensors. These are ideal for doors and windows and send an alert whenever they open. On the other hand, motion sensors are for outdoor use and rooms with multiple doors and windows. For sensors, you need to consider sensitivity from different brands and customizability. 

Alarms and sirens are essential elements of your security system. When shopping, compare the alarm systems from different brands and their response times. Other equipment to compare includes glass break sensors, panic buttons, garage-door-tilt sensors, and base stations. 

App 

Because modern systems are easy to control via an app, you should compare apps from different brands. You need an app with a simple interface that offers advanced customization features. A good app should control all aspects of the home security system and even offer recommendations on how to improve it. Choose an app that allows you to quickly add or remove devices from your security network and that you can use with ease. 

Installation and Monitoring Fees 

After seeing the features of the devices and apps offered by different brands, you need to consider their costs. Compare what the different brands charge yearly to monitor your home and what they charge to install their systems. Most national companies do not charge an installation fee, which is great when running on a tight budget. If a local company charges an installation fee, compare their overall cost to other companies. 

Maintenance 

Security systems need maintenance; some need more frequent maintenance. Wireless systems require you to replace their batteries every year, some after two years and others only after a few months. The battery life will depend on how often you record video clips from your security cameras. If you record long videos several times a week, you may need to replace the battery after a few months. Besides that, these wireless systems only need cleaning to minimize obstructions. 

Wired systems require less maintenance. Once these systems are set up, they work efficiently unless the wires sustain damage. However, the systems may not work when there is a power outage. 

Reviews 

Let other consumers guide your choice of a home security system. You already know how to improve your home security, but these online reviews can tell you which systems will help. Look for reliable third-party sites like Google Reviews, TrustPilot, and the Better Business Bureau. See what consumers say about the quality of the products, the cost of monitoring and maintenance, and the customer-friendliness of the company. 

Making the Final Decision 

The number of home security brands keeps increasing. Several new entrants bring newer technologies. However, all these companies compete heavily on the price of their products. When shopping, you need the best quality at an affordable price. Some companies charge as little as $100 a year for professional monitoring. You know how to improve home security, and if a company meets that criterion and offers affordable products and services, go with it. 

If your budget allows, work with a security professional. These professionals have handled different systems, know which works best, and will be more affordable upfront and in the long run. You can use their security recommendations to reduce the cost of home security while making your home safer. 

Conclusion

Do you know how to improve home security? Knowing what needs doing is the first step in creating a safer home for your family, valuables, and pets. The security market is awash with brands and devices that can improve your security and give you peace of mind. You need a system that protects you at home, at work, or on vacation. A system has to integrate with your smart home systems to send you notifications wherever you are. Start shopping today. 

Wet Chemical Fire Extinguishers: Fire Safety 101 [Expert Reviews & Buyer’s Guide]

Are you looking for a fire extinguisher for your kitchen? Whether at home or in a professional kitchen, wet chemical fire extinguishers will help you keep your kitchen safe from fires related to cooking oils, lard, fats, and olive oils, among others. 

You can also use the extinguishers for class A fires involving flammable solids such as paper, textiles, plastics, and wood. Even better, some brands are ideal for class B fires caused by flammable liquids such as petrol, kerosene, paint, and diesel, among others. Like all other fire extinguishers, you need training on how to use the extinguishers effectively. Read on to learn more. 

What is a Wet Chemical Fire Extinguisher? 

Also known as class F fire extinguishers or ABF fire extinguishers, wet chemical fire extinguishers contain potassium as the extinguishing element. It releases the potassium as a fine mist covering the cooking oils’ surface to extinguish a fire. The extinguishers feature a YELLOW-colored label on their bodies that reads WET CHEMICAL. It features a relatively long hose with a lance attachment, making it safer. Because hot oil tends to pop, the long hose keeps you safe so it doesn’t land on your face or hands. 

wet chemical fire extinguishers

You can use the extinguisher on all premises that fry foods. These include a home kitchen, burger bar, restaurant, hotel, and workplace kitchen. It is effective in fighting class A and class F fires. These wet chemical fire extinguishers are in classification K. The “K” classification suits them for commercial cooking appliances like deep-fat fryers. However, because the potassium in them is electrically conductive, users require training to use them to avoid electrical accidents. It also means you must switch off the appliances before using the fire extinguishers. 

Wet chemical fire extinguishers are the only ones effective against cooking oil. Other extinguishers, such as water, foam, powder, and CO2, will aggravate cooking oil fires. When hot oil comes into contact with other substances, such as water, it sizzles and pops. 

Unless the wet chemical extinguisher is cleared for use on class B fires, always assume that the extinguisher only puts out class F fires. 


How Do Wet Chemical Fire Extinguishers Work?

Wet chemical fire extinguishers contain potassium acetate, potassium citrate, and potassium carbonate. These potassium salts come out as a fine mist that creates a soapy layer when they land on the surface of the hot cooking oils. This soapy layer creates a cooling effect that smothers the fire. The soapy layer also acts as a barrier when it coats the surface of the oil, so splashes will not get to you. 

The light nature of the mist ensures that the fat does not splash. Again, potassium does not react with the fat, so sizzling and popping do not occur. 

Advantages and Limitations of Wet Chemical Fire Extinguishers 

Pros 

  • Fast Action: Wet chemical fire extinguishers release a fine mist that instantly cools the surface of the cooling oil and creates a barrier. 
  • No Re-Ignition: The fine mist from the extinguisher leaves a soapy barrier on the cooking oil’s surface, preventing re-ignition.  
  • Low Pressure: Wet chemical extinguishers release a fine mist at low pressure, ensuring no splashes or injuries to the user. 
  • Easy Cleanup: Although the extinguisher leaves residue behind, it is easier to clean than a dry chemical powder extinguisher. You will not use the cooking fat after extinguishing the fire, as the potassium is unsafe for human use. 
  • Long Hose: Wet chemical fire extinguishers have relatively long hoses. This allows you to use them from a safe distance to protect you from injuries in the event of a splash. 
  • Class F Fires: This is the only extinguisher for cooking oil fires. 

Cons 

  • Corrosive Residue: The substance inside wet chemical fire extinguishers is alkaline. If left to sit on metals after putting out a fire, the substance can corrode aluminium and other metals. As such, you need to clean it up immediately. 
  • Chemical Mist Irritates Eyes and Skin: You need to be safe from the sprayed mist as it can irritate the eyes and skin, causing discomfort. If the mist comes into contact with your skin, clean it immediately. 
  • Not Suitable for Electrical Fires: Potassium is a conductive material. As such, it will aggravate the fire and increase the risk of electric shock when used for electrical fires
  • Toxic Fumes: The fumes from wet chemical fire extinguishers poison cooking oils. During use, be careful not to spray the mist on food items. Open the windows and door to ventilate the kitchen after use. 

How To Use a Wet Chemical Fire Extinguisher 

Wet chemical fire extinguishers feature an extended applicator. During use, move the hose in slow circular movements to gently apply the fine mist in spray form. The mist comes out under low pressure to cover the surface of the burning cooking oil, emulsify it, and cool it.  

Hold the extinguisher and aim the applicator tip at the burning oil to put out a fire. The tip needs to be at least a meter from the burning oil. Squeeze the lever and move the applicator in circles around the base of the fire. Here is a step-by-step procedure:

  • Turn off the deep fat fryer to reduce the risk of an electric shock. Potassium is conductive and should not come into contact with electricity. 
  • Hold the applicator of the extinguisher at arm’s length and let the nozzle sit about a meter from the base of the fire. 
  • Remove the pin and squeeze the lever so the fine mist falls gently on the burning cooking oil. 
  • Spray the entire contents of your extinguisher, even if the fire goes out quickly. This allows the mist to create a barrier that ensures no re-ignition risk. 

To keep wet chemical fire extinguishers, you need to have a professional inspect them every twelve months. However, if your environment has more fire hazards than standard, you should inspect the extinguisher every six months. After five years, wet chemical extinguishers require a hydrostatic pressure test. The test checks the extinguisher’s effectiveness and the chemical’s condition inside the cylinder. You also need to recharge the extinguisher after discharging it. After a recharge, wet chemicals need testing every three years. 

Wet chemical extinguishers may need to bear a tag showing the last inspection date. After a recharge, do not place the extinguishers in extremely cold areas. 

Wet chemical fire extinguishers can last up to ten years for home use. However, you need to check them regularly to ensure that:

  • The pressure level is as recommended 
  • The nozzle has no obstruction 
  • The pin and tamper seal is intact 
  • No leaks
  • Has no dent 
  • No rust that can affect the performance of the cylinder 
  • No signs of wear 
  • No chemical deposits on the cylinder 

After use, you need to clean up to prevent the corrosion of parts. The wet chemical from the extinguisher can irritate your skin. As such, wear protective goggles and gloves to protect your eyes and skin. Soak up the residue with wet paper towels or pieces of cloth and remove it. Wash the affected area with warm water until you remove all residue. Soak up any remaining residue as you wipe the surface. After the cleanup, dispose of the paper towels or cloth as normal waste. 

When using wet chemical fire extinguishers, you need to watch out for the following:

  • Corrosion: Do not leave the wet chemical on metal surfaces for long, which could cause corrosion. 
  • Irritation: Wash off any wet chemical that falls on your skin to prevent skin irritation. If irritation persists even after washing your skin, seek medical attention. 
  • Disposal: The wet chemical is unsafe to dispose of down the drain as it can corrode some metals. 

You will need to refill and recharge wet chemical fire extinguishers every five years. If you last used the extinguisher five years ago, discharge it and recharge it. You need to let a professional trained in handling pressurized chemicals discharge and recharge the extinguisher. If the recharge is not well-handled, the extinguisher could malfunction when needed. The refill process goes as follows:

  • Discharge the extinguisher into a discharge bag.
  • Remove the hose and valve and clean them with a soft cloth. Use a solvent-free cleanser to remove the dirt on the sides of the cylinder. Solvent-based products can damage the plastic parts of the pressure gauge. 
  • Repair or replace damaged parts of the extinguisher. Abrasions, dings, rust, welding damages, and other damages can affect the extinguisher’s effectiveness. 
  • Fill the cylinder with wet chemicals as specified on the label using a funnel.
  • Re-pressurize the extinguisher and test if it meets the recommended pressure level.
  • Reconnect the extinguisher hose and connect the pin
  • Weigh the cylinder

You can drop off the wet chemical extinguisher at the local fire department at the end of its functional life. The cylinder is a dangerous good and should not be part of your household waste collection. 

Wet Chemical Fire Extinguishers

Wet Chemical vs Other Fire Extinguisher Types 

Wet chemical fire extinguishers only fight class A and F fires. If your premises are at risk of fire outbreaks from different fuel sources, you might need one or two other fire extinguishers. Having a suitable fire extinguisher is essential to meeting fire safety regulations. 

To pick the suitable fire extinguisher, you need to understand the different classes of fire as follows:

  • Class A fires that involve combustible solids such as wood, textiles, paper, and plastics
  • Class B fires result from flammable liquids such as petrol, diesel, paint, turpentine, and kerosene, among others 
  • Class C fires that result from flammable gases such as methane and butane 
  • Class D fires that result from combustible metals such as potassium 
  • Class F fires caused by cooking oils
  • Electrical fires that involve electrical equipment 

Depending on the type of fire you want to extinguish, you can choose between five types of extinguishers:

Foam Extinguishers 

These extinguishers put out class B fires. They are water–based and most effective in fighting class A fires. The extinguishers feature a cream-colored label and work by creating a cooling effect on the fuel that causes a fire. Spraying on a fire creates a barrier between the fuel source and the flame. The extinguisher comes in handy in buildings that feature many organic materials, such as warehouses, hospitals, schools, and residential properties. It also works for premises that store flammable liquids such as petrol and diesel. Place the extinguisher near exits that pose a risk for class A and B fires. 

Water Extinguishers 

You can use water extinguishers for class-A fires. The extinguisher features a bright red label and works to prevent fires caused by organic materials such as textiles, cardboard, coal, wood, paper, and plastics, among others. You should never use them for fires caused by flammable liquids, oils, or electricity. 

The water fire extinguisher works by cooling the heat from the fire. You should place them on exits with risks for class A fires. 

Some water fire extinguishers may have a spray nozzle. The spray nozzle allows the water to cover a larger area faster than a jet nozzle. You can also go for water mist fire extinguishers that release water in mist. They have a unique nozzle that releases microscopic mist that reduces the oxygen in the air to suffocate a fire and cool the surface of a fire. 

Buy On Amazon

Dry Powder Extinguishers 

Also known as ABC fire extinguishers, these units have a blue label. They are ideal for fighting class A, B, and C fires. They feature mono ammonium phosphate as the main extinguishing chemical. During use, the powder creates a blanket on top of the fire, suffocating it. The powder is not ideal for indoor use, as inhaling it is risky. After use, the residue requires immediate cleaning as it can harden if left for too long. You can also use the extinguishers for electrical fires in appliances rated 1000v or lower. 

There are specialist dry powder fire extinguishers that you can use to put out metal-related fires – one for lithium-ion fires and another for all other metal fires. It is ideal for garage forecourts, welding businesses, and premises with many flammable organic materials, liquids, and gases. 

Carbon Dioxide (CO2) Fire Extinguishers 

CO2 fire extinguishers are ideal for electrical fires. They smother a fire by reducing oxygen to suffocate the fire. You can use these extinguishers in computer server rooms. Besides electrical fires, these extinguishers effectively put out class B fires involving flammable liquids. It features a black label. 

Dry Chemical Fire Extinguisher

Buy On Amazon

Frequently Asked Questions (FAQs) 

Can I use a wet chemical fire extinguisher on an electrical fire?

No. You should never use water, foam, or wet chemical extinguishers to extinguish an electrical fire. These substances can conduct electricity and increase the risk of an electric shock. Instead, use a CO2 fire extinguisher for all electrical fires or a powder fire extinguisher for electrical equipment rated 1000v or lower. Only wet chemical fire extinguishers are used for cooking oil fires and class B fires. 

Is a wet chemical extinguisher safe to use in confined spaces?

You can use wet chemical fire extinguishers in a confined space. The cylinder releases the wet chemical under low pressure, meaning there is no risk of the chemical coming into contact with your skin. Even better, the extinguishers have a long hose which allows you to use them at arm’s length. However, after discharging the extinguisher, you must ventilate a room to release the poisonous fumes. If the fumes come into contact with your skin or your eyes, you must wash it off immediately to avoid irritation. 

Can I recharge a wet chemical fire extinguisher after use?

Recharging a wet chemical fire extinguisher is best left to professionals trained in handling pressurized chemicals. Even if the process is simple, you should let a professional do it. A recharge comes in handy after use and after five years of no service. A professional will check the cylinder to ensure it has the necessary pressure and that the nozzle and hose are free of obstructions. If you choose to recharge the extinguisher at home, you need the owner’s manual. The manual guides you through the weight of the chemical to use and the recharge process. 

Conclusion

Wet chemical fire extinguishers release dangerous fumes. As such, you need to get the necessary training from a professional before you use these extinguishers. Using these extinguishers is pretty standard – pull the pin, aim the nozzle, squeeze the lever, and sweep side to side. Even though the process is simple, training comes in handy to help you stay safe when putting out a fire. The professional will advise you on the precautions to observe during use and the best way to prevent re-ignition.

Further, picking the right location and size of the wet chemical extinguisher will enhance its effectiveness. Place an extinguisher near an exit identified as high risk for cooking oil fires. The size of the extinguisher you choose should match the size of your kitchen. For large commercial kitchens, a 6kg cylinder will come in handy. For a home kitchen, a 2kg cylinder will suffice

Fire Evacuation Plan

How To Design an Effective Fire Evacuation Plan for Your Home 

The idea of dealing with a fire at home may seem like a distant warning. However, a fire can break out at any time without notice. There are several fire hazards at home, from dropped cigarettes and cooking mistakes to faulty electrical appliances and lighting. After a fire breaks out, it can spread throughout a home in a minute or two. When that happens, you will have no time to create a fire evacuation plan or help your loved ones escape. 

Creating an evacuation plan will help keep your loved ones alive. Everyone in a household needs to know their role during an evacuation plan. Further, knowing the early signs of a fire outbreak, what to do when the fire breaks out, and the routes to follow will be critical to keeping members alive. Read on to learn more. 

Assessing Fire Risks and Hazards 

How safe is your home from a fire? Creating a fire evacuation plan starts when you identify potential risks and hazards, people who are more at risk, and the available fire prevention systems at home. A fire risk assessment examines the likelihood of a fire occurring and the severity of the damage it might cause. It also determines the equipment to prevent and stop a fire and the policies or training to help prevent it. 

Fire Evacuation Plan

Here are some simple steps to assess your home:

  • Identifying Potential Fire Hazard

Identifying fire hazards is the first step in assessing the safety of your home. While at it, you need to look out for:

  1. Ignition Risks: Can things or items start a fire in your home? These can be heating equipment, open flames, lighters, and others. List all these sources of ignition and their locations in a home. 
  2. Fuels at Home: Fuels feed a fire, facilitating its spread. Waste papers, textiles, paraffin, petrol, plastics, and several others can aid in the spread of fire. 
  3. Oxygen Sources: Fire needs fuel, heat, and oxygen to burn. Identifying oxygen sources, such as air conditioning systems, can help you start a fire. 
  4. Electrical Issues: The home’s power source might be a hazard that leads to a fire outbreak. Assessing the home’s wiring system and the safety of appliances will help you create a safety and evacuation plan. 
  • Identify At-Risk Groups 

Who will be more affected if a fire breaks out in your home today? Older adults, children, and the sick are more at risk when a fire breaks out. The three groups may need more mobility, making it easier to escape with everyone else. People working or sleeping near fire hazards are also at greater risk. The kitchen, for instance, is a risk area, and members who cook for the family need a clear fire evacuation plan. 

  • Identify Current Fire Safety Measures

Before creating a fire evacuation plan, you must know what measures are in place to help fight a fire. These measures might include:

  1. Fire Suppression System: These systems detect a fire outbreak and respond instantly to stop it. Most automatic suppression systems do not require human intervention. 
  2. Detection and Alarm Systems: Are smoke and fire detection systems at home working? These systems will give warnings to make an evacuation plan work. 
  3. Fire Fighting Systems: A home with the necessary firefighting equipment will make it easy for people to escape. When creating a fire evacuation plan, having the right equipment will help you clear the way for family members. 
  4. Policies and Training: Are there any procedures put in place to help people escape a fire? Do family members know what to do in case of a fire? Safety rules at home reduce the possibility of a fire starting. Some standard rules include never smoking in the house and switching off appliances after use. 
  5. Set Escape Routes: Every home needs ample escape routes for all members. These escape routes need to be documented, marked, and easy to follow, even if someone is not familiar with the building. 
  • Assess the possible damages of a Fire 

Depending on the fire risks and hazards in a home and the available fire mitigation and fighting systems, it will be easy to assess the possible damages from a fire. The risk might be low, medium, or high, with a slight, tolerable, moderate, or extreme risk of harm. Your evacuation plan will depend on the rating of the risk. 

Fire Evacuation Plan

Designing a Fire Evacuation Plan 

Fires are dangerous, but when people panic, chaos erupts, and the danger increases. With a detailed and rehearsed evacuation plan, family members can escape without compounding the threat. Whether you create an evacuation plan from scratch or build on what the home already has, these steps will help you:

  1. Designing evacuation routes and assembly points 

Before you create a fire evacuation plan with routes and assembly points, you need to imagine different fire outbreak scenarios. For instance, cooking fires are the most common, followed by electrical malfunctions, heating, and arson. Understanding these causes and where they are likely to occur will help you create an evacuation plan. 

You also need to understand the risks. With these dangers and hazards, you can create rules and policies that can prevent fire outbreaks. For instance, you can forbid cooking appliances outside the kitchen. After creating rules, you must create possible fire scenarios and their solutions. Your list should have questions like “What if this happens?” and answers. These different scenarios will help create collective consciousness so everyone in the business understands their role. 

You can create escape routes and assembly points once you imagine the different scenarios and their solutions. This will involve an evacuation plan with primary and secondary routes. Here are some points to observe:

  • Create a fire evacuation plan with passages from the kitchen, store and other at-risk areas in a house
  • Create maps of floor plans and make them accessible from all rooms and to everyone in a home
  • Keep exit routes free of obstructions such as furniture
  • Create an accessible route for people with disabilities 
  • Designate an assembly point outside the standard evacuation route 
  • The assembly area should be ample enough to accommodate all family members and one person to act as a warden for the assembly point.
  • Creating floor plans with clear exit paths marked 

Get a plan of your house to use in creating a fire evacuation plan. On that plan, you need to mark the following:

  • Primary evacuation route,
  • Secondary evacuation route, 
  • show the stairwell, 
  • elevator, 
  • fire alarm, 
  • emergency phone, 
  • sprinkler, 
  • security camera, 
  • fire extinguisher,
  • fire alarm pull,
  • emergency supply kit, 
  • first aid kit, 
  • roof access, 
  • assembly point, and
  • security rounds. 

There are emergency evacuation symbols for each of the above items. Use these symbols on the house plans and transfer them to your house where everyone can see them. It would help to draw the fire safety symbols with paint that glows in the dark. 

Although you can manually draw the symbols on the house plan and transfer them to your rooms, there are online tools you can use to create a fire evacuation plan. A good plan should clearly show responsibilities and a chain of command. Sharing responsibilities will help avoid confusion when a fire breaks out. 

  • Determining primary and secondary escape routes 

It would help to revisit probable fire scenarios to determine primary and secondary escape routes. From the scenarios, you can choose appropriate alternative paths for different rooms in a house. You need to consider the following:

  • Where is the fire likely to start?
  • Which exits are near each of the rooms in a house?
  • How accessible are exits from different rooms? 
  • How accessible is the fire assembly point from other rooms?
  • Are there external hazards near your home? 

Fire Evacuation Plan

Preparing for Different Fire Scenarios 

Before a fire breaks out, everyone in the family needs to be ready. Readiness will involve knowing what to do and who is in charge. Give information on the primary and secondary evacuation routes; everyone needs to know how to use different safety equipment. You need to consider scenarios where:

  • A fire breaks out in one room
  • The fire spreads to other rooms 
  • Fire starts from an electrical fault
  • Cooking fires spread from the kitchen
  • Fire blocks an exit
  • Fire starts when no adult is home 
  • Fire starts from external hazards  
  • Fire affects the structural integrity of a home 

These and many more scenarios should inform how you prepare. For all the above scenarios, your preparedness should involve:

  • Familiarizing yourself with basic fire safety 
  • Assessing the home for fire hazards 
  • Installing the necessary alarms, sprinklers, and fire extinguishers in different parts of the home
  • Creating a fire evacuation plan
  • Practicing an emergency evacuation procedure for different scenarios 
  • Train how to use fire safety equipment and perform first aid
  • Have emergency numbers near the emergency phone  
  • Clearly mark exits

During a fire, people tend to panic. As such, you must create a procedure to ensure everyone gets out quickly and safely. There should be a plan to close the room door where the fire starts. If you cannot access an exit, get near a window and open it to get fresh air and stay visible. If you are on the first floor and can get through the window, drop pillows to cushion you from the fall and get out feet first.  

Fire Evacuation Plan

Special Considerations for Vulnerable Populations 

Your fire evacuation plan needs to consider the vulnerable groups in the home. These are babies, older adults, people with mobility issues, and people with disabilities. To do that:

  • Make exits accessible for people on wheelchairs and crutches 
  • Assign one or two people to carry the older adult, baby, or disabled person out of the room
  • Use emergency lighting and paint that glows in the dark for people with poor eyesight 
  • Teach older children how to respond to a fire and how to help toddlers and babies 
  • Create a safety procedure for people unable to evacuate a room, such as having fire-safe curtains and blankets in their room. 
  • For bedridden patients, create a fire-safe zone around them by ensuring no fire hazards are near them.

Equipping the Building with Fire Safety Tools 

Fires can break out at any time and in any room. You must be ready to save lives with a fire evacuation plan. Preparedness starts with equipping the rooms with fire detection and fighting equipment. These include:

  • Smoke Alarms: These devices are handy in areas where a fire is likely to break out, such as the kitchen. You can have smoke alarms at home in every room and in the corridors on every level. The alarms need testing at least once a month to keep them functional. If they are battery-powered, check and replace batteries at least once a year. 
  • Sprinklers: These devices offer a way to start fighting a fire immediately after it occurs. When sited and installed correctly, sprinklers can stop a fire from spreading and ensure the fire and smoke do not get to your family. It gives you time to escape. 
  • Fire Extinguishers: Get an ABC-rated fire extinguisher to extinguish fires fueled by flammable liquids and gases. Install the equipment near exits and away from sources of heat. You will need training to use these extinguishers. This will help you know when to drop the extinguisher and run during firefighting. 

Fire Evacuation Plan

Conducting Fire Drills and Training 

Fire drills are part of an effective fire evacuation plan. These drills test the efficacy of the evacuation procedures and the preparedness of the family members. When conducted well, they will help identify loopholes in the evacuation plan, reduce injuries in the event of a fire, and identify gaps in fire safety training. 

During a fire drill, family members can practice their roles and responsibilities. The person in charge can use these drills to test response times, access to fire exits, and how panic affects the fire evacuation plan. You must get all family members on board to conduct a fire drill. Exits need clear markings and a fire assembly point; everyone should know their roles. Before the drill, show the fire evacuation plan to all family members and ensure a clear communication plan. 

Before the day of the drill, you need to set goals such as:

  • To determine response times 
  • Check the effective use of firefighting equipment 
  • Check how effectively people switch off equipment 
  • Successful carrying out of different roles 

Rehearse the different fire safety procedures with family members and then randomly conduct a drill. Work with realistic scenarios during the drill, such as “the kitchen is on fire” or “the hallway is on fire and the exit door won’t open,” to monitor preparedness. Conduct a fire drill at least once a year. Everyone should get to the safety spot in under two minutes after the smoke alarm goes off. If it takes longer than that, you need to conduct the drill again after rehearsing the procedures for a second time. 

During the drill, your designated fire warden needs to observe the following:

  • Was everyone calm during the evacuation?
  • Did everyone meet at the fire assembly point?
  • Did the fire safety equipment work?
  • Did members close doors and switch off equipment before evacuation?  
  • Did members contact emergency services after exiting the house?
  • How effective was the firefighting equipment?
  • Did everyone carry out their roles as expected?

After the drill, re-assess the home for fire safety and make necessary changes to the fire evacuation plan. 

Frequently Asked Questions (FAQs) 

What should I do if a fire occurs in my home at night?

Avoid panic and use the pre-planned fire evacuation plan. Because smoke rises, get to the floor and crawl to the fire evacuation routes. Before you open the door, feel its heat with the back of your hand to know whether there is a fire on the other side. If the door feels hot or smoke is coming through the small openings on the door, use the second exit route. 

Are there any apps or tools to help with creating fire evacuation plans?

Yes. You can use an app such as SmartDraw to create an evacuation plan. The apps have templates for different house plans and fire scenarios; you only need to enter your escape plan. 

What should I do if someone is missing during a fire evacuation?

Inform the fire warden or the leader in the evacuation plan and gather information on which room they were last seen in. Check around the house to ascertain that they did not evacuate with everyone else. The warden will establish how safe it is to re-enter the room and access the room of the missing person. If re-entry is impossible, wait for the firefighting team to arrive and inform them of the missing person. 

Is it safe to re-enter a building after a fire evacuation?

Re-entry after a fire evacuation is dangerous. Members should wait until the First Responder says it is safe to enter the house. Sometimes, the evacuation controller may assess the safety risk when someone is missing and decide whether re-entry is possible.  

Conclusion

The first step in a home’s fire safety is the prevention of a fire outbreak. Even before creating a fire evacuation plan, you must follow the necessary procedures to prevent a fire. These procedures may involve practicing good habits, limiting flammable items, switching off appliances after use, and assessing electrical wiring safety. It is also essential to educate all family members on fire safety and inform them of the fire escape plan. After that, purchase the necessary fire safety equipment and create an escape plan.   

Also Read: 

Blink Home Security Cameras: 24/7 Effectiveness [Expert Reviews & Buyer’s Guide]

Blink home security cameras are relatively tiny but pack enough standard and extra features for a great home security system. Most of these cameras will perfectly fit in your palm. As such, Blink has you covered when you need to protect your home and be discreet about it. 

Because Blink is an Amazon-owned company, you can connect your cameras to Alexa, making them easy to control remotely. If you prefer Google Assistant, the cameras give you that option too. All the cameras are smart and connect to the advanced Blink app. This allows you to customize the activity zones, audio volume, video brightness, and other settings from the comfort of your smartphone. Read on to learn more. 

Key Features of Blink Home Security Cameras 

Blink home security cameras are compact and inexpensive. The battery-powered smart cameras are highly efficient and effective and can run on two AA li-ion batteries for up to two years. Several other features set these cameras apart, including:

  • Two-Way Audio: Two-way audio is now a standard feature on most home security cameras. Blink offers advanced audio speakers to retain your natural voice when you talk into the camera or listen to noises from outside or inside the house. You can converse with delivery personnel or visitors to your home in real-time using the feature. It effectively warns burglars and talks to pets when you are away from home. 
  • 1080p HD Video: All Blink home security cameras feature a 1080p HD camera that delivers crisp, clear videos even from a distance. The cameras’ field of view is 110 degrees, which is relatively narrow but effective. You can use the Blink app to zoom up to four times to see precise details from your camera. 
  • Motion Detection: The Blink home security cameras are highly sensitive to motion. You can customize the motion detectors’ sensitivity so you do not keep getting false positives. However, the cameras do not offer person detection, which means you will get alerts without the necessary settings whenever there are strong winds. 
  • Privacy Zone Settings: No one wants someone to access videos recorded from their front window. Blink allows you to set privacy zones so the camera can black out sections of your backyard. If your camera faces the neighbor’s backyard, you can black out that view, minimizing the alerts you get and helping you protect your neighbor. 
  • Local Storage: All Blink home security cameras can save videos locally with the Sync Module or on a USB flash drive that Blink sells separately. You can access more storage space with the Blink Subscription Plan. Enjoy a free 30-day subscription with the purchase of any of the cameras. 
  • Two-Year Battery Life: – According to Blink, two AA li-ion batteries will last you for up to two years. The camera’s battery life will depend on the battery quality and how often you use it. 
  • Alexa Integration: – Thanks to Alexa integration, you can use voice control to alter settings on your smart cameras. It also links to Fire TV and Echo Show, making watching the clips from home more accessible. Blink offers several Alexa commands, making hands-free use a cinch. 
  • Simple Installation and Setup: -Blink cameras incorporate easily into your home security system and are easy to install and set up on your own. Simple instructions and mobile apps make this possible.

What Do I Consider When Choosing The Right Blink Camera? 

Blink offers indoor and outdoor, versatile cameras that work wherever you mount them. When shopping, you need to consider where to install the cameras—indoors or outdoors. 

Indoor cameras cover the ground level of your home, especially areas that are easily accessible. You can mount them near the hallway, large windows, and the living room. Unlike other brands, all indoor Blink home security cameras are wireless, so you never have to install them near an outlet. Outdoor cameras are more expensive thanks to their weather-resistant features.

These cameras can withstand extreme temperatures, rain, snow, dust, and wind. When shopping, check the IP rating of the camera, which shows how effective it is at withstanding the weather. Blink also offers video doorbells, which replace conventional doorbells. Your visitors can speak into the camera, and you can see them. Visitors will ring the doorbell, and you will get a notification on your smartphone or Echo Show. 

The Blink Mini is also a great option when you need a more discreet camera for indoor use. The compact camera offers a wired connection, which is always on when needed. 

The three Blink home security cameras above have a host of similar features. Besides the weather-resistance features, both indoor and outdoor cameras have several similarities. They all allow Alexa integration, offer two-way audio, offer customizable motion alerts, and their cameras offer 1080p HD video quality. As such, you only need to ensure that you have the latest generation of indoor or outdoor cameras to get started. 

Step-by-step installation guide 

You can set up Blink home security cameras in less than 20 minutes. The installation process includes setting up the Blink app, connecting the camera, customizing the settings, mounting the camera, and testing it. Here are the steps in detail:

First Step: Install Blink App 

Download the Blink app from Google Play or the App Store on your smartphone or tablet. Search for Blink Home Monitor on Google Play or the App Store and select the app from the results. Install the app, then open it to create an account. You only need to enter your email address and a strong password to get started. Confirm the email address you use, and your account is ready. 

Second Step: Install the Blink Sync Module 

The Blink Sync Module links the cameras to the Wi-Fi network. It also stores video clips locally, so you can access them whenever needed. Follow the steps below to connect it:

  • Plug it into a power outlet as close to the Wi-Fi router as possible.
  • Once connected, open the Blink Home Monitor app and click the + icon at the top of the screen. You will see the Sync Module on the list of devices. Follow the on-screen prompts to connect the Sync Module. 
  • The first step involves entering your device’s preferred name, which will show blue and green lights. 
  • When ready, the device will generate a Wi-Fi network that shows up on the app as BLINK-XXXX. Tap “Join” and select the Wi-Fi network from the list of networks. Enter your Wi-Fi password, and you are set. 
  • The Blink camera will take a few minutes to connect to the network; once done, it will send a notification. Click “Done” and move to step three. 

Third Step: Add the Blink Home Security Cameras 

After adding the Sync Module, you are ready to bring in the camera. Follow the steps below to do that:

  • Unless you have the wired Blink Mini, all other options are wireless. Unscrew the battery compartment panel and insert two AA li-ion batteries. The camera will blink red once powered on. 
  • Open the Blink camera app and tap the “+” icon at the top of the screen. If you are using a wireless indoor or outdoor camera, tap “Wireless Cameras”, but if you have a mini camera or video doorbell, tap “Mini Camera” and “Video Doorbell”, respectively. You must scan the QR code in the camera’s battery compartment. 
  • Pick a system for your camera, and you will receive a notification at the top of your screen showing that the camera is ready. 

You can add more Blink home security cameras to your system. Open the Blink app and click “Add a Camera ” to start. You will get on-screen prompts directing you to scan the QR code for the cameras. Pick the new camera, give it a name and a location, and choose a Sync Module as the prompts direct. Insert the camera batteries and allow it a few minutes to connect to the Wi-Fi network. 

Fourth Step: Mount the Cameras 

Blink home security cameras mount in minutes with the included mounting bracket and screws. You can also place them on a surface with the included stand. Position the camera where it gives you the best view of the area you need to capture. It should be out of reach for intruders. Better yet, you can choose a discreet location for the camera so no one can access it. 

Once you install the camera, adjust its angle to get the best view of the area. 

Fifth Step: Customize the Camera Settings 

There are several settings you can use to meet your security needs. These include:

  • Video Quality: You can set the quality depending on your desired clarity. High-quality videos allow you to see even the smallest details, but the videos take up more storage space. Again, you need high-speed internet to load these videos. 
  • Motion Detection Sensitivity: The sensitivity of the motion sensors will determine when you get an alert. High sensitivity may trigger false positives. Although Blink cameras do not offer person and pet detection, the correct settings will help you determine what can activate alerts. 
  • Video Length: How long do you want the Blink home security cameras to record? Longer videos will take up more space on the Sync Module and draw more power from the batteries. However, concise videos may not show what is happening in your backyard.
  • Camera Schedules: Blink allows you to create a schedule to arm and disarm the camera. With the schedules, the camera will activate and deactivate at specific times of the day. 

Motion detection is one of the most important aspects of setting up your camera. To set the sensors, open the Blink app and click “Camera Settings”, then scroll to “Motion Detection.”  You can make several changes to improve the performance of your camera, as follows:

  • Sensitivity: A high sensitivity means the camera will detect motion better.
  • Motion Zones: Draw boundaries around the area you want to detect motion. This helps you to black out areas you need to keep private.
  • Clip Length: The setting allows you to determine how long the camera records once it detects motion. This length ranges from 5 seconds to 60 seconds. 
  • Re-trigger Time: It takes between 10 and 60 seconds after the camera detects motion for the sensors to start working again. Set the duration between the clips to ensure you capture everything that happens indoors or outdoors. 

Once you make all the settings, click “Save” and walk in front of the camera to test how well it works.

Tips for Improving Camera Performance 

Blink home security cameras are effective in different weather conditions. However, you need the right location and settings to enjoy excellent performance. 

You can improve motion detection by picking the right location with no obstructions and a clear field of view. Reduce interference near the camera by moving other wireless devices away. Adjust the camera’s sensitivity to get better motion detection without increasing false positives. Although increasing the sensitivity of the sensors will give you more alerts and video clips, you will get more false positives. 

Depending on the area you need to monitor and the details you need to capture, you can increase or reduce the video quality. High-quality videos allow you to see precise details but take up so much space in your Sync Module. 

Top Blink home security cameras

  • Blink Outdoor and Indoor (3rd Gen)

Blink Home Security Cameras

Buy On Amazon

If you want to create a whole-house home security system, you can use this kit. It comes as a bundle with two indoor cameras, two outdoor cameras, and a Sync Module 2. These Blink home security cameras are wireless, and run on two AA li-ion batteries that last up to two years. 

Like all other Blink cameras, it offers customizable motion detection to adjust the sensors’ sensitivity depending on your needs. You can customize motion and privacy zones through the Blink Home Monitor app to access the exact details you need. This way, you never get false positives. The cameras feature two-way audio to hear and speak to visitors and intruders in real time. You can even set it up so you talk to your pets when you are not home. 

Each unit has a mounting bracket to set it up in minutes. Because it has no wires, you can have it working quickly with no clutter. After installation, integrate it with Alexa to use voice control for your home security system. 

  • Blink Indoor (3rd Gen)

Blink Home Security Cameras

Buy On Amazon

The Blink Indoor Camera offers the compactness and effectiveness you need for a home security system. It uses Blink’s chip technology, allowing it to run for up to two years on two AA lithium-ion batteries. This way, you never have the stress of re-installing the camera after battery replacements. Through the camera, you can see, talk, and hear. The camera offers HD live view so you can see activities as they unfold, and it features infrared night vision to monitor your home at night. Thanks to the Blink app, you never have to be close to the camera to talk to intruders, visitors, or pets. 

Blink allows you to create customized privacy and motion detection zones. This way, you can see the movements and areas you care about. To get started, you can use professional installation. Blink offers the installation bracket and everything else you need in the box. The wire-free design lets you mount or place it on a surface, depending on where you get a wide view angle. 

Connect your indoor camera with Alexa for seamless voice control of your security system. You can catch a moment after the action with Blink Sync Module 2’s local and cloud storage options. To store your clips on the cloud, you need a Blink subscription plan, starting with the generous 30-day trial. 

  • Blink Outdoor (3rd Gen)

Blink Home Security Cameras

Buy On Amazon

The Blink Outdoor camera features the same advanced features as the indoor camera but with a weather-resistant build. It is a wireless camera fitted with two lithium-ion batteries that last up to two years. Whether you mount it on a tree outside the home or a wall, it withstands the elements, so your home always stays protected.

Each unit features 2-way audio, so you can speak into the camera (through the app) and listen to noises from outside the home. The camera features infrared night vision for clarity at night, capturing intruders’ faces even at night. 

Like the indoor camera, the outdoor Blink home security cameras allow you to customize activity and privacy zones to see precisely what matters to you. It sets up quickly, and Blink offers you all the materials you need to mount it. After mounting it, integrate it with Alexa for voice control. 

Save your video clips on Sync Module 2 for free, or save them on the cloud with a Blink subscription plan. 

  • Wired Floodlight Camera + Blink Video Doorbell

Blink Home Security Cameras

Buy On Amazon

The Wired Floodlight Camera is an excellent addition to any home security system. It helps you keep your home secure at night by flooding the backyard with 2600 lumens of lighting. Each camera features advanced motion detection and an alarm system that goes off when it detects motion. Even better, it has a video doorbell for visitors and delivery people. 

The unit features a 1080p HD camera that offers a live view of your backyard with infrared night vision for clear videos and photos at night. Further, you get a crisp two-way audio system to talk to intruders, delivery people, and visitors. Like the three cameras above, this floodlight camera is wireless and lasts up to two years with two lithium-ion batteries. 

Customize your camera in the Blink app to get an alert and see only what you want. Create motion zones and privacy zones, and adjust the sensitivity of the sensors. Even better, the camera features an advanced person detection feature,eliminating false positives. However, it would help if you had a Blink subscription plan to get the feature.  

You can have the unit wired or wireless; both units are easy to set up within minutes. Set it up, connect with Alexa for control, and start saving videos on the cloud or locally in Sync Module 2. 

Frequently Asked Questions (FAQs) 

  • Do Blink cameras work at night or in low light conditions?

All Blink home security cameras feature infrared night vision. These cameras use an IR emitter to light an area and create a black-and-white image. You can control the intensity of the IR emitter to determine how precise the images are at night. 

  • Can Blink cameras be used for indoor and outdoor surveillance?

There are cameras for outdoor and indoor use. You can use the Blink outdoor camera for indoor and outdoor surveillance, as it is weather resistant. However, the indoor camera cannot survive the elements outdoors. 

  • How far can Blink cameras detect motion?

You can detect motion up to 20 feet away with any Blink camera on the market. However, you need to adjust the sensitivity of the motion sensors and get the best camera placement for excellent detection. You need to ensure there are no obstructions near the camera and that you set the activity zones precisely. 

  • How long do the batteries last in wireless Blink cameras?

You can use two lithium-ion batteries for up to two years. Blink estimated the battery efficiency using cameras running for about 40,000 seconds a month. Get the correct settings to ensure battery efficiency. 

  • How secure are Blink home security cameras from hacking attempts?

All video clips recorded by the Blink cameras go through encryption before storage. As such, access to recorded videos by an unauthorized person is not possible. If you store the data in the cloud, the storage encrypts it. 

Final Verdict 

Blink home security cameras have a lot to offer. There is a lot to love, from the 1080p image resolution, night vision, two-way audio, and Alexa integration to the battery longevity and two storage options. The Blink cameras are ideal for homes that need compact and discreet home security systems that offer the latest features in camera technology.

The advanced Blink app is the icing on the cake; it allows you so much control of the cameras. When integrated with Alexa, the app makes controlling the home security system even easier. Blink home security systems are ideal for all homes and use cases; whether you need to monitor pets or burglars, the cameras are efficient. 

RELATED ARTICLES:

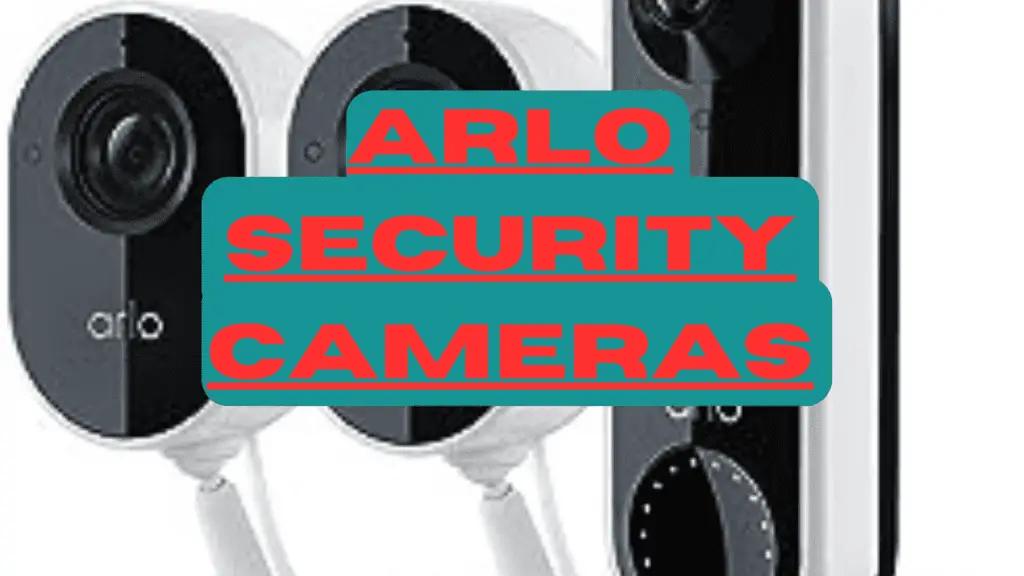
  1. The Effectiveness of Arlo Security Cameras [2023 Review]
  2. Best 5 Lorex Security Cameras to Consider For Advanced Surveillance Solutions
  3. 7 Best Wireless Security Cameras
Dry Chemical Fire Extinguisher

The Power of a Dry Chemical Fire Extinguisher [Expert Reviews & Buyer’s Guide]

Fires break out with no warning. As such, you need to be ready with a working fire extinguisher. A dry chemical fire extinguisher is the most common for outdoor spaces and select indoor use cases. 

Fires start where there is fuel, oxygen, and heat. Therefore, firefighting equipment needs to remove any of these three factors to fight a fire. A dry chemical powder extinguisher covers the fuel source with an inert solid to extinguish it. The powder works the same way sand or dirt fights a fire. Read on to learn more. 

What is a Dry Chemical Fire Extinguisher? 

A dry chemical fire extinguisher, or a multi-purpose dry chemical or ABC extinguisher, is standard for homes, workshops, and some office buildings. The extinguisher uses dry chemicals such as mono ammonium phosphate, potassium bicarbonate, and sodium bicarbonate to coat the fuel source and put out a fire. You can use it to put out class A, B, and C fires. Depending on your extinguisher type, you can use them for class E and F fires. 

Here are common use cases:

  • Class A fires which involve solids such as paper, textiles, and wood 
  • Class B fires that involve flammable solids such as paint, kerosene, petrol, diesel, and turpentine 
  • Class C fires, which involve combustible gases such as methane and butane.
  • Electrical fires for appliances rated 1000v or lower

Besides the standard extinguisher, you can go for a specialist dry chemical fire extinguisher that extinguishes metal-related fires. For instance, L2 extinguishers are ideal for fires that involve lithium. Another option is the M28 specialist powder extinguisher, which smothers all metal-related fires except those that involve lithium. 

Although they are multi-purpose extinguishers, you should not use them to fight class F fires. These fires involve cooking oil fires, such as chip pan fires. Again, the extinguishers are not effective when used in enclosed spaces. The dry powder can create a cloud of fog that limits visibility. Even worse, it is not safe to inhale the chemical powders. You should also not use extinguishers to put out fires on electrical equipment and appliances rated at more than 1000v. Avoid fighting metal-related fires unless you have a specialist dry powder fire extinguisher. 

ABC fire extinguishers feature a blue-colored label written POWDER. Some may have an ID sign that reads POWDER EXTINGUISHER. This way, you can identify them quickly. 

How Does a Dry Chemical Fire Extinguisher Work? 

Dry Chemical Fire Extinguisher

When a fire extinguisher is unavailable, people use a blanket or throw sand and dirt on the fire. You can also pour salt or baking soda to blanket the fuel source to smother the fire. A dry chemical fire extinguisher works the same way with blankets, sand, dirt, and salt – it covers the fuel source to extinguish a fire. 

These chemical extinguishers can eliminate the most common fires in the kitchen and workshop. It fights fires from flammable solids, liquids, and gases. The working mode uses an inert solid to coat the fuel and put out the fire. Inside the extinguisher cylinder is a fine powder of sodium bicarbonate (baking soda) and potassium bicarbonate, which have the same properties as baking soda or mono ammonium phosphate. The latter is more popular thanks to its effectiveness. 

Buy On Amazon


Pros and Cons of Using a Dry Chemical Fire Extinguisher 

Advantages of a Dry Chemical Fire Extinguisher

  • Fast Action: ABC extinguishers extinguish a fire within seconds when correctly aimed at the fuel source at the appropriate application rate. 
  • Use on Live Electrical Equipment – Although the powder is ineffective on equipment rated above 1000v, it is safe to use on these equipment fires as it does not conduct electricity. 
  • Extinguishers Running Fires – Running fuel fires spread fast; ABC extinguishers can stop them. When used with foam sprays, these extinguishers can cut the running fire’s fuel supply, preventing its spread. 
  • Safe from Thermal Shock – Because the dry chemical powder does not conduct electricity, you can use it on hot metals in undercarriage assemblies without the risk of thermal shock.  
  • Protect Yourself from Heat – When sprayed on a surface, the powder creates a shield that blocks off radiated heat. In a large fire, you can use the powder to create a shield around people and structures to prevent devastating fire damage. 
  • Versatile Use – A dry chemical powder fire extinguisher effectively puts out class A, B, and C fires. It also puts out electrical fires on appliances rated 1000v or lower. You can also go for the specialist extinguishers that put out metal-related fires. 
  • Use on Wide Temperature Range – A dry chemical fire extinguisher works efficiently between -20 and 60 degrees Celsius. 

Disadvantages 

  • Reduces Visibility – When sprayed, the chemical powder creates a cloud that reduces visibility. When that happens, the operator cannot judge the exact location of the fire, which may also make it challenging for people to escape. 
  • Affects Breathing – When used in an enclosed space, the operator can inhale the powder, which can irritate the breathing system. Short-term exposure is not harmful, but prolonged exposure may further damage the respiratory system. 
  • Residue – After application, the powder leaves a messy residue that needs immediate cleaning. The powder is corrosive to some metals, and thanks to its fineness, it can be abrasive. As such, one needs to use it carefully to avoid causing more damage than the fire would have. When used in the kitchen, the powder can contaminate food. In the office, the chemical powder will make electrical components such as keyboards unusable. When used outdoors on a windy day, the fine powder can spread over a wide area, increasing the risk of contamination. 
  • Risk of Re-Ignition – The dry chemical powder works as long as it stays above the fuel. The powder’s fine particles can blow away on a windy day, causing the fire to re-ignite.  
  • Risk of Packing Down – The powder can pack down after a long time in the cylinder. This is common for a dry chemical fire extinguisher in a motor vehicle or any other area that experiences a lot of vibrations. The extinguisher fails to work when the powder packs down. You must assess the extinguisher’s functionality to avoid failure during emergencies. 
  • Breaks Down a Foam Blanket – When applied, the chemical powder can break down a foam blanket. 

Thanks to the advantages and disadvantages above, a dry chemical fire extinguisher is only effective in industrial and residential settings where there is no risk of contamination. At home, it works best in a garage or workshop where you face the risk of fuel and chemical fires. 

It works best on a calm day. It could be more effective in fighting class D and F fires. 

Different Types of Dry Chemical Fire Extinguishers 

A dry chemical fire extinguisher can be classified based on the fire class it fights or the chemical powder in it. Based on function, there are two types of fire extinguishers:

Standard Dry Chemical Powder Extinguisher 

These extinguishers are versatile to put out class A, B, and C fires. Also known as ABC fire extinguishers, these units can fight:

  • Class A fires 
  • Class B fires
  • Class C fires 
  • Electrical fires for equipment rated 1000v or lower 

Specialist Dry Chemical Powder Extinguisher 

These are ideal for lithium and all flammable metal fires – the L2 and M28 extinguishers. 

Based on the chemical powder used in the cylinder, there are four types of powder chemical extinguishers:

  • Monoammonium Phosphate This substance is the most common for powder extinguishers. They are multi-purpose chemical extinguishers that can put out class A, B, and C fires. The powder is a mixture of ammonium sulfate and mono-ammonium phosphate, the latter being the extinguishing component. Depending on industry standards, the combination can be 60-40% or 40-60%. 
  • Sodium Bicarbonate – Baking soda is a common extinguishing chemical and is even helpful when a fire extinguisher is not available. It worked perfectly on class B and C fires and was the first chemical used in extinguishers. In an extinguisher, baking soda heats up and releases a cloud of carbon dioxide, depriving the fire of oxygen and smothering it. However, you cannot use these extinguishers on class A fires as they are ineffective in reducing fire heat, meaning they do not prevent reflashing of burning materials. 
  • Potassium Bicarbonate (Purple-K) – Purple-K can put out class B and C fires. The substance is twice as effective as baking soda. It works well in the oil and gas industry as it is the only certified chemical agent used in Aircraft Rescue and Fire Fighting (ARFF). 
  • Potassium Bicarbonate and Urea Complex – Also known as Monnex or Powerex, the complex chemical can break into tiny particles when sprayed on the surface of a fire. It spreads over a large area to suppress a running fire. 

Besides having the right extinguisher, ensure you have the right size. For instance, you can use the 2kg model, which will suit the needs of most homes while being light enough and easy to operate. Larger models are ideal for putting out large fires in workshops and garage forecourts. However, these are heavier, and operations can be relatively challenging. 

Comparing Dry Chemical Extinguishers with Other Types 

The dry chemical fire extinguisher is not practical for all classes of fire. As such, you might need to buy other fire extinguishers to meet all your firefighting needs. When shopping, you need to consider the materials in the room or area you need to protect. For instance, a place with flammable solids such as paper, wood, and clothes needs protection from class-A fires. 

All portable fire extinguishers are red, with a small colored band showing their type. For instance, a dry chemical fire extinguisher will have a blue bar that reads POWDER. A red band is for water extinguishers, cream for foam units, yellow for extinguishers used for wet chemicals, white and red for water mist, black for CO2, and green for clean agent extinguishers. 

Here are the six types of fire extinguishers and their uses:

Water Fire Extinguishers 

These red-label extinguishers are only ideal for class-A fires. You can use them for fires involving coal, paper, wood, rubber, coal, textiles, soft plastics, and soft furnishings. They contain water in their cylinder and work by spraying it from a nozzle at high pressure. When used well, the extinguishers can cover a vast area. They are more affordable compared to dry chemical fire extinguishers. Some units may contain an additive that makes the fire extinguishers more effective while reducing the overall size of the extinguishers. However, these options are more expensive. 

Since the extinguishers only contain water, they are easy to maintain and have a lower risk of failure. They suppress a fire by reducing the surface heat when materials soak in water. You can use these options in shops, retail premises, schools, hotels, residential premises, and warehouses. Although they leave a little mess behind, they are easier to clean than dry chemical powder. 

Dry Chemical Fire ExtinguisherBuy On Amazon

Water Mist Extinguishers 

Dry Chemical Fire Extinguisher

Water mist extinguishers are relatively new in the market. They are more compact and robust and work by releasing a fine mist of demineralized water particles. You can use them on class A, B, and C fires, like the dry chemical powder extinguisher, but they also suppress class F fires. They are highly versatile, so you do not need several extinguishers in your home. Some units effectively put out electrical fires for appliances rated 1000v or lower. 

Water mist extinguishers suppress a fire by cooling the surface and depriving the fire of oxygen. Unlike dry chemical extinguishers, these extinguishers leave no residue and do not corrode surfaces. They contain no chemicals, so you can recycle them. The extinguishers are more expensive than water extinguishers. 

Buy On Amazon


Foam Fire Extinguishers 

The cream-labeled fire extinguishers suppress fires involving flammable solids and liquids (class A and B fires). You can use them on electrical fires if you spray them from a meter away. After use, you will need to clean up the residue. Again, the units are more expensive than water extinguishers. 

Foam fire extinguishers are ideal for use in homes, offices, workshops, garage forecourts, and many other areas. They extinguish fires involving papers, textiles, turpentine, petrol, paint, and other solids and liquids. 

Water Spray Fire Extinguishers 

Dry Chemical Fire Extinguisher

These extinguishers come in three- and six-liter cylinders. They effectively put out fires involving flammable solids such as wood, textiles, coal, plastics, and paper. Never use them on fat and oil-related fires or electrical equipment. You need to aim the nozzle at the base of the flames, spray, and move across the fire until it successfully suppresses it.

Instead of a jet nozzle, the extinguishers have a spray nozzle that allows the unit to produce a fine spray from the high pressure inside the cylinder. When used correctly, the extinguisher can suppress fire over a large area and extract heat faster. Manufacturers sometimes use surfactants to ensure the water penetrates further into the burning material. 

Buy On Amazon

CO2 Fire Extinguishers 

CO2 fire extinguishers contain pressurized carbon dioxide, depriving a fire of oxygen to smother it. The extinguishers leave no residue after use and are ideal for class B and electrical fires. As such, you can use them in offices, garage forecourts, and workshops where petroleum and flammable liquids are common. The CO2 does not cause damage to equipment and does not contaminate food or the surrounding area. 

The main disadvantage of CO2 extinguishers is that they get cold during use. The operator’s hands will freeze if the cylinder lacks a double lining and a frost-free swivel. Please do not use them enclosed, as they can cause asphyxiation. Again, please do not use them on deep-fat fryers, as the jets from the cylinder can cause the fat to fly off the fryers. 

CO2 extinguishers, like dry chemical powder extinguishers, do not offer the best post-fire security, as a fire can re-ignite when the CO2 dissipates into the atmosphere. The extinguishers are always relatively expensive. 

Dry Chemical Fire Extinguisher

Buy On Amazon

Wet Chemical Fire Extinguishers 

These extinguishers have a yellow label. They are ideal for fighting class F fires, which involve fats and oils. You can, therefore, use them in the kitchen and on deep-fat fryers. Besides class F, you can use them on class A and B fires. 

Dry Chemical Fire Extinguisher

Inside their cylinders are pressurized alkali salts dissolved in water. During operation, the extinguisher releases a fine mist that reduces the heat of the flames without causing a splash. You will pay more for the extinguishers compared to water and water mist extinguishers. 

All the above fire extinguishers are easy to use. However, a fire extinguisher is only effective when used by trained hands. To activate the fire extinguisher, the fire alarm must first go off, and an evacuation route must be decided.

  If using the fire extinguisher doesn’t feel like a safe option, or the fire keeps spreading even after using the extinguisher, exit the building. 

Use the PASS method of extinguishing a fire with any of the above extinguishers. Pull the extinguisher pin. Aim the extinguisher nozzle at the base of the fire. Squeeze the handle. Sweep from side to side until the fire is out. 

Frequently Asked Questions (FAQs) 

Can I use a powder fire extinguisher on an electrical fire?

Yes. This equipment can suppress electrical fires in appliances rated 1000v or less. However, some electrical components, such as keyboards, will be unusable after use. The chemical powder does not conduct electricity, and you can use it to gain access where an electric fire blocks your access to power outlets. 

Are dry chemical extinguishers safe to use indoors?

A dry chemical fire extinguisher is not safe for use indoors. For starters, the discharge of the chemical powder reduces visibility, making it challenging for the operator to determine the effectiveness of the extinguishing process. The cloud of powder may also make it difficult for people to evacuate a building. In an enclosed space, operators can inhale the powder, irritating the respiratory system. 

How do I clean up after using a dry chemical fire extinguisher?

The dry powder is easy to vacuum after suppressing a fire. You can also sweep it off surfaces and dispose of it appropriately. If the residue adheres to surfaces or hardens, clean it with isopropyl alcohol diluted with warm water. The alcohol breaks down the hardened residue, making it easier to remove. If the extinguisher uses sodium or potassium bicarbonate, you can use hot water and vinegar to neutralize the residue and then wipe it off with a wet cloth. 

Can dry chemical extinguishers be used on flammable liquids?

Yes. The extinguishers are effective on class B fires that involve flammable liquids such as gasoline, turpentine, paraffin, and many others. They cut off the fuel supply by creating a coat around it to smother the fire. 

What should I do if my dry chemical extinguisher is not working correctly?

The main problem a dry chemical powder extinguisher might face is packing down. This happens when the chemical powder compacts to the bottom of the cylinder, especially after it is exposed to vibrations. You can prevent packing by placing the extinguisher where there are no vibrations. Even better, invert the extinguisher occasionally and pat its bottom. After six years, you need a professional to maintain and repair the extinguisher. 

Final Word

You need a fire extinguisher to help you suppress fires caused by different fuels. A dry chemical fire extinguisher can put out fires in three classes, as well as electrical fires. If you have a specialist extinguisher, you will put out metal fires. In a place of business where different fuels can cause a fire, you might need to get another type of fire extinguisher

Getting the right size and weight of a dry powder extinguisher is as essential as knowing how to use it. The extinguisher should meet the set fire safety regulations for your industry. You need to go through training to use a fire extinguisher effectively; this text does not count as training. After learning how to use the equipment, contract a professional once in a while to inspect, maintain, and repair the extinguisher to ensure it is ready to suppress a fire at all times. 

Child Safety Hazards

Child Safety Hazards to Address in 2024

 Children are curious. They are at risk of injury as they learn to chew food, walk around the house, jump, read, and play new games. Minor injuries are common for most children. However, as a parent, you need to get rid of child safety hazards to create a haven for children. Children need a place to explore and learn without the risk of cuts, burns, broken bones, choking, or poisoning. 

Even as you take precautions to keep children safe, you must teach them basic home safety rules. This entails giving them essential information on electricity, appliances, and other elements in your home. Act out what you teach them, as they learn better through imitation. If, for instance, you want them to wear shoes when walking around the kitchen, have shoes too. Read on to learn more. 

Top Child Safety Hazards

How safe is your home for toddlers? You need to assess your home for child safety hazards by getting to the child’s level. While at it, consider the following dangers:

Choking Hazards 

Choking is common when babies and toddlers learn to chew. By 12 months, the baby may try to feed themselves. Some foods increase the risk of choking for babies. For instance, eating raw foods, whole grain dishes, and foods in specific sizes and shapes are choking hazards. To prevent choking in toddlers, cut food into small pieces that a child can serve without choking or mashing their food. 

Below are tips to prevent choking in children:

Choose What They Eat

Several foods are choking hazards. These foods include nuts, cherries with pits, hard candy, popcorn, raw carrots, celery, peas, apples and pears, watermelon with seeds, and sunflower seeds. The food can block a child’s windpipe, causing choking. Even soft foods such as cheese cubes, grapes, caramel, and hot dogs can cause choking if not cut into small pieces. Further, avoid spooning your child peanut butter and other foods that can stick in the mouth. 

Only feed your child pea-sized pieces of food until they can chew well. If you feed them meat and fish, remove the bones and mince the meat into easy-to-swallow pieces. 

Supervise the Child 

Keeping a keen eye on the child while eating will help you respond quickly if choking occurs.  Ensure the child remains seated, as choking risks increase with a child’s level of activity. Sit with the child as they eat and ensure they are not distracted enough to want to stand up. 

Choose Age-Appropriate Toys and Childproof Your Home

Toys and other small items around the house are child safety hazards. Get rid of broken crayons, batteries, marbles, small balls, safety pins, paper clips, push pins, coins, balloons, toys with small detachable parts, and jewelry.  Walk around the house, collecting any small items a baby will likely put in their mouth. Get on your hands and knees to see what a child sees and remove any items that can cause choking. 

Learn cardiopulmonary resuscitation (CPR) so you can save your child in case of an emergency. An age-appropriate Heimlich maneuver can also help save a child. 

Child Safety Hazard

Electrical Hazards 

An average home boasts several electrical child safety hazards. As a parent, you must safeguard the house and make it a safe learning environment for children. Although your safety precautions make the home safe for children of all ages, the risks of electrical injuries are more significant when the child is younger.  

Before you get rid of child safety hazards, make your child understand the basics of electricity safety.  First, let them know that electricity can cause shock, burns, and even death. Next, teach them that water and electricity should not mix, as electricity passes through water, which can, in turn, pass through your body. Extension cords are child safety hazards that children should learn not to tamper with. 

  • To keep your home safe:  
  • Switch off appliances after use 
  • Manage extension cords and electrical wires so the child doesn’t have access to them
  • Keep extension cords away from gas cookers and other hot surfaces 
  • Keep small wires and pins away from the child to prevent them from plugging them into sockets 
  • Cover all sockets within a child’s reach  
  • Remove any wall outlets you do not need 
  • Store electrical appliances out of a child’s reach 
  • Fly kites and drones away from power lines near your home 
  • Prune trees near power lines and advise children to avoid climbing them 
  • Repair all damaged cords and appliances at home 

Child Safety Hazard

Falls and Injury Hazards 

Babies use their hands to reach before they learn to sit, roll, and crawl. After crawling, they pull up, walk along furniture, and finally walk. During the first two years of their lives, they face several child safety hazards. Children are curious and desire to climb on everything they can grasp. Most falls only result in minor bruises and bumps, but some may result in cuts, fractures, and concussions. 

Fall child safety hazards result from slipping, tripping, and stumbling on items on the floor. They may also result from equipment on their playground and play items such as skis, skateboards, and ice skates.  For children under four years old, falling from chairs is common.

The seriousness of injuries from falls depends on the height a child falls from, the nature of the surface they fall onto, and what they hit when they fall.  Heights over 1.5 meters are dangerous to children younger than five years old, while elevations above two meters are unsafe for older children. 

Here are some simple ways to prevent falls at home:

Toddlers

  • Create clear paths for the toddlers by removing rugs and electrical cords 
  • Remove tables and benches from their play area 
  • Use a safety gate to restrict access to the stairway
  • Pad sharp corners of tables 
  • Keep toys off cots that a toddler can climb on 
  • Place a mattress on the floor to protect your child from dangerous falls as they learn to climb out of a cot
  • Keep the floor dry at all times

Children 

  • Ensure bunk beds have a safe guardrail and warn children against playing in these beds 
  • Keep children under nine years away from the top bunk of beds 
  • Keep windows locked to ensure kids do not climb out 
  • Discourage kids from running while holding knives, glassware, scissors, and other sharp objects 
  • Remove tripping and slipping hazards from the kitchen and bathroom 
  • Use safety harnesses for  pushers, prams, and high chairs 

Consider slippery areas, glass and sharp objects, and balconies and windows when ridding the home of child safety hazards. 

Poisoning Hazards 

Children seem to always move toward danger. These children move quickly and may touch and taste chemicals you would think they are not interested in. Some of the typical child safety hazards at home include:

  • Household Cleaners – Cleaning agents such as rust removers, toilet bowl cleaners, and oven cleaners can cause chemical burns, gastrointestinal illnesses, and respiratory conditions. To protect your children, store all household cleaners out of reach of children. Do not leave a child unattended in a room where cleaning occurs. 
  • Lithium Cell Batteries – Batteries in remote controls and other devices can cause severe tissue damage and even death when ingested. Protect your child by keeping batteries in locked drawers or out of reach. Used batteries should be disposed of appropriately or recycled. Lastly, use tape to restrict the battery compartment of a remote control or other device.
  • Personal Care and Beauty Products – The average home has several beauty and personal care products, such as toothpaste, aftershave, face cleansers, makeup, and hair care products. Most beauty products contain alcohol, which can cause seizures, comas, and even death when ingested. Some, such as nail glue removers, may contain cyanide, which causes burns on the skin and mouth. These beauty products should be out of reach for children.
  • Medication – An overdose of prescription medicines can cause death. These medicines are child safety hazards and should be kept out of reach of children. When you bring medication home, please keep it in its original bottle or package and keep it away from food. When taking medicine at home, do it away from the child’s sight, as they may want to imitate your behavior. Further, avoid referring to medicine as candy, as kids might want to get a taste of it. 
  • Lead – Lead poisoning is common, with more than half a million children in the U.S being affected annually. The substance is too tiny to see and may be in water, air, soil, or on products such as toys and furniture. When ingested, lead can cause developmental delays and a reduced IQ. It can also affect the body’s endocrine, immune, and cardiovascular systems. Children can suffer from kidney, brain, and ear damage if exposed to high lead levels. Besides removing child safety hazards from the house, you must ensure children between 6 and 12 get screened for lead. 
  • Pesticides and Herbicides – Do you store farm chemicals at home? When ingested or inhaled, farm chemicals can cause damage to a child’s nervous and respiratory systems. As such, you need a lockable cabinet in your garage for these chemicals. 
  • Alcohol – No amount of alcohol is safe for a child. Drinking alcohol can result in seizures, comas, and even death. Keep alcohol out of reach of children.  

Other child safety hazards at home include hydrocarbons, carbon monoxide, automotive fluids, and poisonous houseplants. 

Child Safety Hazard

Burns and Scalds Hazards 

Children are curious and love to explore the home and its surroundings. While at it, they do not know the child safety hazards around the house that can cause burns and scalds. Burns result from dry heat, such as flames and hot metals, while scalds result from hot liquids and steam. Children under four are more at risk of burns and scalds, but the danger only significantly reduces when a child is fourteen. 

Some of the causes of burns and scalds at home include:

  • Hot foods and drinks 
  • Hot saucepans 
  • Coal ashes and hot drinks
  • Friction from treadmills and other moving objects 
  • Steam and vapor from boiling water 
  • Matches and lighters  
  • Hot cooking fat or oil 
  • Running hot water from taps 

To keep children safe, treat every hot substance at home as dangerous as flames. Burns and scald injuries are common when a child is sick, tired, distracted, or in a hurry and is doing many things simultaneously. 

Most burns and scalds happen in the bathroom and kitchen. Here are some tips to prevent burns in these two rooms:

  • Keep bathing water temperatures between 37 and 38 degrees Fahrenheit 
  • Keep the child within arm’s reach when in the bath 
  • Use tempering valves or hot water shutdown devices to regulate the bath water temperature  
  • Never leave cooking food unattended when the kids are around 
  • Keep the baby a safe distance from you when you are drinking or eating something hot
  • Never leave children in the kitchen alone
  • Install guards on stove and oven knobs 
  • Turn the handles of saucepans towards the back of the cooktop 
  • Use cordless appliances where possible in the kitchen 
  • Switch off appliances not in use and empty hot water from kettles 
  • Give toddlers and children special cups so they are never tempted to drink from adult cups, which may contain hot liquids 
  • Use a childproof gate to restrict a toddler’s access to the kitchen when you are busy

Child Safety Hazard

Drowning Hazards 

Drowning is a common cause of death for people of all ages. However, babies and toddlers face a greater drowning risk. When left unattended, toddlers can drown in a bathtub with as little as one inch of water.  Around the home, you need to assess the safety of the bathtub, wading pools, swimming pools, buckets, and sinks. 

To keep your kids safe, you need to restrict their access to the bathroom and kitchen, keep an eye on them at all times, or drain water from the above areas and vessels. 

Prevent Drowning in the Bathroom

  • Keep an eye on your child while in the bathroom. If you must leave the bathroom, even briefly, bring the baby with you. 
  • Drain water out of buckets and other containers after use. 
  • Never leave the baby in the bathtub unattended 
  • Install a locking device on the toilet seat 
  • Keep the bathroom door locked 

Drowning in the Pool 

  • If there is a pool on your property, install a fence of at least five feet high with a self-closing gate 
  • Install a pool alarm or a cover over the pool 
  • After a swimming session, remove toys that children might try to recover 
  • Always supervise children when they play in the pool, even when they have flotation devices on 
  • Let a professional teach swimming lessons to the children 
  • If your pool is above the ground, remove ladders when the pool is not in use 
  • Teach children basic pool safety rules 

Learn cardiopulmonary resuscitation (CPR) and the Heimlich maneuver to save a child in case of an accident. Keep a first-aid kit at home with the necessary contents. 

Importance of child safety awareness 

Safety at home is essential for everyone. You enjoy several benefits by learning how to keep children safe at home. 

Minimize Accidents at Home 

Your child feels more comfortable at home than anywhere else. As such, you need to minimize the risks they face when playing and learning at home. Accidents and injuries at home can be costly in terms of time and money. Accidents and associated injuries leave people stressed and strained. Save your children from the pain, discomfort, and stress that come with injuries from different accidents. 

Make Home a Safe Place for Learning

Allow your kids to learn and explore their surroundings without worry. Children learn to crawl, walk, and learn in the first two years of their lives. When you let your kid explore their curiosity, a safe environment gives you peace of mind. After making your home safe, you can create a stimulating play space where kids get the entertainment they need while avoiding accidents. 

Allow Older Children to Supervise the Younger Ones 

When older children are aware of the dangers lurking in different child safety hazards, they take charge to protect the young ones. Teaching children about safety should be a fun experience for them. Choose exciting activities to show the potential danger of hot and sharp objects and other safety hazards. Repeat safety rules whenever you feel they are ignoring them and demonstrate safety behaviors. 

Keep Children Safe Outside the Home

Children will be safe when they visit friends by learning safety rules and adopting safe play and behaviors at home. Knowing that your child will stay safe even when they are away from home will give you peace of mind. 

Conclusion

A child needs to be free to explore in order to learn. As such, you are responsible for providing a safe environment without restricting your movements and play activities. You can do that by removing child safety hazards at home, setting safety rules, and teaching kids safe practices at home. You still need to learn basic first aid practices to save a life, stop bleeding, and relieve pain. Learning CPR, managing cuts and burns, the Heimlich maneuver, and managing choking and foreign bodies in ears and eyes will help you save a child. You may also need safety devices such as smoke and carbon monoxide detectors, non-slip mats, and fire extinguishers in your home

The Effectiveness of Arlo Security Cameras [2023 Reviews & Buyer’s Guide]

Did you know that the first Arlo Security Camera release happened in 2014?

But did you also know that later in 2018 is when Arlo Technologies was launched as a stand-alone company?

With all these years in the security industry, you can tell that Arlo has experience in home security cameras. Arlo has proven their expertise over the years since its launch by developing firsts in the category, such as an LTE-enabled camera.

As a result, one individual decided to install an Arlo security camera in his home after checking Arlo’s reputation. His experience with Arlo made him appreciate his move to work with them. 

Later, after hearing his friends complain about poor home security services, he told them to install Arlo security cameras. Thanks to Arlo’s proven track record, many of his friends jumped ship to Arlo. Now he and his friends are all smiles since they know they have security services they can rely on.

You can be like our friend here by choosing Arlo security cameras. By selecting these cameras:-

  • You’ll deter intruders and burglars from coming to your home.
  • You’ll have peace of mind knowing your home is safe.
  • You’ll have remote monitoring capabilities. 
  • You’ll have evidence in case of a break-in. 

You don’t need to continue complaining about the home security camera company you chose while Arlo is here. Learn about the different Arlo security cameras and make a choice. 

Key Features and Specifications Arlo Cameras

Arlo security Cameras are well-known and highly regarded in home security systems. These advanced cameras offer various features and specifications that make them unique. In this comprehensive explanation, we will delve into the key characteristics of these Cameras to help you understand their capabilities better.

Wireless Design

Unlike traditional security cameras, which are wired, most Arlo security cameras work remotely, and setting them up is quick. This feature gives you more options for where to put the cameras surrounding your property, so you can get the best coverage without being limited by cables.

High-Definition Video Quality 

These cameras have high-definition (HD) video quality and can record clear, vivid pictures day or night. Owing to built-in infrared night vision technology, the advanced image sensors in Arlo security cameras can take clear pictures even when there isn’t much light. This robust night vision feature ensures that your security works all the time, giving you peace of mind no matter what time it is.

Wide Field of View

Arlo security cameras offer a wide field of view with adjustable angles to enhance their usability. You can achieve impressive viewing angles depending on your camera model and settings. Additionally, some models can have both horizontal and vertical panning. 

These features allow complete control over what areas you want to monitor at any given time.

Motion Detection Technology

Arlo security cameras also include motion detection technology. This intelligent feature delivers timely notifications to your connected devices whenever there is motion within the camera’s range. However, you should avoid setting motion detection sensitivity too low since it might not trigger a recording.

Customize sensitivity levels according to your preferences so only relevant movement triggers alerts. It will help reduce false alarms caused by insignificant events like pets wandering around. 

Two-way audio capabilities

Most Arlo security camera models provide two-way audio capabilities through integrated speakers and microphones. This means you see what is happening on camera. Also, you can communicate with individuals near the camera’s location using compatible mobile devices or computers. 

Also, the two-way audio is handy for greeting visitors remotely, instructing delivery personnel, or deterring potential intruders.

Different Storage Capabilities

When it comes to storage, Arlo security cameras offer flexible options. Some models support local storage with SD cards, allowing you to keep recordings directly on the camera. 

Additionally, cloud storage is available through subscription plans. Cloud storage enables you to store and access your footage securely from anywhere over the internet. This cloud-based solution ensures your video recordings are always protected, even if the camera is tampered with or stolen.

Compatibility with Smart Home Systems

Another aspect that sets Arlo security cameras apart is their compatibility with smart home systems and virtual assistants like Amazon Alexa and Google Assistant. This integration lets you handle your cameras with your voice or through apps on your phone. This improves the user experience and makes it easy to manage your security system.

Weather resistant 

Many Arlo Camera types work well in all kinds of weather. With this feature, you can put Arlo security cameras inside and outside, giving your whole property full security coverage.

Connectivity 

Arlo security cameras connect to Wi-Fi, giving you ease when setting up your surveillance system. However, although you can wirelessly set up some Arlo security cameras, you need a smart hub or a base station for other cameras.

Mobile App

Arlo also has a mobile app that is easy to use and helps you access live camera feeds and records. You may additionally use the app to view settings you’ve changed from anywhere with your phone or tablet.

Subscription Plans

Arlo provides various subscription plans for additional services and features. Depending on your needs, these plans can offer extended cloud storage capacity and advanced motion detection capabilities. You can also get professional monitoring services for higher security oversight.

Arlo Camera Options and Series

Arlo offers various camera options and series to cater to home security needs. Let’s explore these options.

Arlo Pro Series

The Arlo Pro Series includes the Arlo Pro 3, the Arlo Pro 4, and the Arlo Pro 5.  

They can see in color at night and have a wider viewing of up to 160 degrees. They have a resolution of 2K. 

Also, these cams have better technology for detecting motion, two-way audio with noise cancellation, and can store data locally on USB drives or microSD cards. 

For more storage space, the Pro cameras also have membership plans for cloud storage. The good thing about them is that you can use them indoors and outdoors and with virtual helpers in smart homes.

Arlo Essential Series 

Arlo Essential Camera and Arlo Essential Spotlight Camera are part of the Arlo Essential Series. They offer HD video, night vision, motion detection with tailored warnings, and two-way audio. 

You can monitor your home and detect an emergency with these features.

Arlo Ultra Series

Do you need a high-quality video camera series? Pick an Arlo Ultra Series camera. 

The best camera in this series is the Arlo Ultra Camera. Its 4K HDR video resolution lets it pick out tiny details. 

This camera features auto-zoom, tracking, and an in-camera flash, so you can easily focus on moving objects. 

A 180-degree diagonal field of view, a dual-microphone array for improved audio quality, and an in-built siren are also included. 

The Arlo Ultra series can also be set up with wires or without them. 

In addition to being voice-controlled, it is compatible with Google Assistant and Alexa.

Other Arlo Devices 

The Arlo Go Camera and the Arlo Video Doorbell are two of Arlo’s unique cameras. 

You can keep an eye on your front door thanks to the HD video quality, two-way audio, and motion detection of the Video Doorbell. It also has 180 degrees wide view angle and requires wiring. 

On the other hand, the Arlo Go Camera is designed specifically for those seeking a surveillance solution in areas without access to Wi-Fi networks. It operates on 4G LTE connectivity needing just a cellular data plan.

Overall, Arlo’s camera options and series present various choices to suit different security requirements. Whether you need basic wireless cameras from the Essential Series or more advanced features from the Pro Series or Ultra Series, Arlo provides high-quality security solutions to help protect your home.

Top Arlo Security Cameras

#1: Arlo Essential Indoor Security Camera – 2 Cam (VMC2240), White Essential Wired Video Doorbell Bundle (AVD1001), White Bundle

One unique feature of this Essential Camera is its smart security that protects your privacy. You can keep your moments secret by locking the privacy shield straight from the Arlo app for extra peace of mind.

Additionally, this camera helps you watch what counts. You can capture precise particulars in full high definition and discover an image with a 130-degree viewing angle. This makes it the best camera to watch a nanny, baby, or pet.

Also, it is easy to install and connect. You plug the home camera into any outlet inside and link it to Wi-Fi without a hub to use the Wi-Fi features.

However, to install it, you need essential installation requirements. The wired doorbell and chime need existing electrical lines with a voltage of 24V AC and 16V AC, and a 10VA.

The good part after installing the camera is that you can see more at the entrance to your home with its front door camera and door security devices. With a 180-degree view, you can fully view an individual or an object on the ground.

The best part about this security camera is that it gives you a better picture. With its HD and HDR quality, you can see anything, whether dark or during the day. These are some of the features that make it fall under the Arlo security cameras. 

Arlo Security Cameras

Buy On Amazon


#2: Arlo VMS4230P-100NAS Pro 2 – Wireless Home Security Camera System with Siren, Rechargeable, Night Vision, Indoor/Outdoor, 1080p, 2-Way Audio, Wall Mount, Cloud Storage Included, 2 Camera Kit

The Arlo Pro cameras are 100% wireless. However, it has very long-lasting batteries last. They can last you up to several months. 

Additionally, this camera has a clean and easy-to-use app. You can record to the cloud for free for seven days. However, if you have many cameras, the recording fees are higher. 

Also, its two-camera kit comes with a siren and two cameras. The good part about this camera is that it can move anywhere without running new wires.

The good thing about this camera is that it is effortless to install and set up. You download the app and start setting up the base station, which needs to be connected to the network and plugged into power. 

The best part about this camera is that you can put them anywhere you want as long as they connect to Wi-Fi. These features make it easily fall into the category of the top Arlo security cameras.

Arlo Security Cameras

Buy On Amazon


#3: Arlo outdoor Ultra 2 Spotlight Camera Wire-Free Security System 4 Pack with Total Security

The Ultra 2 spotlight camera has 4 Batteries, 4 Ultra V2 Spotlight Cameras, 1 Total Security Mount, 3 Outdoor Wall Mounts, and 1 SmartHub.

Additionally, the camera has good quality, enabling you to see sharp details when you zoom in on a 4K video.

The camera has a 180-degree field of vision and built-in Spotlight Color Night Vision. 

This camera’s two-way audio and built-in siren are its greatest features. Because of these improvements, it is now considered one of the best Arlo security cameras available. 

Arlo Security Cameras

Buy On Amazon


#4: Arlo Essential 2 Outdoor 2K Security Camera, White – 1 Pack (VMC3050)

If you are looking for a camera that fits small places, the Arlo Essential 2 is the best option. However, the camera will not compromise reliability, video quality, or outdoor durability.

Buy On Amazon

Additionally, this camera comes with a 1080p video recording and a spotlight built-in.

Also, it connects to Wi-Fi and has a rechargeable battery. 

The best thing about it is that it has good night vision. So, you shouldn’t worry about viewing activities at night. 

#5: Arlo Ultra 2 Spotlight Camera – 2 Camera Security System (VMS5240-200NAS) Essential Wire-Free Video Doorbell (AVD2001), White

One unique feature of this ultra two-spotlight camera is that it offers you free local storage. You can view your smart camera footage from afar using the Arlo Smart hub and a MicroSD card sold independently.

Additionally, it is easy to set up and recharge. So, you can charge it quickly, which will last a long time.

With an Arlo Secure plan, you can get smarter alerts about individuals, cars, and animals so that you can act fast. The good thing is that it will happen right from your phone’s lock screen.

Also, this spotlight camera ensures that every corner of your area is taken care of. With a fast, wire-free setup, you get more options for where to put your doorbell camera to get the best view.

The good part about the video doorbell is you can see more at your front door. With a 180-degree wide field of view, the wireless doorbell with a camera gives you a complete image of an individual or a package on the ground.

The best part is you can see more at night. These outdoor security and home cameras have color night vision that lets you see people and license plates.

Arlo Security Cameras

Buy On Amazon

Installation and Setup of Arlo Cameras

Download the Arlo Application

The Arlo app shows you how to set up the camera and lets you change the settings. Without the app, you can’t set up a camera. Once you’ve downloaded the app, sign up for an account and choose your camera type from the list.

Switch on your Arlo Camera

When setting up a wire-free Arlo camera, follow the steps for inserting the battery in its camera housing. The bottom of the battery has grooves that make it impossible to insert it upside down.

After you put the battery in the camera, shut the case and look at the front LED. If the light is yellow, plug it into the charging wire that came with it. If it’s showing blue, you may continue to the following step without charging.

Arlo hardwired cameras need to be within 6 feet of a power port. For wireless models, you can buy extra power cords in lengths of 8 feet or 25 feet. Arlo additionally sells solar panel chargers that you can use with outdoor cameras.

Connect your Arlo Camera to Wi-Fi

Once your camera has power, you can connect it to your Wi-Fi network by following the steps in the Arlo app. Enter the name and password for your internet connection, and the app will produce a QR code that the camera can read. 

After the camera reads the code, please wait for it to flash. Be mindful that Arlo security cameras don’t work with Wi-Fi networks with 5 GHz frequency. You’ll require a 2.4 GHz network instead.

Position your Arlo Camera

Set up your Arlo camera about 6 to 7 ft above the ground. This is the best place to see what’s happening and record video without making it too hard.

Shelf

The only Arlo security cameras with built-in stands operating well on a shelf are the Arlo Essential Indoor and the Arlo Q. Most other security cameras can sit on a shelf. However, without a mount, you lack many options for aiming them at the action.

Magnetic Mount

Any Arlo Ultra or Arlo Pro camera can be attached to a sticky mount. This mount is attached to the wall with a drywall pin, a single screw, and a plastic stopper that fits into the back.

Outdoor mount

If you put a camera outside, one of Arlo’s outdoor mounts will make it safer. The camera will be held in place by a screw in these mounts. Unlike magnetic clips, they are hard to take off the wall. 

Arlo also advises using these mounts to put a camera above 6.5 feet.

Adjust your Arlo camera’s view

Even though most Arlo security cameras have a broad field of view to catch a lot of action, you can change the camera’s angle to get a better view. This makes motion recognition, alerts, and recording more reliable.

Camera positioning

Using Arlo’s Camera Positioning feature, you can change the camera’s view quickly and almost in real time. This setting instructs the camera to send video quickly, so you need not wait as long for the live view to pick up with your changes.

Field of view

Some Arlo security cameras, like the Arlo Pro 4, let you adjust the field of view or the size of the area that the camera can see. Most of the time, you want a bigger view outside, where walls don’t block your view. 

While indoors, on the other hand, you should choose a smaller view because you don’t need to record broader than your walls allow. This reduces video bandwidth.

Motion zones

When Arlo security cameras decide to record, the motion zones tell them what not to record. Arlo uses motion zones in two ways: adjustable and passive.

If you purchase an Arlo Secure Plan and link your camera to an electricity outlet, you can set up custom motion zones to capture activity in those places.

Arm your Arlo

If you have an Arlo Secure subscription or establish local storage, arming an Arlo camera tells it to send messages and record video clips. It is also a great way to keep your information safe. 

Frequently Asked Questions (FAQs)

  1. Are Arlo cameras suitable for both indoor and outdoor use?

Yes. Arlo cameras are suitable for both indoor and outdoor use. For indoor surveillance, Arlo security cameras offer features and capabilities that make them ideal for keeping an eye on the interior of your home. Regarding outdoor security, Arlo security cameras are built to withstand varying weather conditions while providing reliable monitoring capabilities. 

  1. Can I access live camera feeds remotely on my smartphone?

Yes, you can remotely access live camera feeds from your Arlo security cameras on your smartphone. Arlo has a user-friendly mobile app. Once you log in, the app lets you view live video streams from your Arlo security cameras directly on your smartphone screen. So, if you link your phone to the internet, you can monitor your home in real-time from anywhere.

  1. How does cloud storage work with Arlo cameras?

When you use an Arlo camera to watch over your home, it records video of what happens within its range. But Arlo also has a cloud storage service that you can subscribe to. When you sign up for a cloud storage plan, videos from your Arlo security cameras record are sent to the cloud and stored safely there.

  1. What is the difference between Arlo Pro and Arlo Ultra cameras?

The Arlo Pro and Arlo Ultra camera systems have different features.

The Arlo Pro cams have a 720p resolution. This means they have great video quality during the day and at night. 

The Pro cameras also have motion detection, which means that when they detect motion, you can get an instant alert on your phone. They also have a microphone and speaker built-in, which you can use for two-way audio conversation.

In contrast, Arlo Ultra cameras have 4K UHD video quality. So they can handle complex lighting situations. Also, these cameras have a built-in spotlight that shines light into dark places where possible intruders might be.

Conclusion

The power of Arlo security cameras is undeniable in protecting your home. For any Arlo camera you choose, you will enjoy remarkable features that guarantee watchful eyes guard your home.

Don’t leave your home’s safety to chance – take action today and invest in Arlo security cameras. 

Experience the crystal-clear video quality, advanced motion detection, two-way audio, and innovative features that set Arlo apart. With Arlo, you can closely monitor every corner of your property and deter potential threats.

Upgrade to an unbeatable level of security with Arlo security cameras – because nothing should come between you and the safety of your loved ones. 

Order yours now and embrace a new era of protection for your home.

Also Read: 

  1. Best 5 Lorex Security Cameras to Consider For Advanced Surveillance Solutions
  2. 10 Best SimpliSafe Home Security Systems in 2023
  3. Secure Your Home with the Best ADT Security Cameras of 2023


How to Build an Emergency Kit

DIY: How to Build an Emergency Kit For 24/7 Preparedness

Did you know that, per the American Institute of CPAs, only 34% of Americans have emergency kits?

But did you also know that almost every state in the United States has natural disasters that are increasing occasionally?

The above statistics for individuals with emergency kits and the ever-increasing incidences of natural disasters call for knowledge on building an emergency kit. 

We have an individual who, after he experienced a hurricane with his family, decided to build an emergency kit for the home. He prioritized food, water, and medical supplies in his home disaster emergency kit. 

Later the same year, they experienced a heat wave. Luckily, his emergency kit was ready to handle the situation, and he and his family relied on it.

You can be like our friend here. You can avoid a few things with the help of an emergency kit:-

  • You can avoid disruption and discomfort.
  • You can avoid inadequate communication.
  • You can avoid shortages and hunger.
  • You can avoid panic and anxiety in the event of an emergency.

First, you should learn how to build an emergency kit to avoid all these instances. 

Ready? Let’s get started. 

Importance of Having an Emergency Kit 

An emergency kit can be essential to ensuring safety in the face of emergencies. So, you may be wondering why emergency kits are crucial. Read on to learn more.

  1. Enhances communication during an emergency

When you assess how to build an emergency kit, you should include essentials such as non-perishable food. However, a necessity such as a portable phone charger is essential. 

It can help charge your phone for communication during an emergency. Hence, an emergency kit is essential for enhancing communication.

  1. Guarantees Personal Safety 

So, as you consider how to build an emergency kit, you need to prioritize safety. You should have the necessary tools to manage urgent needs during emergencies by having a well-stocked kit. 

Therefore, an emergency kit is essential for guaranteeing one’s safety.

  1. Provides Shelter and Protection 

When you consider how to build an emergency kit, understand that disasters may require evictions. So, an emergency kit can shelter you in such circumstances. For temporary protection from severe weather, your kit can have blankets, tarps, tents, or ponchos to keep you dry, warm, and safe.

  1. Assists in Long-Term Emergency Occurrences 

While emergency kits work to solve immediate needs, they can also be effective in long-term emergencies. When regular access to services and supplies is disrupted for a lengthy period, an emergency kit can keep you alive until aid and essential services are available again.

  1. Enables you to Teach Preparedness to Children 

Building an emergency kit with kids encourages a sense of readiness. It teaches kids the value of planning and gives them the information and skills to react appropriately in an emergency.

  1. Enhanced Resilience 

An emergency kit improves your ability to handle crises. It gives you a sense of control and assurance because you know that essential supplies are easily accessible. Communities can also be resilient since more homes with emergency kits lead to a resilient society.

  1. Enhances Peace of Mind

Knowing that you have a well-prepared emergency kit brings a sense of peace. It alleviates worries about being caught off-guard during emergencies. With a properly stocked and organized kit, you can rest easy knowing you have the essential supplies to weather any storm.

  1. Disaster Preparedness 

Emergencies can strike without warning, leaving you vulnerable. You will be better prepared to handle such situations with an emergency kit. 

Your package should include non-perishable food, flashlights, first aid supplies, water, batteries, hygiene products, and vital documents. Being well-prepared ensures that you can meet your basic needs until help arrives.

  1. Self-Reliance 

When external assistance is limited, self-reliance becomes critical. An emergency kit makes you more self-sufficient in providing for yourself and your family. It gives you what you need to get by until expert help arrives.

Consider your home’s needs when considering how to build an emergency kit. Consider gathering necessary items such as identification cards, insurance information, and emergency supplies. 

Additionally, stay updated on local emergency protocols if you want your emergency kit to be reliable.

How to Build an Emergency Kit

How to Build an Emergency Kit: Essential Items for Your Emergency Kit

  1. Water

When you think about how to build an emergency kit, water should be a priority because it is vital for survival. Consider keeping three days’ worth of water in storage for each person, or at least one gallon. This will take care of both drinking water and bathroom needs. Don’t forget to include water purification tablets or filters as a backup.

  1. Non-Perishable Food

Non-perishable food can ensure you and your family have something to eat in an emergency. Select foods that don’t need to be cooked and have a lengthy shelf life. Good choices include canned products, dry fruits, energy bars, and prepared meals. 

Aim for a food supply that will last at least three days.

  1. Medical Supplies

Have a lot of medication in your emergency kit if you or anybody in your household takes prescription medications or has special medical needs. Consider packing antacids, over-the-counter painkillers, and other essential medical items like sticky bandages or antiseptic creams.

Also, ensure that your kit includes bandages in various sizes, adhesive tape, cleansing wipes, tweezers, scissors, gloves, and a first aid manual.

  1. Lighting

Power outages are common during emergencies; reliable lighting sources are essential. Include flashlights, headlamps, lanterns, and extra batteries in your emergency kit. Consider adding glow sticks, as they provide a long-lasting and low-cost light source.

  1. Communication

Staying connected with the outside world becomes even more critical during emergencies. Ensure to include a battery-powered or hand-cranked radio to receive emergency alerts and updates from authorities. Pack extra batteries or invest in a portable solar charger for your electronic devices.

  1. Personal Documents

Keep important documents such as identification cards, passports, insurance policies, and contact information in a waterproof and portable container within your emergency kit. Having copies of these documents will facilitate communication with agencies and quicken recovery.

  1. Sanitation and Hygiene Items

Maintaining sanitation is vital in emergencies to prevent the spread of diseases. Pack items like toiletries, sanitizers, soap, and disinfectant wipes.

  1. Clothing and Bedding

Include extra clothing suitable for various weather conditions in your emergency kit. Pack shoes or boots, socks, gloves, hats for sun protection or warmth (depending on the climate), thermal blankets, or sleeping bags for each family member.

  1. Tools and Supplies

Essential tools can be invaluable during emergencies when you need to repair or secure your surroundings. Include items such as multi-purpose pocket knives, duct tape, rope or paracord,

a whistle for signaling, pliers, and a wrench.

Additionally, it’s essential to have basic supplies like a manual can opener, plastic utensils,

disposable plates/cups/bowls, dust masks, and plastic sheeting/tarps.

  1. Entertainment and Comfort Items

Having comfort and entertainment items can significantly improve morale during stressful times. Include books, playing cards, puzzles, or other activities to help pass the time and reduce anxiety.

Remember to check and update your emergency kit regularly. Replace expired food, medication, and batteries as needed. Conduct seasonal assessments to ensure your supplies are appropriate for changing weather conditions.

Building an emergency kit is a proactive step towards preparedness and resilience in the face of unforeseen events. Taking the time to gather these essential items will increase your chances of successfully navigating emergencies.

Organizing and Storing Your Emergency Kit

You can quickly locate specific items when needed by systematically categorizing your supplies. You can learn the importance of effectively dividing items and tips on organizing your emergency. Check out the methods below to ensure your items are well organized.

  1. Categorize by Type

One of the first steps when considering how to build an emergency kit, is to categorize items by type. This means grouping similar items to create distinct categories within your kit. For example:

  • Food and Water: You can allocate a section for non-perishable food, such as canned foods.
  • First Aid Supplies: Dedicate an area for bandages, antiseptic wipes, medications, and other medical necessities.
  • Tools and Safety Equipment: Keep all tools, like wrenches or pliers, and safety gear, such as masks or gloves, in one place.
  • Communication Devices: Separate communication tools like radios or walkie-talkies with extra batteries or chargers.

By categorizing items according to their purpose, you eliminate the need to search through the entire kit during emergencies, saving precious time.

  1. Consider Frequency of Use

Another critical aspect when considering how to build an emergency kit is considering the frequency of use for each item in your kit. You might use some essentials more frequently than others. By keeping frequently used supplies near the top of your kit, you won’t have to dig through everything during an emergency.

In contrast, you can place less frequently used supplies towards the bottom or back of the kit.

  1. Mark Containers Clearly

As you consider how to build an emergency kit, know that it is essential to mark the containers with labels indicating their contents. This will help you quickly identify your need without opening each container or bag. Use waterproof markers or labels to ensure visibility and durability in various conditions.

  1. Use Transparent Pouches or Bags

Additionally, when you consider how to build an emergency kit, remember that you will have to use transparent pouches or bags. Transparent containers allow a quick visual check of contents without opening each bag individually, saving valuable time during emergencies. You can use these pouches for smaller items like matches, lighters, batteries, or first aid supplies.

  1. Prioritize Essential Items

It’s crucial to prioritize essential items you need immediately during an emergency. This includes water, first-aid supplies, non-perishable food, and flashlights. Place these essentials in accessible locations within your kit so you can reach them quickly when needed.

  1. Optimize Space and Weight Distribution

Using the space in your emergency kit is crucial to maintaining organization while ensuring you can easily carry the kit.

  • Have small compartments within larger containers for storing smaller items.
  • Pack heavier items near the bottom of the kit to distribute weight evenly.
  • Utilize vacuum-sealed bags to compress bulky items and maximize space.

So, with the above techniques, you can be assured that you can access items freely in an emergency. Who wants to waste time disorganizing items? We bet you don’t. 

How to Build an Emergency Kit

Maintaining and Updating Your Emergency Kit 

Putting together an emergency pack is only the first step toward being prepared. However, you need to maintain and replace your supplies regularly. Read on to learn the significance of maintaining and updating your emergency kit.

  • Regular Inventory Checks

Regular inventory inspections are essential for maintaining the readiness of your emergency kit. Make it a habit to review the supplies at least twice a year or after any natural disaster in your area. During these checks, assess the condition of all products. You can further verify expiration dates on food, water, drugs, batteries, and other perishable supplies. 

Replace expired items with new supplies as soon as possible.

  • Assessing Changing Needs

Over time, your needs may change based on various factors, such as changes in family size or health conditions. It’s essential to reassess your emergency kit periodically to accommodate these changes adequately. For example, if you have a new family member or acquire a pet, adjust food rations accordingly. 

Likewise, if someone in your family develops specific medical needs or allergies, ensure you have the necessary medications or special accommodations.

  • Shifting Calamities

The risks you face might change over time based on factors like geographical location and current events related to climate change. Increasing the severity of certain weather patterns might necessitate specific equipment. Frequently considering updates to your kit will help ensure you prepare for the most likely emergencies in your area.

  • Seasonal Considerations

Consider seasonal variations when organizing and updating your emergency kit. Different seasons bring different challenges and requirements for survival during emergencies. For instance, include extra blankets during the winter to keep everyone comfortable in low temperatures. 

In hot climates or in summer, focus on sunscreen protection and hats/caps for sun safety measures.

  • Replace Worn items.

Regular use of flashlights or portable radios in your emergency kit can result in wear and tear. Scrutinize each item during inventory checks and replace anything no longer functioning properly instead of waiting until an emergency occurs.

  •  Documenting Changes and Review Dates

Keep a record of all changes made to your emergency kit, along with dates of inventory checks and updates. This documentation will help you track when you last replaced items, anticipate future needs, and provide a clear maintenance history for future reference.

  • Evolving Technology 

Technological advancements may make new devices available to enhance your preparedness efforts. Keeping up with the latest innovations allows you to incorporate newer, more efficient gadgets into your emergency kit. For example, compact solar-powered chargers are now available for charging electronics off-grid.

  • Preventing Complacency 

Over time, you may become complacent about your emergency kit if you don’t update it. You might assume that everything is still intact and functioning. As a result, the effectiveness of your preparedness measures diminishes.

So, regular maintenance routines help prevent complacency by emphasizing the importance of vigilance.

By maintaining and regularly updating your emergency kit, you can rest assured that you are well-prepared for unforeseen circumstances. It’s an ongoing commitment to being proactive about your safety. You should not underestimate its importance.

Conclusion 

In a world of uncertainties, being prepared is your strongest defense. Now that you know how to build an emergency kit, it’s time to start building one.

Be sure to begin gathering and arranging your supplies before calamity strikes. In those vital moments, a well-organized kit makes the difference.

So roll up your sleeves and assemble an emergency kit that will serve as your lifeline when the unexpected knocks on your door. You’ll have peace of mind knowing you’re prepared to confront any situation head-on with meticulous planning and organization.

Read Vicki’s story to discover why having an emergency kit is so important.

“I was driving and came across an accident where a very pregnant lady had spun her car upside down.”

“I stopped to help but wasn’t the first one on the scene.”

“She had a cut on her arm and hand that was bleeding quite a lot, and the people helping her were scrabbling for something to put pressure on the wound.”

Vicki used her creativity to locate a suitable object to apply pressure to the incision.

“I went to find something suitable in my boot and thought a clean nappy was probably the cleanest and most hygienic thing I had to hand.”

“I handed them over, and it worked perfectly!”

So, if it were not for her creativity, she could have watched a woman bleed to death. Although she saved the situation, she needed an emergency kit in her car to help with such uncertainties.

REMEMBER – hope is not a strategy. Take charge of your safety by building an emergency kit that can be the ultimate game-changer. 

Whether it’s assembling food and water supplies, first aid essentials, or communication tools, every item counts in safeguarding yourself and your loved ones.

RELATED: 

  1. Best Winter Emergency Car Kits to Consider in 2023
  2. Top 10 Essential Home Safety Kits
  3. How to Prepare for an Earthquake
Scroll to Top